Optional remote on/off, Elec sch:hpr260xd pwr sply w/auto – Инструкция по эксплуатации Hypertherm HPR260XD Auto Gas
Страница 264
1
2
4
3
5
7
6
5
1
3
2
4
7
6
4
3
2
1
1
A
4
3
2
A
B
C
D
B
C
D
Interface
CNC
(Customer Supplied)
041993 CONTROL BOARD
S100
1 2
J303
3 4
3
2
1
4
J300A
J300B
Serial ID
Dipswitch
Jumper Block
Machine Motion
CNC Interface Cable
7
RED/BLK
RED
WHT
RED
Gas Console
078170
Gas Power Cable
Customer Supplied
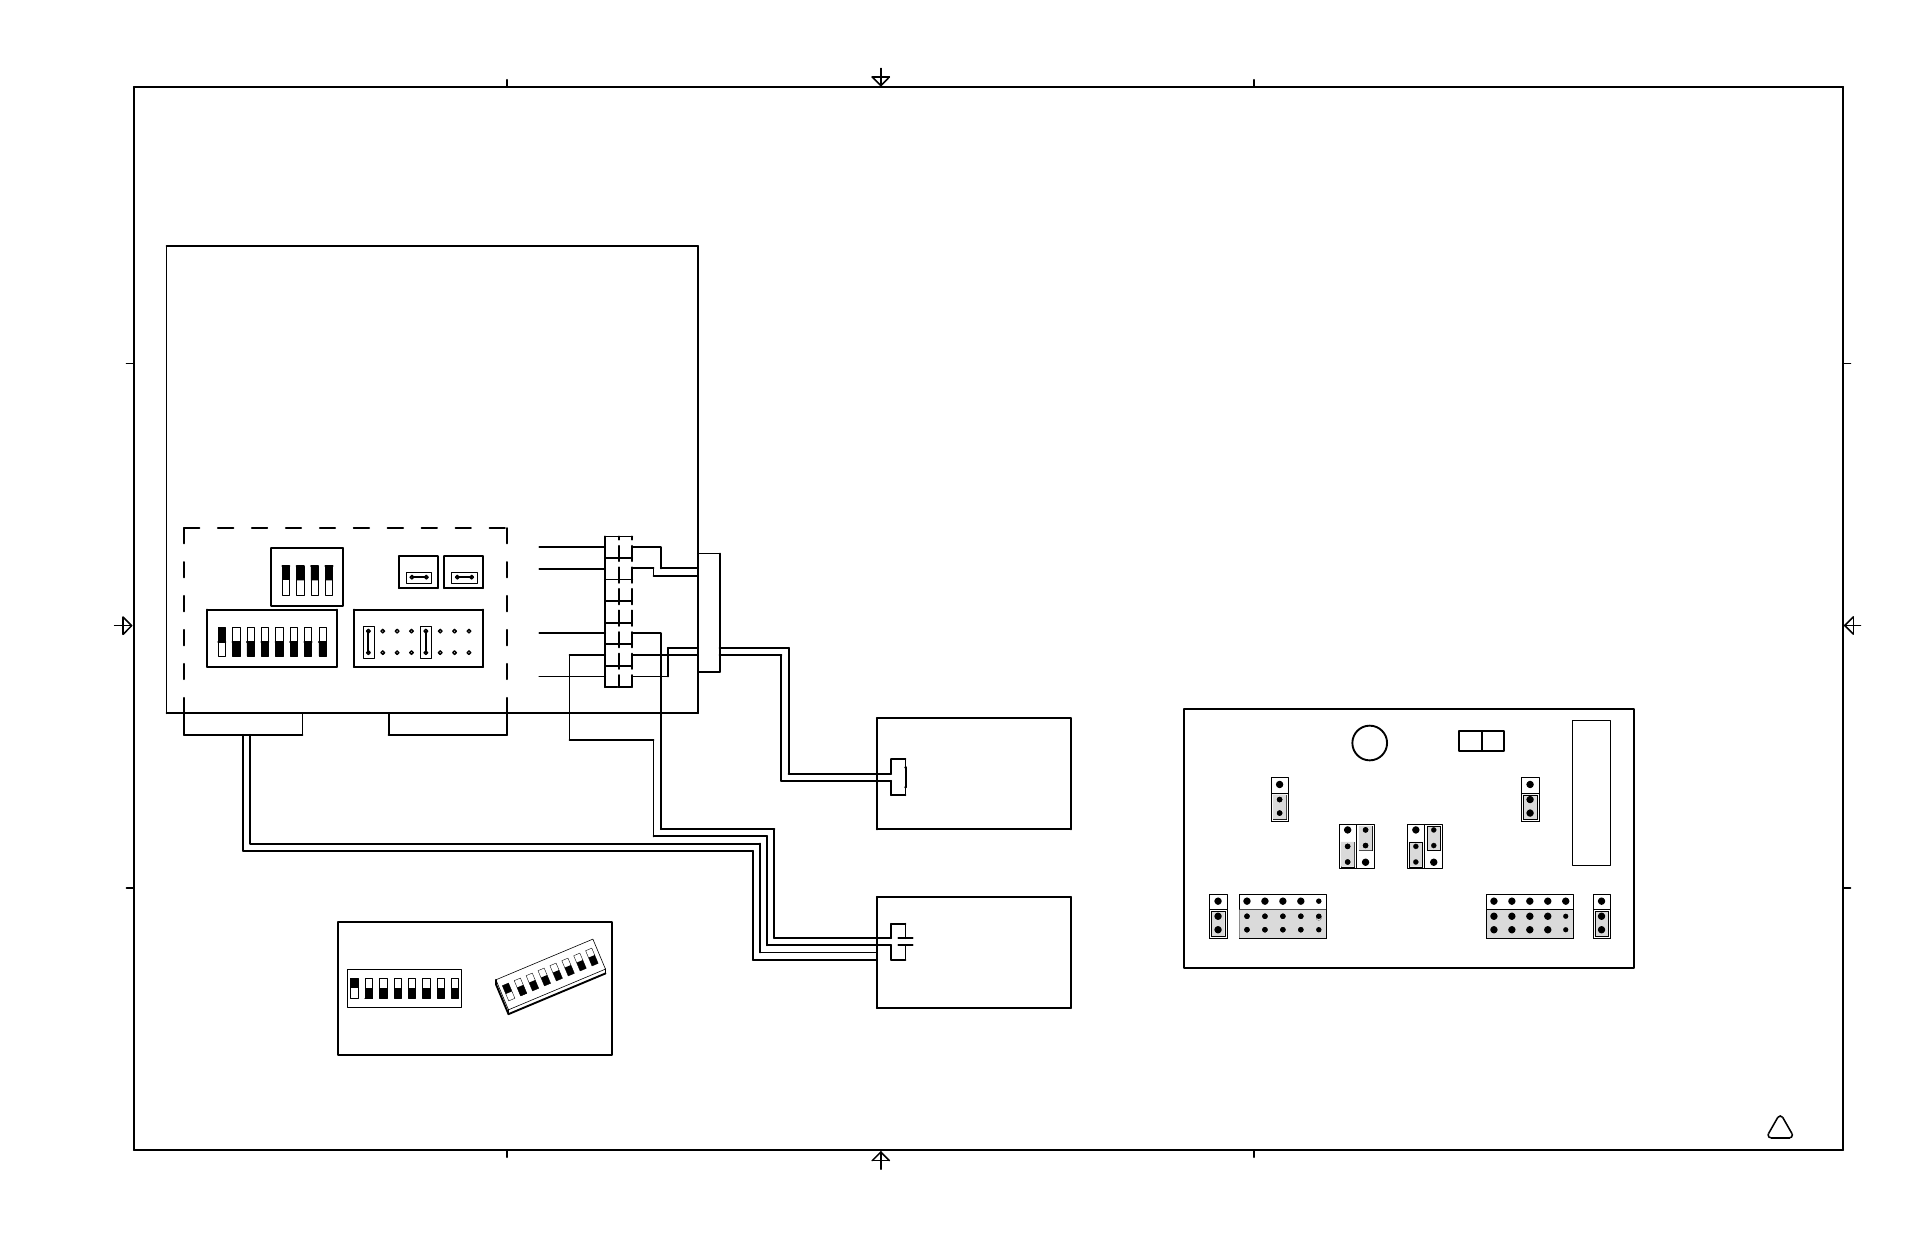
Remote On/Off
J106
2
1
2
1
J107
Optional Remote On/Off
TB2
WHT
RED
RED/BLK
RED
6
2
1
1X1
Switches 2-8 are in the Off position
Switch 1 is in the On position
BMD
J2
BTR
J7
RS-232
J9
RS-422
BHST
AHST
J3
AMD
J5
J6
RS-422
J10
RS-232
ATR
J8
J1
SV
RIBBO
N
C
A
BL
E
Serial isolation board in a Hypertherm Automation controller
1 2 3 4 5 6 7 8
ON
1 2 3 4
S101
ON
Notes:
1) For single system installation set Serial ID (S100), Machine
Motion (J303), J106 & J107 as shown.
Relocate the white wire on TB2 from position #3 to position
#2. Connect customer supplied Remote On/Off cable in series
with the power supply and the gas console power switch.
Connect one terminal of the Remote On/Off cable to position
#2 on TB2 and the other terminal to position #3.
Refer to page 3 of the wiring diagram
Depress the Gas Console Power switch to the closed position (on position).
2) For a multi-system installation set up as described above, set jumpers as shown on the
multi-system interface page
3) The CNC will need a dedicated I/O for each system using the Remote On/Off feature
(contact should be rated for min. 24Vac, 0.5 Amp)
HPR PAC
Dry Cutting System
S100
3
1 2
6
5
4
8
7
Dipswitch setting example:
1 2 3 4 5 6 7 8
ON
* If a Hypertherm Automation controller is being used, and there are intermittent communication
failures (PS Link Failure), try removing the jumnpers on J104 and J105 on the control board, and the
termination jumper (J6 or J8) on the serial isolation board in the controler. Only remove
the termination jumper on the serial isolation board that is connected to the HPR
power supply. See figure below for details.
ON
ELEC SCH:HPR260XD PWR SPLY W/AUTO
B
013378
SHEET 20 OF 22
7-24