Окно patch select (выбор соединения), Patch select window, Patching with the encoders – Инструкция по эксплуатации Yamaha dm2000v2e1
Страница 83: A d 1

DM2000 Version 2—Owner’s Manual
83
Входные и выходные соединения
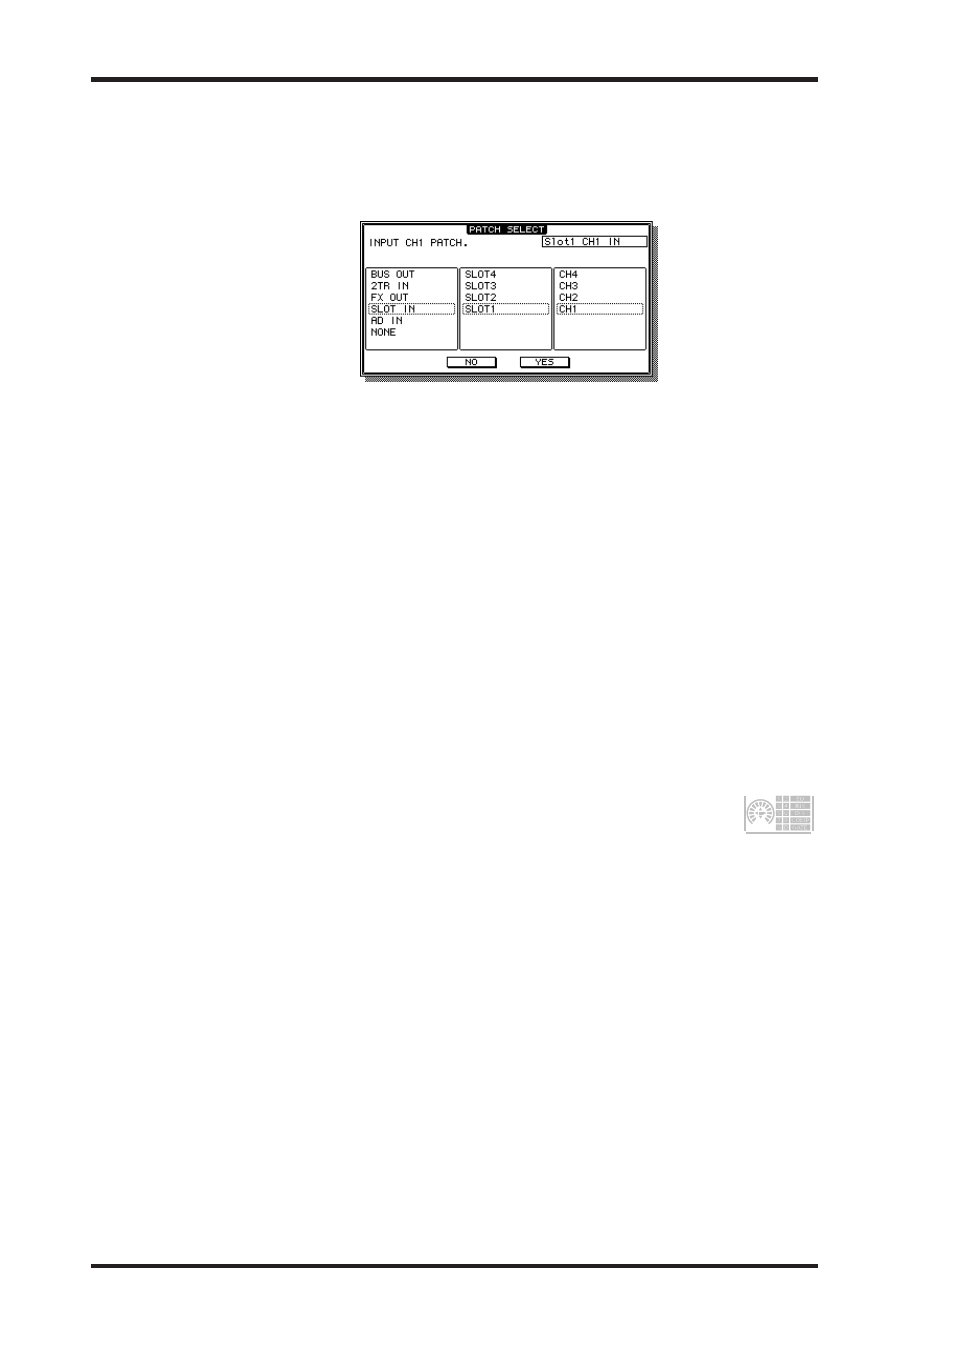
Окно Patch Select (выбор соединения)
В показанном на рисунке окне Patch Select, появляющемся по нажатию кнопки [ENTER],
когда выбран параметр соединения, можно настраивать входные и выходные соедине-
ния.
Patch Select Window
83
DM2000 Version 2—Owner’s Manual
Patch Select Window
Input and Output patches can be made by using the Patch Select window, shown below,
which appears when the [ENTER] button is pressed while a patch parameter is selected.
Available input and output sources and destinations are displayed in a hierarchical format
in three panes. The existing source or destination is displayed in the upper-right corner of
the window. Use the cursor buttons to move the cursor to the pane on the left, and use the
Parameter wheel or INC/DEC buttons to select the top level item. Then move the cursor to
the center pane, and select an item at the next level. Select an item in the right pane, if avail-
able, and then select the YES button and press [ENTER].
Patching with the Encoders
The following patches can be made by using the Encoders: Input Channel Inputs, Insert
Outs, Insert Ins, and Direct Outs.
1
Assign one of the above parameters to an Encoder ASSIGN button, as
explained on page 62.
To set the Input Channel Input or Direct Out patches, you must select an Input Channel
Layer. For Insert Out or Insert In patches, you can select an Input Channel Layer or the Mas-
ter Layer.
2
Press the ASSIGN button to which you assigned the patch parameter.
If no further action is taken within five seconds, the channel strip displays
return to normal, and you must press the ASSIGN button again.
Depending on the “Port ID/Name on FL Display” preference on page 276, the
channel strip displays show the Port IDs or Short Port names for the current
patches.
3
Use the Encoders to select ports, and press the Encoder push switches to set
them.
If you don’t activate your selection within five seconds (i.e., while the Port ID or Short
Channel name flashes), or you operate another Encoder, the selection is cancelled and the
patch is left unchanged.
A D 1
Доступные входные и выходные источники и назначения показываются в иерархиче-
ском формате в трех столбцах. Существующий источник или назначение отображается в
правом верхнем углу окна. Кнопками управления курсором сместите его в левый стол-
бец, после чего ручкой настройки параметров или кнопками INC/DEC выберите элемент
верхнего уровня. Затем переведите курсор в центральное положенияльный столбец и
выберите элемент следующего уровня. В последнюю очередь выберите элемент (если
имеется) в правом столбце, после чего выберите кнопку YES и нажмите [ENTER].
Использование кодеров для установки входных соединений
С помощью кодеров можно устанавливать соединения для: входов, Insert Out, Insert In
входных каналов и прямых выходов.
1 Назначьте один из перечисленных параметров кнопке Encoder ASSIGN, как опи-
сано на стр. 62.
Для установки соединений для входа или прямого выхода входного канала следует
выбрать уровень входного канала. Для установки соединений Insert Out или Insert In
следует выбрать уровень входного канала или ведущий уровень.
2 Нажмите кнопку ASSIGN, которой был назначен параметр соединения.
Если в течение 5 секунд не будет выполнена какая-либо операция, окно полос кана-
ла вернется в исходное состояние и нужно будет снова нажать кнопку
ASSIGN.
В зависимости от установки опции “Port ID/Name on FL Display” (см. стр.
276), в окне полос каналов будут отображаться идентификаторы или корот-
кие названия портов выбранных соединений.
3 С помощью кодеров выбирайте порты, после чего нажимайте кнопку кодера
для подтверждения выбора.
Если Вы не подтвердите выбор в течение 5 секунд (т.е. пока мигает идентификатор или
короткое название канала), либо, если Вы повернете другой кодер, выбор будет отменен
и соединение останется неизмененным.
Patch Select Window
83
DM2000 Version 2—Owner’s Manual
Patch Select Window
Input and Output patches can be made by using the Patch Select window, shown below,
which appears when the [ENTER] button is pressed while a patch parameter is selected.
Available input and output sources and destinations are displayed in a hierarchical format
in three panes. The existing source or destination is displayed in the upper-right corner of
the window. Use the cursor buttons to move the cursor to the pane on the left, and use the
Parameter wheel or INC/DEC buttons to select the top level item. Then move the cursor to
the center pane, and select an item at the next level. Select an item in the right pane, if avail-
able, and then select the YES button and press [ENTER].
Patching with the Encoders
The following patches can be made by using the Encoders: Input Channel Inputs, Insert
Outs, Insert Ins, and Direct Outs.
1
Assign one of the above parameters to an Encoder ASSIGN button, as
explained on page 62.
To set the Input Channel Input or Direct Out patches, you must select an Input Channel
Layer. For Insert Out or Insert In patches, you can select an Input Channel Layer or the Mas-
ter Layer.
2
Press the ASSIGN button to which you assigned the patch parameter.
If no further action is taken within five seconds, the channel strip displays
return to normal, and you must press the ASSIGN button again.
Depending on the “Port ID/Name on FL Display” preference on page 276, the
channel strip displays show the Port IDs or Short Port names for the current
patches.
3
Use the Encoders to select ports, and press the Encoder push switches to set
them.
If you don’t activate your selection within five seconds (i.e., while the Port ID or Short
Channel name flashes), or you operate another Encoder, the selection is cancelled and the
patch is left unchanged.
A D 1