Maintenance, En gl ish – Инструкция по эксплуатации Kastor K0-20 Wood-burning sauna stoves
Страница 47
EN
gl
ISH
4.1.
4.2.
4.3.
4.4.
4. MAINTENANcE
4.1. CLEANING THE STOVE
The stove’s surface can be cleaned with a mild cleaning fluid
detergent solution by wiping down with a soft, moist rag.
Brushed, stainless steel has its own detergent, which you will
find in the cleaning department of most shops.
The glass doors are cleaned with Kastor’s Nokipois cleaning
fluid, which is available in hardware stores.
4.2. ASH REMOVAL
Excessive ash shortens the grate’s lifespan and weakens the
burning. remove the ash while it is cold, always before the
next heating, using a metal container to avoid a fire hazard.
4.3. SWEEPING THE STOVE
The hatches in the stone compartment are for sweeping
(covered with lids).
The stove’s internals are cleaned through these hatches 2–6
times a year, depending on use.
If the stove is connected to the chimney from the top, soot will
drop into it, which needs to be removed.
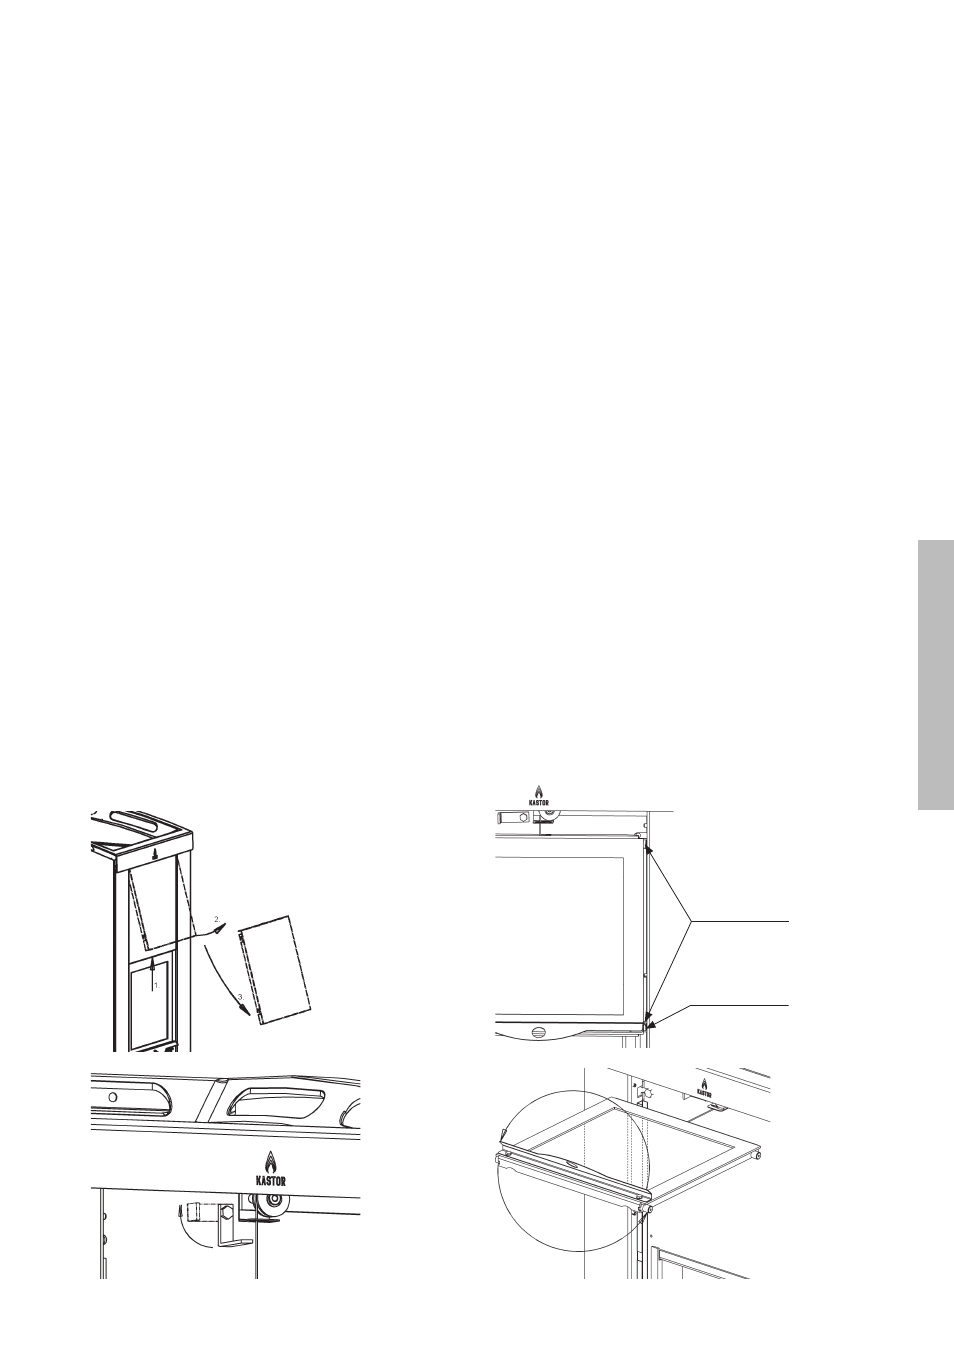
4.4. REMOVAL AND CLEANING OF THE KH MODEL’S
ELEVATOR DOOR GLASS
When needed, the inside of the KH stove door’s glass can be
cleaned as follows:
Remove the stove’s front screen. (Picture 4.4./1.)
1.
Turn the locker sideways. If necessary, use a suitable tool.
2.
(Picture 4.4./2.)
Raise the door as high as it goes while supporting it with
3.
both hands.
Now, the glider wheels of the door emerge at the upper
4.
ends of the rails and the door can be pulled off the stove.
Pull the door carefully out by its handle, so that the lower
5.
glider wheels are released through the openings in the
middle of the glide rails. (Picture 4.4./3.)
Once the door is off the rails, turn it into a horizontal position.
6.
Turn the door’s inside upwards in a clockwise direction
7.
while making sure that the wire stays in place.
(Picture 4.4./4.)
Clean the glass with Kastor’s Nokipois cleaning fluid. Keep
8.
the glass well supported throughout the cleaning.
Reinstall the the door by reversing the preceding steps.
9.
Turn the locker into its lower position.
10.
Install the stove’s front screen.
11.
picture 4.4./1.
picture 4.4./2.
picture 4.4./3.
picture 4.4./4.
Opening in glide rail
glider wheels