En gl ish – Инструкция по эксплуатации Kastor K0-20 Wood-burning sauna stoves
Страница 41
EN
gl
ISH
2.5.
2.5.1.
2.5.2.
2.6.
2.5. CONNECTING THE STOVE TO A bRICK CHIMNEY
The stove can be connected to a brick chimney from the back
or the top. For a brick chimney connection, the safety distan-
ces and protectors named in chapter 2.4. and the chimney’s
masonry regulations must be adhered to.
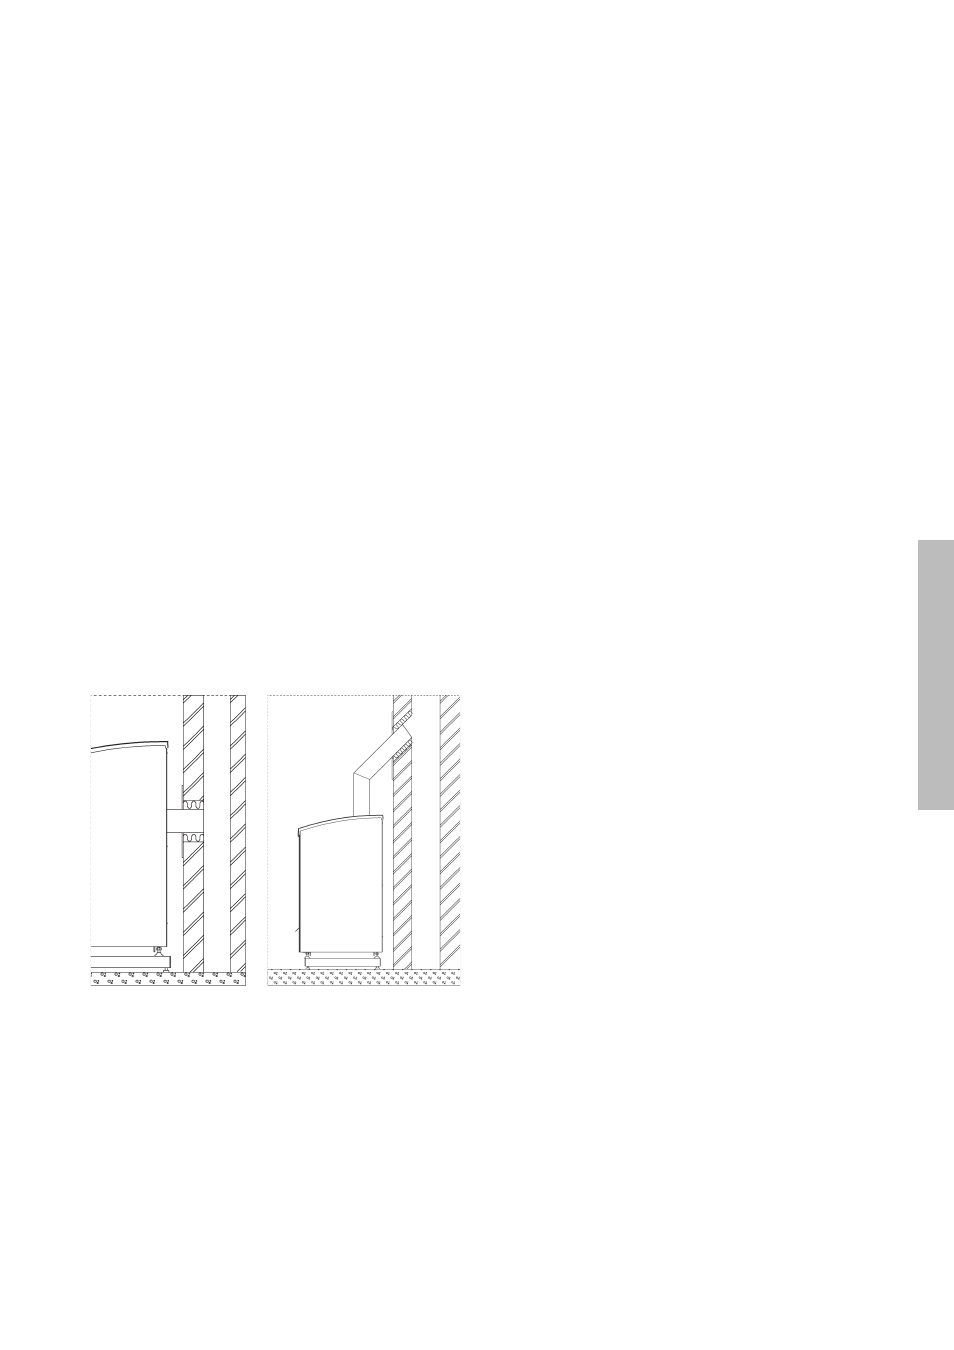
2.5.1. CONNECTING FROM THE bACK
Make an opening into the brick chimney that is 2–3 cm larger
than the connection pipe. Open the outer back mantle. Use a
screwdriver to open the plate covering the hole in the inner
mantle. Use this covering plate to stop up the backmost hole
on top of the stove. Insert the connection pipe that came with
the stove into the stove’s back wall flue opening. Push the
stove into place. Make sure that the connection pipe sits well
in the opening you made in the chimney. Seal the empty space
between connection pipe and chimney with flexible, fireproof
material such as stone wool. The lead-through is then tidied up
with a Kastor covering plate, which is available at your hardwa-
re store. The covering plate is attached to the wall with metal
bolts or fireproof paste. (Picture 2.5.1.)
2.5.2. CONNECTING FROM THE TOP
Make an opening into the brick chimney that is 2–3 cm larger
than the connection pipe. Use a 45° bent pipe for the connec-
tion from the top of the stove, which can be turned to align
with the chimney. Suitable 45° bent pipes are available at
the hardware store. Extend the bent pipe with an extension
piece, if necessary. Install the stove’s own connection pipe in
the backmost flue opening on top of the stove (the foremost
opening is the sweeping hole, which must not be used for
the pipe!). The bent pipe is then attached to the stove’s own
connection pipe. Saw the bent pipe and any extension pipe
down to a suitable size where necessary. Make sure the pipe
extends sufficiently into the chimney (but not so far that it
blocks up the chimney).
Seal the empty space between connection pipe and chim-
ney with flexible, fireproof material such as stone wool. The
lead-through is then tidied up with a Kastor covering plate,
which is available at your hardware store. The covering plate
is attached to the wall with metal bolts or fireproof paste. See
picture 2.5.2.
2.6. CONNECTING TO A KASTOR CHIMNEY
The Kastor stove can be connected from the top to a factory
built Kastor chimney.
Make sure to choose the correct chimney type with regard to
your stove mode, chimney height, exterior circumstances etc.
For best results we recommend that you install a chimney
valve, as well. Picture 2.6.
Set the stove’s own connecting pipe into the stove’s back-
•
most flue opening.
Install an uninsulated connection pipe and any necessa-
•
ry extension piping on top of the connecting pipe. Where
necessary, saw the connection pipe and the extension pipe
down to suitable size.
The chimney valve goes between the insulated and non-
•
insulated sections or into the first insulated pipe section.
Continue from the chimney valve with an insulated pipe.
•
The insulated pipe section must start at least 400 mm
beneath the ceiling. Follow the installation and usage
instructions for Kastor chimneys.
remember to keep all safety distances to flammable and
non-flammable materials named above. Kastor Oy does not
guarantee the suitability and functioning of other manufactu-
rers’ factory-built chimneys with Kastor stoves. Kastor Oy does
not take responsibility for the quality of other manufacturers’
factory-built chimneys.
picture 2.5.1. connecting the
stove from the back to a brick
chimney.
picture 2.5.2. connecting the stove
from the top to a brick chimney.