En gl ish – Инструкция по эксплуатации Kastor VK-20 Watertank
Страница 23
EN
gl
ISH
2.
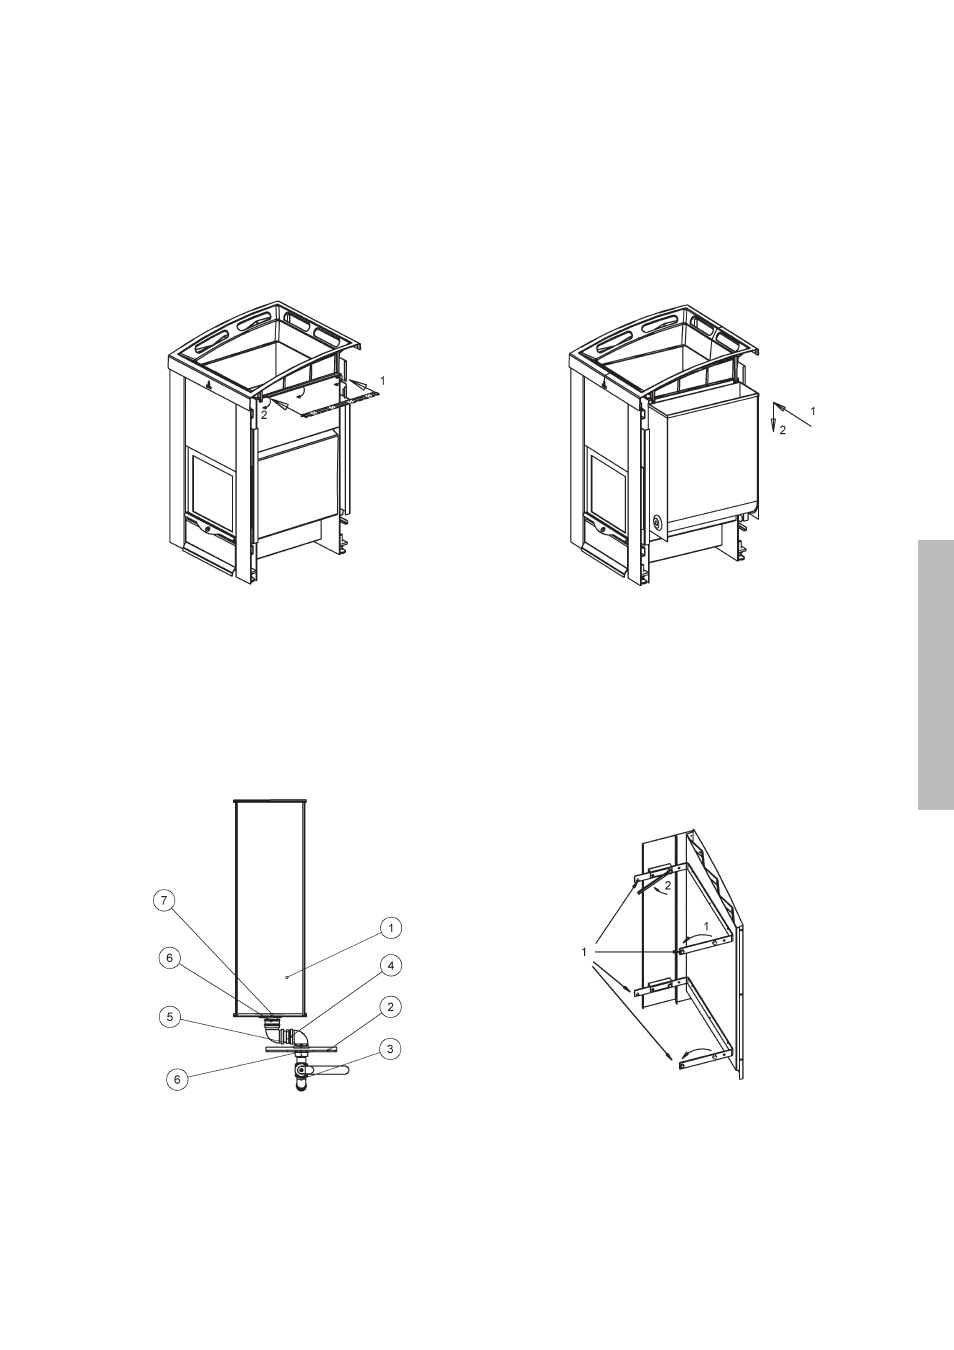
figure 3. Installing the water tank support
Install the water tank support into the slot in the lower edge of the upper
frame by pushing it in with the support in horizontal position. push the
support forcefully down until it turns into vertical position and locks into
place.
Take water tank out of package and see how the tap parts are
installed that have been attached as an example.
1. Water tank
2. front panel
3. lever tap
4. bent pipe
5. Silicone sealing ring (inside front panel)
6. Hard sealing ring (between water tank and tap)
6. Hard sealing ring (between front panel and tap)
7. Tightening nut
Open the nut from the inside of the water tank and detach the tank.
- Take tank to the side of the stove.
- push tank to hang by the support using the slot on the upper edge
of the tank.
- centre. Make sure lever tap points at front.
- Move the 4 mantle package attachment bolts into the outer holes.
- Attach back cover plate with bolts delivered with water tank package (one
each above and below), tighten with hexagonal wrench to upper and lower
supports in such a way that the space between back plate and side mantle
is as small as possible.
figure 4a. parts to be permanently attached to water tank
figure 5. Installation of back mantle
figure 4b. Hanging the water tank