Инструкция по эксплуатации Yamaha sp2060
Страница 35
Предисловие
Введение
в SP2060
Регуляторы
и подключения
Работа
с панелью
Настройки
сети
Справочники
SP2060 Руководство пользователя
35
Работа с панелью
Настройка восстановления последней
запомненной сцены
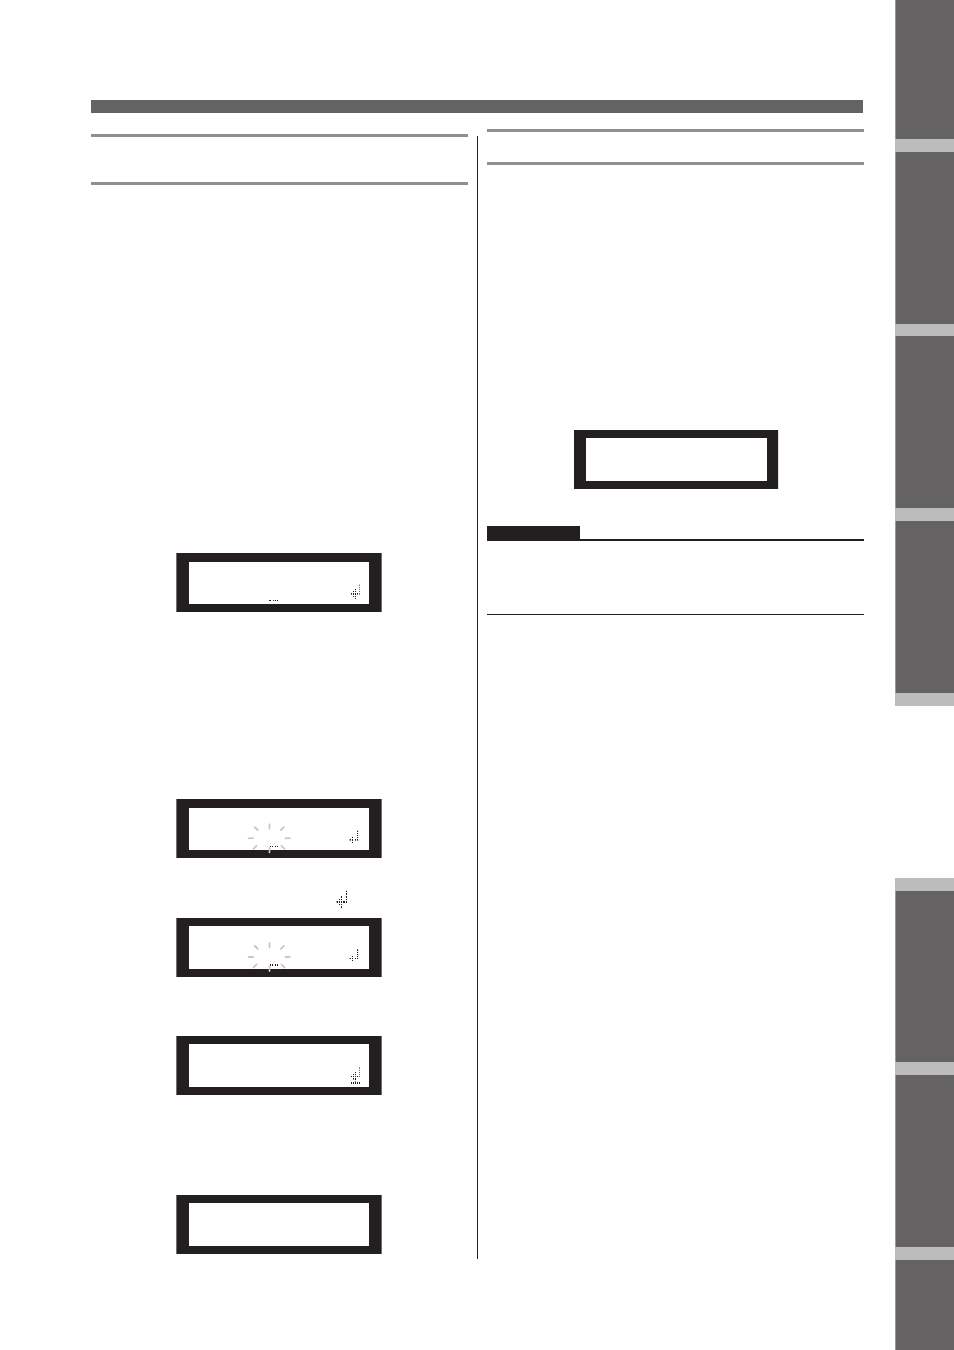
Установка запуска SP2060 со сценой, выбранной перед от-
ключением питания или запуска с тем же статусом, который
был перед последним выключением. Значение по умолча-
нию – “ON”.
OFF: При запуске SP2060 вызывает сцену, выбранную пе-
ред выключением питания устройства.
ON: SP2060 запускается в том же статусе, в котором оно
находилось перед последним выключением.
1.
Нажмите на клавишу [UTILITY] для выбо-
ра экрана Utility (Утилиты).
На экране будут выведены наиболее часто используе-
мые утилиты.
2.
Нажмите повторно на клавишу [UTILITY],
[NEXT] или [BACK] до тех пор, пока не
появится страница Memory Resume (Вос-
становление памяти).
Panel Operation
SP2060 Owner’s Manual
Fore
w
or
d
Netw
ork Settings
Ref
erences
P
anel Operation
Intr
oduction
to the SP2060
The Contr
ols
and Connector
s
36
Setting the Last Memory Resume
You can select whether at the startup the SP2060 recalls the
scene selected before you turned off the power to the device,
or it starts up with the same status as when it was shut down
last time. The default setting is “ON.”
OFF: At the startup, the SP2060 will recall the scene select-
ed before you turned off the power to the device.
ON: The SP2060 will start up with the same status as
when it was shut down last time.
1.
Press the [UTILITY] key to select the Utility
display.
The most recently used Utility display will appear.
2.
Press the [UTILITY], [NEXT] or [BACK] key
repeatedly until the Last Memory Resume
page appears.
3.
Press the [▲INC] key so that the SP2060 will
start up with the same status as when it was
shut down last time. Press the [▼DEC] key so
that at the startup the SP2060 will recall the
scene selected before you turned off the
power to the device.
“ON” flashes on the screen.
4.
Press the [NEXT] key to move the cursor to
the icon.
5.
Press the [YES] key.
A confirmation message will appear.
6.
To confirm the operation, press the [YES] key.
The selection is applied and the unit returns to the Last
Memory Resume page.
Displaying the label
You can view the label for the SP2060 that you have set on
DME Designer.
1.
Press the [UTILITY] key to select the Utility
display.
The most recently used Utility display will appear.
2.
Press the [UTILITY], [NEXT] or [BACK] key
repeatedly until the Label page appears.
The unit displays the label you created on DME Design-
er.
LAST MEM. RESUME
ON
LAST MEM. RESUME
ON
LAST MEM. RESUME
ON
LAST MEM. RESUME
ARE YOU SURE?
NOTE
• You cannot edit the label on the SP2060.
• Up to 14 characters from the top can be displayed.
LABEL
[FoH L ]
3.
Нажмите на клавишу [
/
INC] для запуска
SP2060 в том же статусе, в котором оно
находилось перед последним выключе-
нием. Нажмите на клавишу [
\
DEC] для
запуска SP2060 с той же сценой, которая
была выбрана перед выключением пита-
ния устройства.
На экране замигает индикация «ON»
Panel Operation
SP2060 Owner’s Manual
Fore
w
or
d
Netw
ork Settings
Ref
erences
P
anel Operation
Intr
oduction
to the SP2060
The Contr
ols
and Connector
s
36
Setting the Last Memory Resume
You can select whether at the startup the SP2060 recalls the
scene selected before you turned off the power to the device,
or it starts up with the same status as when it was shut down
last time. The default setting is “ON.”
OFF: At the startup, the SP2060 will recall the scene select-
ed before you turned off the power to the device.
ON: The SP2060 will start up with the same status as
when it was shut down last time.
1.
Press the [UTILITY] key to select the Utility
display.
The most recently used Utility display will appear.
2.
Press the [UTILITY], [NEXT] or [BACK] key
repeatedly until the Last Memory Resume
page appears.
3.
Press the [▲INC] key so that the SP2060 will
start up with the same status as when it was
shut down last time. Press the [▼DEC] key so
that at the startup the SP2060 will recall the
scene selected before you turned off the
power to the device.
“ON” flashes on the screen.
4.
Press the [NEXT] key to move the cursor to
the icon.
5.
Press the [YES] key.
A confirmation message will appear.
6.
To confirm the operation, press the [YES] key.
The selection is applied and the unit returns to the Last
Memory Resume page.
Displaying the label
You can view the label for the SP2060 that you have set on
DME Designer.
1.
Press the [UTILITY] key to select the Utility
display.
The most recently used Utility display will appear.
2.
Press the [UTILITY], [NEXT] or [BACK] key
repeatedly until the Label page appears.
The unit displays the label you created on DME Design-
er.
LAST MEM. RESUME
ON
LAST MEM. RESUME
ON
LAST MEM. RESUME
ON
LAST MEM. RESUME
ARE YOU SURE?
NOTE
• You cannot edit the label on the SP2060.
• Up to 14 characters from the top can be displayed.
LABEL
[FoH L ]
4.
Нажмите на клавишу [NEXT] для переме-
щения курсора на иконку
Panel Operation
SP2060 Owner’s Manual
Fore
w
or
d
Netw
ork Settings
Ref
erences
P
anel Operation
Intr
oduction
to the SP2060
The Contr
ols
and Connector
s
32
Storing a scene
Follow the steps below to store a scene (13–99) to the user
area:
1.
Press the [SCENE] key to select the Scene
Selection display.
2.
Press the [▲INC]/[▼DEC] keys to select a
scene number.
3.
Press the [BACK/STORE] key.
A confirmation message will appear.
4.
Press the [YES] key.
The scene is stored and its number becomes the current
scene number.
To cancel the store operation, press the [NO] key, in-
stead of the [YES] key. The unit returns to the Scene Se-
lection display.
Changing a scene title
Follow the steps below to change the title (up to 13 charac-
ters) of the scene stored for the current scene number:
1.
Press the [SCENE] key repeatedly until the
Scene Edit display appears on the screen.
2.
Press the [BACK]/[NEXT] keys to move the
cursor to a character you want to edit.
3.
Press the [▲INC]/[▼DEC] keys to change the
character.
4.
When you finish editing the title, press the
[NEXT] key repeatedly to move the cursor to
the icon, then press the [YES] key.
A confirmation message will appear.
5.
To confirm the edit, press the [YES] key.
The title is changed and the unit returns to the Scene
Edit display.
Protecting a scene
Follow the steps below to protect a scene:
1.
Press the [SCENE] key repeatedly until the
Scene Edit display appears on the screen.
2.
Press the [▲INC]/[▼DEC] keys to select a
scene number.
3.
Press the [NEXT] key to move the cursor to
the scene property icon.
4.
Press the [▲INC]/[▼DEC] keys to turn
protection on or off.
The protection icon flashes.
HINT
You can also store a scene using the DME Designer application.
NOTE
You cannot change the title of any protected User scenes.
25:FOH(Event A)
[2x(2way+SUB)L]
72:STORE
ARE YOU SURE?
SCENE EDIT
73:FOH(Event A)
SCENE EDIT
73:FOH(Event A)
HINT
Holding down the [▲INC]/[▼DEC] keys will increase the speed
at which the characters scroll.
SCENE EDIT
ARE YOU SURE?
SCENE EDIT
73:FOH(Event A)
SCENE EDIT
73:FOH(Event A)
SCENE EDIT
73 FOH(Event A)
.
Panel Operation
SP2060 Owner’s Manual
Fore
w
or
d
Netw
ork Settings
Ref
erences
P
anel Operation
Intr
oduction
to the SP2060
The Contr
ols
and Connector
s
36
Setting the Last Memory Resume
You can select whether at the startup the SP2060 recalls the
scene selected before you turned off the power to the device,
or it starts up with the same status as when it was shut down
last time. The default setting is “ON.”
OFF: At the startup, the SP2060 will recall the scene select-
ed before you turned off the power to the device.
ON: The SP2060 will start up with the same status as
when it was shut down last time.
1.
Press the [UTILITY] key to select the Utility
display.
The most recently used Utility display will appear.
2.
Press the [UTILITY], [NEXT] or [BACK] key
repeatedly until the Last Memory Resume
page appears.
3.
Press the [▲INC] key so that the SP2060 will
start up with the same status as when it was
shut down last time. Press the [▼DEC] key so
that at the startup the SP2060 will recall the
scene selected before you turned off the
power to the device.
“ON” flashes on the screen.
4.
Press the [NEXT] key to move the cursor to
the icon.
5.
Press the [YES] key.
A confirmation message will appear.
6.
To confirm the operation, press the [YES] key.
The selection is applied and the unit returns to the Last
Memory Resume page.
Displaying the label
You can view the label for the SP2060 that you have set on
DME Designer.
1.
Press the [UTILITY] key to select the Utility
display.
The most recently used Utility display will appear.
2.
Press the [UTILITY], [NEXT] or [BACK] key
repeatedly until the Label page appears.
The unit displays the label you created on DME Design-
er.
LAST MEM. RESUME
ON
LAST MEM. RESUME
ON
LAST MEM. RESUME
ON
LAST MEM. RESUME
ARE YOU SURE?
NOTE
• You cannot edit the label on the SP2060.
• Up to 14 characters from the top can be displayed.
LABEL
[FoH L ]
5.
Нажмите на клавишу [YES]
Появится подтверждающее сообщение.
Panel Operation
SP2060 Owner’s Manual
Fore
w
or
d
Netw
ork Settings
Ref
erences
P
anel Operation
Intr
oduction
to the SP2060
The Contr
ols
and Connector
s
36
Setting the Last Memory Resume
You can select whether at the startup the SP2060 recalls the
scene selected before you turned off the power to the device,
or it starts up with the same status as when it was shut down
last time. The default setting is “ON.”
OFF: At the startup, the SP2060 will recall the scene select-
ed before you turned off the power to the device.
ON: The SP2060 will start up with the same status as
when it was shut down last time.
1.
Press the [UTILITY] key to select the Utility
display.
The most recently used Utility display will appear.
2.
Press the [UTILITY], [NEXT] or [BACK] key
repeatedly until the Last Memory Resume
page appears.
3.
Press the [▲INC] key so that the SP2060 will
start up with the same status as when it was
shut down last time. Press the [▼DEC] key so
that at the startup the SP2060 will recall the
scene selected before you turned off the
power to the device.
“ON” flashes on the screen.
4.
Press the [NEXT] key to move the cursor to
the icon.
5.
Press the [YES] key.
A confirmation message will appear.
6.
To confirm the operation, press the [YES] key.
The selection is applied and the unit returns to the Last
Memory Resume page.
Displaying the label
You can view the label for the SP2060 that you have set on
DME Designer.
1.
Press the [UTILITY] key to select the Utility
display.
The most recently used Utility display will appear.
2.
Press the [UTILITY], [NEXT] or [BACK] key
repeatedly until the Label page appears.
The unit displays the label you created on DME Design-
er.
LAST MEM. RESUME
ON
LAST MEM. RESUME
ON
LAST MEM. RESUME
ON
LAST MEM. RESUME
ARE YOU SURE?
NOTE
• You cannot edit the label on the SP2060.
• Up to 14 characters from the top can be displayed.
LABEL
[FoH L ]
6.
Для подтверждения операции нажмите
на клавишу [YES].
Нужный выбор будет сделан, и устройство вернется к
странице Last Memory Resume.
Panel Operation
SP2060 Owner’s Manual
Fore
w
or
d
Netw
ork Settings
Ref
erences
P
anel Operation
Intr
oduction
to the SP2060
The Contr
ols
and Connector
s
36
Setting the Last Memory Resume
You can select whether at the startup the SP2060 recalls the
scene selected before you turned off the power to the device,
or it starts up with the same status as when it was shut down
last time. The default setting is “ON.”
OFF: At the startup, the SP2060 will recall the scene select-
ed before you turned off the power to the device.
ON: The SP2060 will start up with the same status as
when it was shut down last time.
1.
Press the [UTILITY] key to select the Utility
display.
The most recently used Utility display will appear.
2.
Press the [UTILITY], [NEXT] or [BACK] key
repeatedly until the Last Memory Resume
page appears.
3.
Press the [▲INC] key so that the SP2060 will
start up with the same status as when it was
shut down last time. Press the [▼DEC] key so
that at the startup the SP2060 will recall the
scene selected before you turned off the
power to the device.
“ON” flashes on the screen.
4.
Press the [NEXT] key to move the cursor to
the icon.
5.
Press the [YES] key.
A confirmation message will appear.
6.
To confirm the operation, press the [YES] key.
The selection is applied and the unit returns to the Last
Memory Resume page.
Displaying the label
You can view the label for the SP2060 that you have set on
DME Designer.
1.
Press the [UTILITY] key to select the Utility
display.
The most recently used Utility display will appear.
2.
Press the [UTILITY], [NEXT] or [BACK] key
repeatedly until the Label page appears.
The unit displays the label you created on DME Design-
er.
LAST MEM. RESUME
ON
LAST MEM. RESUME
ON
LAST MEM. RESUME
ON
LAST MEM. RESUME
ARE YOU SURE?
NOTE
• You cannot edit the label on the SP2060.
• Up to 14 characters from the top can be displayed.
LABEL
[FoH L ]
Просмотр маркировки
Можно просмотреть маркировку SP2060, которая была ус-
тановлена на DME Designer.
1.
Нажмите на клавишу [UTILITY] для выбо-
ра экрана Utility (Утилиты).
На экране будут выведены наиболее часто используе-
мые утилиты.
2.
Нажмите повторно на клавишу [UTILITY],
[NEXT] или [BACK] до тех пор, пока не
появится страница Label (Маркировка).
На устройстве высветится маркировка, созданная в
DME Designer.
Panel Operation
SP2060 Owner’s Manual
Fore
w
or
d
Netw
ork Settings
Ref
erences
P
anel Operation
Intr
oduction
to the SP2060
The Contr
ols
and Connector
s
36
Setting the Last Memory Resume
You can select whether at the startup the SP2060 recalls the
scene selected before you turned off the power to the device,
or it starts up with the same status as when it was shut down
last time. The default setting is “ON.”
OFF: At the startup, the SP2060 will recall the scene select-
ed before you turned off the power to the device.
ON: The SP2060 will start up with the same status as
when it was shut down last time.
1.
Press the [UTILITY] key to select the Utility
display.
The most recently used Utility display will appear.
2.
Press the [UTILITY], [NEXT] or [BACK] key
repeatedly until the Last Memory Resume
page appears.
3.
Press the [▲INC] key so that the SP2060 will
start up with the same status as when it was
shut down last time. Press the [▼DEC] key so
that at the startup the SP2060 will recall the
scene selected before you turned off the
power to the device.
“ON” flashes on the screen.
4.
Press the [NEXT] key to move the cursor to
the icon.
5.
Press the [YES] key.
A confirmation message will appear.
6.
To confirm the operation, press the [YES] key.
The selection is applied and the unit returns to the Last
Memory Resume page.
Displaying the label
You can view the label for the SP2060 that you have set on
DME Designer.
1.
Press the [UTILITY] key to select the Utility
display.
The most recently used Utility display will appear.
2.
Press the [UTILITY], [NEXT] or [BACK] key
repeatedly until the Label page appears.
The unit displays the label you created on DME Design-
er.
LAST MEM. RESUME
ON
LAST MEM. RESUME
ON
LAST MEM. RESUME
ON
LAST MEM. RESUME
ARE YOU SURE?
NOTE
• You cannot edit the label on the SP2060.
• Up to 14 characters from the top can be displayed.
LABEL
[FoH L ]
ПРИМЕЧАНИЕ:
• На SP2060 редактирование маркировки невозможно.
• На экране может быть выведено до 14 знаков, начиная с
верху.