Utility (утилиты), Utility – Инструкция по эксплуатации Yamaha sp2060
Страница 32
Предисловие
Введение
в SP2060
Регуляторы
и подключения
Работа
с панелью
Настройки
сети
Справочники
32
SP2060 Руководство пользователя
Работа с панелью
5.
Нажмите на клавишу [NEXT] для пере-
мещения курсора на иконку
Panel Operation
SP2060 Owner’s Manual
Fore
w
or
d
Netw
ork Settings
Ref
erences
P
anel Operation
Intr
oduction
to the SP2060
The Contr
ols
and Connector
s
32
Storing a scene
Follow the steps below to store a scene (13–99) to the user
area:
1.
Press the [SCENE] key to select the Scene
Selection display.
2.
Press the [▲INC]/[▼DEC] keys to select a
scene number.
3.
Press the [BACK/STORE] key.
A confirmation message will appear.
4.
Press the [YES] key.
The scene is stored and its number becomes the current
scene number.
To cancel the store operation, press the [NO] key, in-
stead of the [YES] key. The unit returns to the Scene Se-
lection display.
Changing a scene title
Follow the steps below to change the title (up to 13 charac-
ters) of the scene stored for the current scene number:
1.
Press the [SCENE] key repeatedly until the
Scene Edit display appears on the screen.
2.
Press the [BACK]/[NEXT] keys to move the
cursor to a character you want to edit.
3.
Press the [▲INC]/[▼DEC] keys to change the
character.
4.
When you finish editing the title, press the
[NEXT] key repeatedly to move the cursor to
the icon, then press the [YES] key.
A confirmation message will appear.
5.
To confirm the edit, press the [YES] key.
The title is changed and the unit returns to the Scene
Edit display.
Protecting a scene
Follow the steps below to protect a scene:
1.
Press the [SCENE] key repeatedly until the
Scene Edit display appears on the screen.
2.
Press the [▲INC]/[▼DEC] keys to select a
scene number.
3.
Press the [NEXT] key to move the cursor to
the scene property icon.
4.
Press the [▲INC]/[▼DEC] keys to turn
protection on or off.
The protection icon flashes.
HINT
You can also store a scene using the DME Designer application.
NOTE
You cannot change the title of any protected User scenes.
25:FOH(Event A)
[2x(2way+SUB)L]
72:STORE
ARE YOU SURE?
SCENE EDIT
73:FOH(Event A)
SCENE EDIT
73:FOH(Event A)
HINT
Holding down the [▲INC]/[▼DEC] keys will increase the speed
at which the characters scroll.
SCENE EDIT
ARE YOU SURE?
SCENE EDIT
73:FOH(Event A)
SCENE EDIT
73:FOH(Event A)
SCENE EDIT
73 FOH(Event A)
и затем
нажмите на клавишу [YES].
Появится подтверждающее сообщение.
Ref
erences
Intr
oduction
to the SP2060
Fore
w
or
d
The Contr
ols
and Connector
s
Netw
ork Settings
P
anel Operation
Panel Operation
SP2060 Owner’s Manual
33
5.
Press the [NEXT] key repeatedly to move the
cursor to the icon, then press the [YES]
key.
A confirmation message will appear.
6.
To confirm the edit, press the [YES] key.
The unit reflects the edit and returns to the Scene Edit
display.
Deleting a scene
Follow the steps below to delete a scene:
1.
Press the [SCENE] key repeatedly until the
Scene Delete display appears on the screen.
2.
Press the [▲INC]/[▼DEC] keys to select a
scene to delete.
3.
Press the [NEXT] key to move the cursor to
the icon, then press the [YES] key.
A confirmation message will appear.
4.
To confirm the operation, press the [YES] key.
The operation is executed and the unit returns to the
Scene Delete display.
UTILITY
The Utility function enables you to view the word clock sta-
tus and make network settings. See page 39 for more infor-
mation on making network settings.
INPUT A/B LINK
Follow the steps below to link the Input channel A and B pa-
rameters:
When INPUT A/B LINK is turned On, the parameters for
channel A and B are linked and set to the same value auto-
matically.
The following components will be linked:
• INPUT LEVEL
• INPUT EQ
• INPUT DELAY
1.
Press the [UTILITY] key to select the Utility
display.
The most recently used Utility display will appear.
2.
Press the [UTILITY], [NEXT] or [BACK] key
repeatedly until the INPUT A/B LINK page
appears.
3.
Press the [▲INC] key to link the parameters.
“ON” flashes on the screen.
4.
Press the [NEXT] key to move the cursor to
the icon.
5.
Press the [YES] key.
A confirmation message will appear.
HINT
You can turn protection on and off from the DME Designer
application.
NOTE
You cannot delete preset scenes, protected scenes, and current
scene.
SCENE EDIT
ARE YOU SURE?
SCENE DELETE
72:FOH(Event A)
SCENE DELETE
ARE YOU SURE?
NOTE
The channel SUM parameters cannot be linked.
INPUT A/B LINK
OFF
INPUT A/B LINK
ON
INPUT A/B LINK
ON
INPUT A/B LINK
ARE YOU SURE?
6.
Для подтверждения редактирования
нажмите на клавишу [YES].
На устройстве будет отражено сделанное редактиро-
вание, и показания дисплея вернутся к Scene Edit.
СОВЕТ:
Для включения и выключения защиты можно использовать
программу DME Designer.
Стирание сцены
Для стирания сцены выполните следующие шаги:
1.
Нажмите повторно на клавишу [SCENE]
до тех пор, пока на дисплее не появится
экран Scene Delete (Стирание сцены).
Ref
erences
Intr
oduction
to the SP2060
Fore
w
or
d
The Contr
ols
and Connector
s
Netw
ork Settings
P
anel Operation
Panel Operation
SP2060 Owner’s Manual
33
5.
Press the [NEXT] key repeatedly to move the
cursor to the icon, then press the [YES]
key.
A confirmation message will appear.
6.
To confirm the edit, press the [YES] key.
The unit reflects the edit and returns to the Scene Edit
display.
Deleting a scene
Follow the steps below to delete a scene:
1.
Press the [SCENE] key repeatedly until the
Scene Delete display appears on the screen.
2.
Press the [▲INC]/[▼DEC] keys to select a
scene to delete.
3.
Press the [NEXT] key to move the cursor to
the icon, then press the [YES] key.
A confirmation message will appear.
4.
To confirm the operation, press the [YES] key.
The operation is executed and the unit returns to the
Scene Delete display.
UTILITY
The Utility function enables you to view the word clock sta-
tus and make network settings. See page 39 for more infor-
mation on making network settings.
INPUT A/B LINK
Follow the steps below to link the Input channel A and B pa-
rameters:
When INPUT A/B LINK is turned On, the parameters for
channel A and B are linked and set to the same value auto-
matically.
The following components will be linked:
• INPUT LEVEL
• INPUT EQ
• INPUT DELAY
1.
Press the [UTILITY] key to select the Utility
display.
The most recently used Utility display will appear.
2.
Press the [UTILITY], [NEXT] or [BACK] key
repeatedly until the INPUT A/B LINK page
appears.
3.
Press the [▲INC] key to link the parameters.
“ON” flashes on the screen.
4.
Press the [NEXT] key to move the cursor to
the icon.
5.
Press the [YES] key.
A confirmation message will appear.
HINT
You can turn protection on and off from the DME Designer
application.
NOTE
You cannot delete preset scenes, protected scenes, and current
scene.
SCENE EDIT
ARE YOU SURE?
SCENE DELETE
72:FOH(Event A)
SCENE DELETE
ARE YOU SURE?
NOTE
The channel SUM parameters cannot be linked.
INPUT A/B LINK
OFF
INPUT A/B LINK
ON
INPUT A/B LINK
ON
INPUT A/B LINK
ARE YOU SURE?
2.
Для выбора стираемой сцены, нажмите
на клавиши [
/
INC]/[
\
DEC]
3.
Нажмите на клавишу [NEXT] для пере-
мещения курсора на иконку
Panel Operation
SP2060 Owner’s Manual
Fore
w
or
d
Netw
ork Settings
Ref
erences
P
anel Operation
Intr
oduction
to the SP2060
The Contr
ols
and Connector
s
32
Storing a scene
Follow the steps below to store a scene (13–99) to the user
area:
1.
Press the [SCENE] key to select the Scene
Selection display.
2.
Press the [▲INC]/[▼DEC] keys to select a
scene number.
3.
Press the [BACK/STORE] key.
A confirmation message will appear.
4.
Press the [YES] key.
The scene is stored and its number becomes the current
scene number.
To cancel the store operation, press the [NO] key, in-
stead of the [YES] key. The unit returns to the Scene Se-
lection display.
Changing a scene title
Follow the steps below to change the title (up to 13 charac-
ters) of the scene stored for the current scene number:
1.
Press the [SCENE] key repeatedly until the
Scene Edit display appears on the screen.
2.
Press the [BACK]/[NEXT] keys to move the
cursor to a character you want to edit.
3.
Press the [▲INC]/[▼DEC] keys to change the
character.
4.
When you finish editing the title, press the
[NEXT] key repeatedly to move the cursor to
the icon, then press the [YES] key.
A confirmation message will appear.
5.
To confirm the edit, press the [YES] key.
The title is changed and the unit returns to the Scene
Edit display.
Protecting a scene
Follow the steps below to protect a scene:
1.
Press the [SCENE] key repeatedly until the
Scene Edit display appears on the screen.
2.
Press the [▲INC]/[▼DEC] keys to select a
scene number.
3.
Press the [NEXT] key to move the cursor to
the scene property icon.
4.
Press the [▲INC]/[▼DEC] keys to turn
protection on or off.
The protection icon flashes.
HINT
You can also store a scene using the DME Designer application.
NOTE
You cannot change the title of any protected User scenes.
25:FOH(Event A)
[2x(2way+SUB)L]
72:STORE
ARE YOU SURE?
SCENE EDIT
73:FOH(Event A)
SCENE EDIT
73:FOH(Event A)
HINT
Holding down the [▲INC]/[▼DEC] keys will increase the speed
at which the characters scroll.
SCENE EDIT
ARE YOU SURE?
SCENE EDIT
73:FOH(Event A)
SCENE EDIT
73:FOH(Event A)
SCENE EDIT
73 FOH(Event A)
, и затем
нажмите на клавишу [YES]
Появится подтверждающее сообщение.
Ref
erences
Intr
oduction
to the SP2060
Fore
w
or
d
The Contr
ols
and Connector
s
Netw
ork Settings
P
anel Operation
Panel Operation
SP2060 Owner’s Manual
33
5.
Press the [NEXT] key repeatedly to move the
cursor to the icon, then press the [YES]
key.
A confirmation message will appear.
6.
To confirm the edit, press the [YES] key.
The unit reflects the edit and returns to the Scene Edit
display.
Deleting a scene
Follow the steps below to delete a scene:
1.
Press the [SCENE] key repeatedly until the
Scene Delete display appears on the screen.
2.
Press the [▲INC]/[▼DEC] keys to select a
scene to delete.
3.
Press the [NEXT] key to move the cursor to
the icon, then press the [YES] key.
A confirmation message will appear.
4.
To confirm the operation, press the [YES] key.
The operation is executed and the unit returns to the
Scene Delete display.
UTILITY
The Utility function enables you to view the word clock sta-
tus and make network settings. See page 39 for more infor-
mation on making network settings.
INPUT A/B LINK
Follow the steps below to link the Input channel A and B pa-
rameters:
When INPUT A/B LINK is turned On, the parameters for
channel A and B are linked and set to the same value auto-
matically.
The following components will be linked:
• INPUT LEVEL
• INPUT EQ
• INPUT DELAY
1.
Press the [UTILITY] key to select the Utility
display.
The most recently used Utility display will appear.
2.
Press the [UTILITY], [NEXT] or [BACK] key
repeatedly until the INPUT A/B LINK page
appears.
3.
Press the [▲INC] key to link the parameters.
“ON” flashes on the screen.
4.
Press the [NEXT] key to move the cursor to
the icon.
5.
Press the [YES] key.
A confirmation message will appear.
HINT
You can turn protection on and off from the DME Designer
application.
NOTE
You cannot delete preset scenes, protected scenes, and current
scene.
SCENE EDIT
ARE YOU SURE?
SCENE DELETE
72:FOH(Event A)
SCENE DELETE
ARE YOU SURE?
NOTE
The channel SUM parameters cannot be linked.
INPUT A/B LINK
OFF
INPUT A/B LINK
ON
INPUT A/B LINK
ON
INPUT A/B LINK
ARE YOU SURE?
4.
Для подтверждения операции нажмите
на клавишу [YES].
Операция будет выполнена, а устройство вернется к
дисплею Scene Delete.
ПРИМЕЧАНИЕ:
старине предустановленных сцен, защищенных сцен и теку-
щей сцены – невозможно.
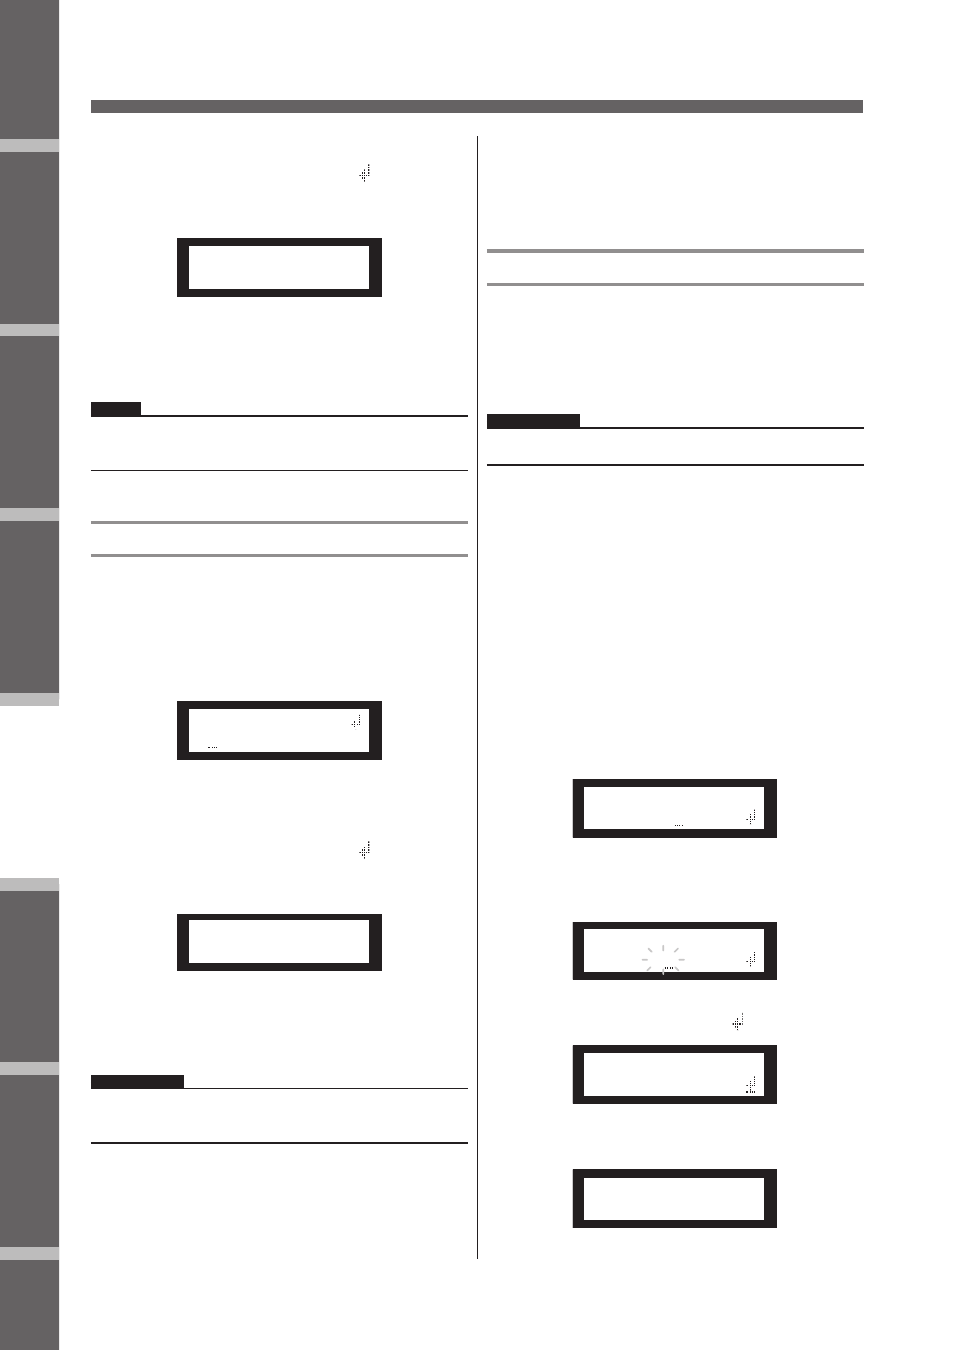
UTILITY (Утилиты)
Функция утилит позволяет просмотреть статус синхроим-
пульсов и сделать сетевые настройки. Дополнительная ин-
формация о сетевых настройках дается на странице 39.
INPUT A/B LINK
Для связи параметров канала А и В выполните следующие
шаги:
При включении INPUT A/B LINK, параметры каналов А и В
будут связаны, и на них будут автоматически установлено
одинаковое значение.
ПРИМЕЧАНИЕ:
Параметры канала SUM не могут быть связаны.
Могут быть связаны следующие компоненты:
• INPUT LEVEL (уровень входного сигнала)
• INPUT EQ (Эквализация входного сигнала)
• INPUT DELAY (Задержка входного сигнала)
1.
Нажмите на клавишу [UTILITY] для выбо-
ра экрана Utility (Утилиты).
На экране будут выведены наиболее часто используе-
мые утилиты.
2.
Нажмите повторно на клавишу [UTILITY],
[NEXT] или [BACK] до тех пор, пока не
появится страница INPUT A/B LINK.
Ref
erences
Intr
oduction
to the SP2060
Fore
w
or
d
The Contr
ols
and Connector
s
Netw
ork Settings
P
anel Operation
Panel Operation
SP2060 Owner’s Manual
33
5.
Press the [NEXT] key repeatedly to move the
cursor to the icon, then press the [YES]
key.
A confirmation message will appear.
6.
To confirm the edit, press the [YES] key.
The unit reflects the edit and returns to the Scene Edit
display.
Deleting a scene
Follow the steps below to delete a scene:
1.
Press the [SCENE] key repeatedly until the
Scene Delete display appears on the screen.
2.
Press the [▲INC]/[▼DEC] keys to select a
scene to delete.
3.
Press the [NEXT] key to move the cursor to
the icon, then press the [YES] key.
A confirmation message will appear.
4.
To confirm the operation, press the [YES] key.
The operation is executed and the unit returns to the
Scene Delete display.
UTILITY
The Utility function enables you to view the word clock sta-
tus and make network settings. See page 39 for more infor-
mation on making network settings.
INPUT A/B LINK
Follow the steps below to link the Input channel A and B pa-
rameters:
When INPUT A/B LINK is turned On, the parameters for
channel A and B are linked and set to the same value auto-
matically.
The following components will be linked:
• INPUT LEVEL
• INPUT EQ
• INPUT DELAY
1.
Press the [UTILITY] key to select the Utility
display.
The most recently used Utility display will appear.
2.
Press the [UTILITY], [NEXT] or [BACK] key
repeatedly until the INPUT A/B LINK page
appears.
3.
Press the [▲INC] key to link the parameters.
“ON” flashes on the screen.
4.
Press the [NEXT] key to move the cursor to
the icon.
5.
Press the [YES] key.
A confirmation message will appear.
HINT
You can turn protection on and off from the DME Designer
application.
NOTE
You cannot delete preset scenes, protected scenes, and current
scene.
SCENE EDIT
ARE YOU SURE?
SCENE DELETE
72:FOH(Event A)
SCENE DELETE
ARE YOU SURE?
NOTE
The channel SUM parameters cannot be linked.
INPUT A/B LINK
OFF
INPUT A/B LINK
ON
INPUT A/B LINK
ON
INPUT A/B LINK
ARE YOU SURE?
3.
Для связывания параметров, нажмите на
клавишу [
/
INC]
На экране замигает индикация «ON»
Ref
erences
Intr
oduction
to the SP2060
Fore
w
or
d
The Contr
ols
and Connector
s
Netw
ork Settings
P
anel Operation
Panel Operation
SP2060 Owner’s Manual
33
5.
Press the [NEXT] key repeatedly to move the
cursor to the icon, then press the [YES]
key.
A confirmation message will appear.
6.
To confirm the edit, press the [YES] key.
The unit reflects the edit and returns to the Scene Edit
display.
Deleting a scene
Follow the steps below to delete a scene:
1.
Press the [SCENE] key repeatedly until the
Scene Delete display appears on the screen.
2.
Press the [▲INC]/[▼DEC] keys to select a
scene to delete.
3.
Press the [NEXT] key to move the cursor to
the icon, then press the [YES] key.
A confirmation message will appear.
4.
To confirm the operation, press the [YES] key.
The operation is executed and the unit returns to the
Scene Delete display.
UTILITY
The Utility function enables you to view the word clock sta-
tus and make network settings. See page 39 for more infor-
mation on making network settings.
INPUT A/B LINK
Follow the steps below to link the Input channel A and B pa-
rameters:
When INPUT A/B LINK is turned On, the parameters for
channel A and B are linked and set to the same value auto-
matically.
The following components will be linked:
• INPUT LEVEL
• INPUT EQ
• INPUT DELAY
1.
Press the [UTILITY] key to select the Utility
display.
The most recently used Utility display will appear.
2.
Press the [UTILITY], [NEXT] or [BACK] key
repeatedly until the INPUT A/B LINK page
appears.
3.
Press the [▲INC] key to link the parameters.
“ON” flashes on the screen.
4.
Press the [NEXT] key to move the cursor to
the icon.
5.
Press the [YES] key.
A confirmation message will appear.
HINT
You can turn protection on and off from the DME Designer
application.
NOTE
You cannot delete preset scenes, protected scenes, and current
scene.
SCENE EDIT
ARE YOU SURE?
SCENE DELETE
72:FOH(Event A)
SCENE DELETE
ARE YOU SURE?
NOTE
The channel SUM parameters cannot be linked.
INPUT A/B LINK
OFF
INPUT A/B LINK
ON
INPUT A/B LINK
ON
INPUT A/B LINK
ARE YOU SURE?
4.
Нажмите на клавишу [NEXT] для переме-
щения курсора на иконку
Panel Operation
SP2060 Owner’s Manual
Fore
w
or
d
Netw
ork Settings
Ref
erences
P
anel Operation
Intr
oduction
to the SP2060
The Contr
ols
and Connector
s
32
Storing a scene
Follow the steps below to store a scene (13–99) to the user
area:
1.
Press the [SCENE] key to select the Scene
Selection display.
2.
Press the [▲INC]/[▼DEC] keys to select a
scene number.
3.
Press the [BACK/STORE] key.
A confirmation message will appear.
4.
Press the [YES] key.
The scene is stored and its number becomes the current
scene number.
To cancel the store operation, press the [NO] key, in-
stead of the [YES] key. The unit returns to the Scene Se-
lection display.
Changing a scene title
Follow the steps below to change the title (up to 13 charac-
ters) of the scene stored for the current scene number:
1.
Press the [SCENE] key repeatedly until the
Scene Edit display appears on the screen.
2.
Press the [BACK]/[NEXT] keys to move the
cursor to a character you want to edit.
3.
Press the [▲INC]/[▼DEC] keys to change the
character.
4.
When you finish editing the title, press the
[NEXT] key repeatedly to move the cursor to
the icon, then press the [YES] key.
A confirmation message will appear.
5.
To confirm the edit, press the [YES] key.
The title is changed and the unit returns to the Scene
Edit display.
Protecting a scene
Follow the steps below to protect a scene:
1.
Press the [SCENE] key repeatedly until the
Scene Edit display appears on the screen.
2.
Press the [▲INC]/[▼DEC] keys to select a
scene number.
3.
Press the [NEXT] key to move the cursor to
the scene property icon.
4.
Press the [▲INC]/[▼DEC] keys to turn
protection on or off.
The protection icon flashes.
HINT
You can also store a scene using the DME Designer application.
NOTE
You cannot change the title of any protected User scenes.
25:FOH(Event A)
[2x(2way+SUB)L]
72:STORE
ARE YOU SURE?
SCENE EDIT
73:FOH(Event A)
SCENE EDIT
73:FOH(Event A)
HINT
Holding down the [▲INC]/[▼DEC] keys will increase the speed
at which the characters scroll.
SCENE EDIT
ARE YOU SURE?
SCENE EDIT
73:FOH(Event A)
SCENE EDIT
73:FOH(Event A)
SCENE EDIT
73 FOH(Event A)
.
Ref
erences
Intr
oduction
to the SP2060
Fore
w
or
d
The Contr
ols
and Connector
s
Netw
ork Settings
P
anel Operation
Panel Operation
SP2060 Owner’s Manual
33
5.
Press the [NEXT] key repeatedly to move the
cursor to the icon, then press the [YES]
key.
A confirmation message will appear.
6.
To confirm the edit, press the [YES] key.
The unit reflects the edit and returns to the Scene Edit
display.
Deleting a scene
Follow the steps below to delete a scene:
1.
Press the [SCENE] key repeatedly until the
Scene Delete display appears on the screen.
2.
Press the [▲INC]/[▼DEC] keys to select a
scene to delete.
3.
Press the [NEXT] key to move the cursor to
the icon, then press the [YES] key.
A confirmation message will appear.
4.
To confirm the operation, press the [YES] key.
The operation is executed and the unit returns to the
Scene Delete display.
UTILITY
The Utility function enables you to view the word clock sta-
tus and make network settings. See page 39 for more infor-
mation on making network settings.
INPUT A/B LINK
Follow the steps below to link the Input channel A and B pa-
rameters:
When INPUT A/B LINK is turned On, the parameters for
channel A and B are linked and set to the same value auto-
matically.
The following components will be linked:
• INPUT LEVEL
• INPUT EQ
• INPUT DELAY
1.
Press the [UTILITY] key to select the Utility
display.
The most recently used Utility display will appear.
2.
Press the [UTILITY], [NEXT] or [BACK] key
repeatedly until the INPUT A/B LINK page
appears.
3.
Press the [▲INC] key to link the parameters.
“ON” flashes on the screen.
4.
Press the [NEXT] key to move the cursor to
the icon.
5.
Press the [YES] key.
A confirmation message will appear.
HINT
You can turn protection on and off from the DME Designer
application.
NOTE
You cannot delete preset scenes, protected scenes, and current
scene.
SCENE EDIT
ARE YOU SURE?
SCENE DELETE
72:FOH(Event A)
SCENE DELETE
ARE YOU SURE?
NOTE
The channel SUM parameters cannot be linked.
INPUT A/B LINK
OFF
INPUT A/B LINK
ON
INPUT A/B LINK
ON
INPUT A/B LINK
ARE YOU SURE?
5.
Нажмите на клавишу [YES]
Появится подтверждающее сообщение.
Ref
erences
Intr
oduction
to the SP2060
Fore
w
or
d
The Contr
ols
and Connector
s
Netw
ork Settings
P
anel Operation
Panel Operation
SP2060 Owner’s Manual
33
5.
Press the [NEXT] key repeatedly to move the
cursor to the icon, then press the [YES]
key.
A confirmation message will appear.
6.
To confirm the edit, press the [YES] key.
The unit reflects the edit and returns to the Scene Edit
display.
Deleting a scene
Follow the steps below to delete a scene:
1.
Press the [SCENE] key repeatedly until the
Scene Delete display appears on the screen.
2.
Press the [▲INC]/[▼DEC] keys to select a
scene to delete.
3.
Press the [NEXT] key to move the cursor to
the icon, then press the [YES] key.
A confirmation message will appear.
4.
To confirm the operation, press the [YES] key.
The operation is executed and the unit returns to the
Scene Delete display.
UTILITY
The Utility function enables you to view the word clock sta-
tus and make network settings. See page 39 for more infor-
mation on making network settings.
INPUT A/B LINK
Follow the steps below to link the Input channel A and B pa-
rameters:
When INPUT A/B LINK is turned On, the parameters for
channel A and B are linked and set to the same value auto-
matically.
The following components will be linked:
• INPUT LEVEL
• INPUT EQ
• INPUT DELAY
1.
Press the [UTILITY] key to select the Utility
display.
The most recently used Utility display will appear.
2.
Press the [UTILITY], [NEXT] or [BACK] key
repeatedly until the INPUT A/B LINK page
appears.
3.
Press the [▲INC] key to link the parameters.
“ON” flashes on the screen.
4.
Press the [NEXT] key to move the cursor to
the icon.
5.
Press the [YES] key.
A confirmation message will appear.
HINT
You can turn protection on and off from the DME Designer
application.
NOTE
You cannot delete preset scenes, protected scenes, and current
scene.
SCENE EDIT
ARE YOU SURE?
SCENE DELETE
72:FOH(Event A)
SCENE DELETE
ARE YOU SURE?
NOTE
The channel SUM parameters cannot be linked.
INPUT A/B LINK
OFF
INPUT A/B LINK
ON
INPUT A/B LINK
ON
INPUT A/B LINK
ARE YOU SURE?