The rpx400 and recording, Using the rpx400’s footswitches for recording, Запись дорожек – Инструкция по эксплуатации DigiTech rpx400
Страница 32: Recording a track or tracks
4. Нажмите кнопку ОК.
5. Нажмите кнопку ОК, когда изменения будут сохранены, перед перезапуском приложения.
6. Закройте программу Pro Tracks. Когда появится предложение сохранить изменения, нажмите
No.
7. Перезагрузите Pro Tracks еще раз.
8. Закройте окна Tip of the Day и Quick Start если они появятся.
9. Выберите Options>Audio в меню Pro Tracks.
10. Убедитесь, что в конфигурации воспроизведения (Playback) и Recording Timing Master
выбрано DigiTech USB 1-2 In/Out в качестве выхода по умолчанию. В противном случае –
следует настроить конфигурации сейчас.
11. Нажмите на кнопку Wave Profiler на нижней панели.
12. Нажмите кнопку Yes для тестирования звукового оборудования.
13. Когда операция установки профиля завершится, нажмите кнопку ОК.
14. Если окно Audio Options все еще открыто – закройте его нажатием на кнопку ОК.
Теперь вы готовы использовать программу Pro Tracks в работе с RPx400.
ВНИМАНИЕ: Не отключайте RPx400 из сети и не отсоединяйте USB-кабель от компьютера во время
работы программы Pro Tracks. Это может вызвать непредсказуемые сбои в работе компьютера.
3. Under the Output Drivers settings, select DigiTech USB 1-2 In/Out and deselect all other
options.
4. Click the OK button.
5. Click the OK buttonwhen the window stating changes will be saved upon re-start appears.
6. Close the Pro Tracks application. When you are prompted to save changed, click No.
7. Re-start the Pro Tracks application again.
8. Close the Tip of the Day and Quick Start windows if they appear.
9. From the Pro Tracks menu bar, select Options>Audio.
10. Verify that the Playback and Record Timing Master settings have DigiTech USB 1-2 In/Out select-
ed. If not, select these now.
11. Click the Wave Profiler button at the bottom.
12. Click the Yes button to continue performing the tests.
13. When the profiling operation is successfully completed, click the OK button.
14. Click the OK button to close the Audio Options window if it is still open.
You are now ready to use the RPx400 with Pro Tracks recording software.
CAUTION: Do not disconnect power or disconnect the USB cable from the RPx400 or the
computer while the Pro Tracks software is running. Doing so can result in unpredictable
behavior from your computer’s operating system.
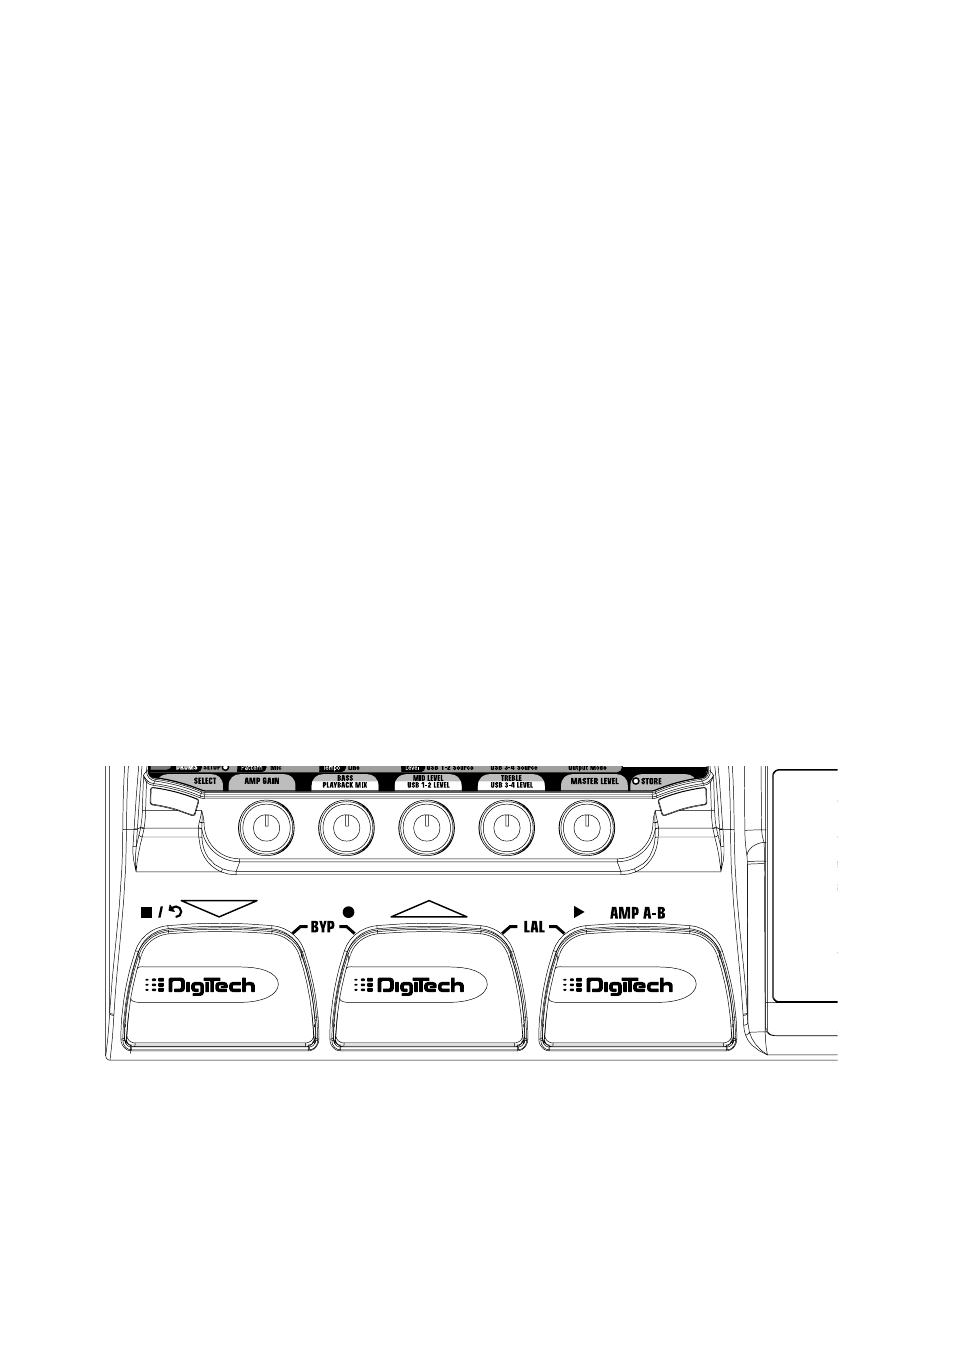
Using the RPx400’s Footswitches for Recording
The RPx400’s footswitches are capable of controlling the Pro Tracks™ recording software, creating a hands-
free recording interface. To do this, the RPx400 must be connected to the computer via the included USB
cable and the Pro Tracks application must be installed and open.
Recording a Track or Tracks
To begin recording a track using the footswitches, follow these steps:
1. Start the Pro Tracks application.
2. From the Pro Tracks menu bar, select File>New. The New Project File window will appear.
3. From the New Project File window, select Normal - Hands-Free Session.
4. Put the RPx400 footswitches in Recorder mode by pressing and holding the UP and AMP A/B
31
The RPx400 and Recording
Использование напольных переключателей
RPx400 при записи
Напольные переключатели RPx400 способны управлять звукозаписывающей программой
Pro Tracks. Таким образом создается записывающий интерфейс hands-free. Для этого
RPx400 должен быть подключен через USB-порт к компьютеру с установленным и
работающим программным обеспечением Pro Tracks.
Запись дорожек
Для записи звука с использованием напольных переключателей необходимо:
1. Запустить программу Pro Tracks.
2. Выберите File>New из панели меню Pro Tracks. После этого появится окно New Project File.
3. Выберите пункт Normal – Hands-Free Session в окне New Project File.
4. Для перехода процессора в режим Записи, необходимо одновременно зажать
переключатели UP и Amp A-B до появления на дисплее REC FS.