Creating presets – Инструкция по эксплуатации DigiTech rpx400
Страница 12
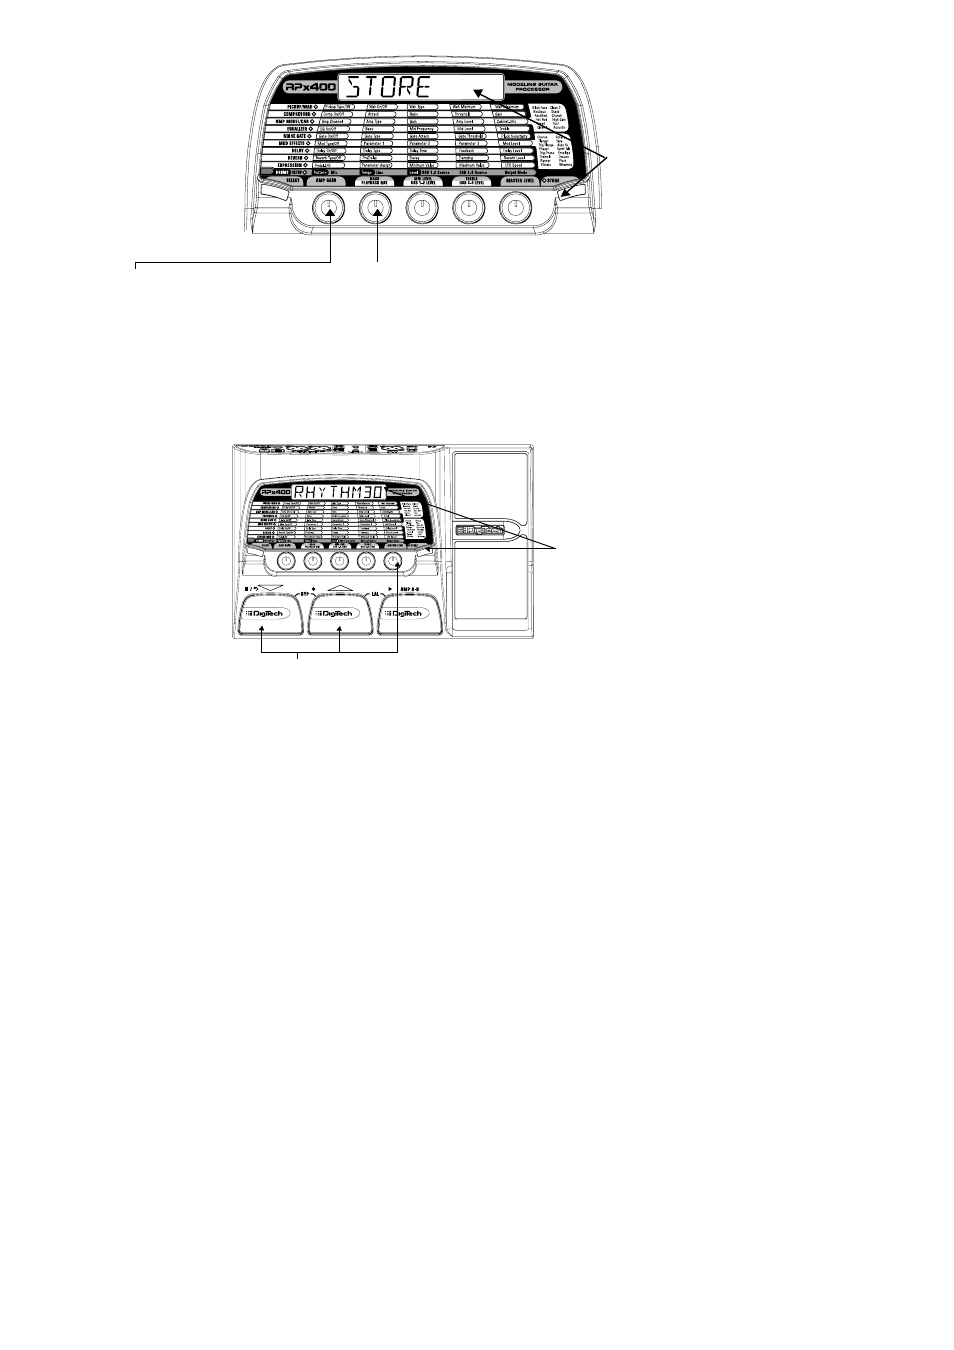
1. Press the Store button once. The Store button LED blinks and the first character in the display flashes
indicating you can name your new preset.
2. Use the Number 1 Knob or Up/Down Footswitches to select the alpha-numeric character.
3. Rotate the Number 2 Knob clockwise to select the next character, and counterclockwise to select the
previous character. Repeat step 2 until the name is complete.
4. Once the name is shown in the display, press the Store button. The display alternates between the new
name and the name of the preset about to be overwritten.
5. Select the User Preset location of your new preset using the Number 5 Knob or the Up/Down
Footswitches. The display continues to alternate between the new preset name and name of the preset
about to be overwritten.
6. Press the Store button again to save the changes.
Press the Select or Drums buttons at any time to abort storing.
To copy one preset to another preset location is the same as above. Use the footswitches to select the pre-
set that you want to copy, then follow the steps listed above.
11
Creating Presets
6. Для сохранения изменений нажмите кнопку Store еще раз. Нажмите кнопку Select или
Drums, если хотите прервать операцию сохранения. Копирование пресета
в локацию другого пресета происходит по принципу, описанному выше.
Выберите пресет, который вы хотите скопировать (с помощью Переключателей),
а затем следуйте вышеперечисленным пунктам.
1. Press the Store button once. The Store button LED blinks and the first character in the display flashes
indicating you can name your new preset.
2. Use the Number 1 Knob or Up/Down Footswitches to select the alpha-numeric character.
3. Rotate the Number 2 Knob clockwise to select the next character, and counterclockwise to select the
previous character. Repeat step 2 until the name is complete.
4. Once the name is shown in the display, press the Store button. The display alternates between the new
name and the name of the preset about to be overwritten.
5. Select the User Preset location of your new preset using the Number 5 Knob or the Up/Down
Footswitches. The display continues to alternate between the new preset name and name of the preset
about to be overwritten.
6. Press the Store button again to save the changes.
Press the Select or Drums buttons at any time to abort storing.
To copy one preset to another preset location is the same as above. Use the footswitches to select the pre-
set that you want to copy, then follow the steps listed above.
11
Creating Presets
1. Нажмите кнопку Store. После
этого загорается диод Store, а
первый символ названия пресета
на дисплее начинает мигать.
2. Используйте Регулятор 1 или
Переключатели Up/Down для
выбора первого символа.
3. Для перехода на следующий символ, поворачивайте
Регулятор 2 по часовой стрелке. Для перехода на
предыдущий символ, поворачивайте Регулятор
2 против часовой стрелки. Повторяйте шаг 2 до
установления название пресета.
4. Нажмите кнопку Store, когда
заданное название отображается
на дисплее. На дисплее начнут
поочередно отображаться новое
название и название пресета,
который вы собираетесь изменить.
5. Выберите локацию для
измененного пресета из набора
Пользовательских Пресетов,
используя Регулятор 5 или
Переключатели Up/Down,. Дисплей
по-прежнему будет поочередно
отображать новое название и
название пресета, который вы
собираетесь изменить.