Panel operation, Работа с панелью, Основные операции – Инструкция по эксплуатации Yamaha sp2060
Страница 23: Уровень, Basic operation, Level, Изменение значений параметров, Changing the parameter values
Предисловие
Введение
в SP2060
Регуляторы
и подключения
Работа
с панелью
Настройки
сети
Справочники
SP2060 Руководство пользователя
23
Работа с панелью
Основные операции
Изменение значений параметров
Можно отрегулировать настройки параметров, например
эквализацию, в соответствии с характеристикой динамика
или акустикой конкретного зала. В данном разделе, в качес-
тве примера, дается описание процедуры изменения вре-
мени задержки для выхода канала 1.
Выведите на экран настройку параметра, кото-
рую вы хотите изменить. Для изменения вре-
мени задержки, нажмите вначале на клавишу
[DELAY] для переключения на дисплей Delay.
Для получения информации о зависимости между
параметрами и клавишами смотрите раздел «Регуля-
торы и подключения» на стр. 21.
SP2060 Owner’s Manual
Fore
w
or
d
Netw
ork Settings
Ref
erences
P
anel Operation
Intr
oduction
to the SP2060
The Contr
ols
and Connector
s
24
Basic Operation
Changing the parameter values
You can adjust the parameter settings, such as EQ, according
to the speaker response or the acoustic environment of a par-
ticular venue. This section explains how to change the delay
time for Output channel 1 as an example.
1.
Display the parameter setting you wish to
change. To change the delay time, first press
the [DELAY] key to switch to the Delay
display.
Refer to “The Controls and Connectors” on page 22 for
information on the relationship between the parameters
and keys.
2.
Select a channel for which you wish to
change the delay time. In this example, press
the OUTPUT 1 [SEL] key.
3.
Press the [NEXT] key repeatedly until the
parameter you wish to change appears on the
screen. In this example, select the Time
parameter.
4.
Press the [▲ INC]/[▼ DEC] keys to change the
parameter value.
The parameter value on the screen changes accordingly.
This section describes the function of the panel keys and re-
lated displays.
Some parameters will prompt you to confirm the operation
to reflect the change in the value.
In this case, a confirmation icon will appear on the display.
Press the [NEXT] key to move the cursor to the icon, then
press the [YES] key. A message prompts you to confirm.
Press the [YES] key to confirm the operation.
LEVEL
You can view and adjust the Input and Output channel lev-
els.
1.
Press the [LEVEL] key to select the Level
display.
2.
Press the [SEL] key for the target channel.
The corresponding channel is selected. The [SEL] key
LED for the selected channel lights up.
3.
Press the [▲INC]/[▼DEC] keys to adjust the
input or output level.
Panel Operation
[▲ INC]
key
Press the [▲ INC]
key.
The value increases.
Hold down the
[▲ INC] key.
The value continues to
increase as long as you
hold down the key.
While holding down
the [▲ INC] key,
press the [▼ DEC]
key.
The value continues to
increase at a rate more
rapid than when you hold
down the [▲ INC] key.
[▼ DEC]
key
Press the [▼ DEC]
key.
The value decreases.
Hold down the
[▼ DEC] key.
The value continues to
decrease as long as you
down the key.
While holding down
the [▼ DEC] key,
press the [▲ INC]
key.
The value continues to
decrease at a rate more
rapid than when you hold
down the [▼ DEC] key.
OUT 1
ON/OFF = ON
OUT 1
TIME = 2.67ms
Parameter
Range
INPUT A/B/SUM
–
∞
, –138.00 through +10.00dB
OUTPUT 1-6
–
∞
, –138.00 through +10.00dB
NOTE
When INPUT A/B LINK is turned On, the parameters for
channels A and B are linked and set to the same value
automatically.
SCENE EDIT
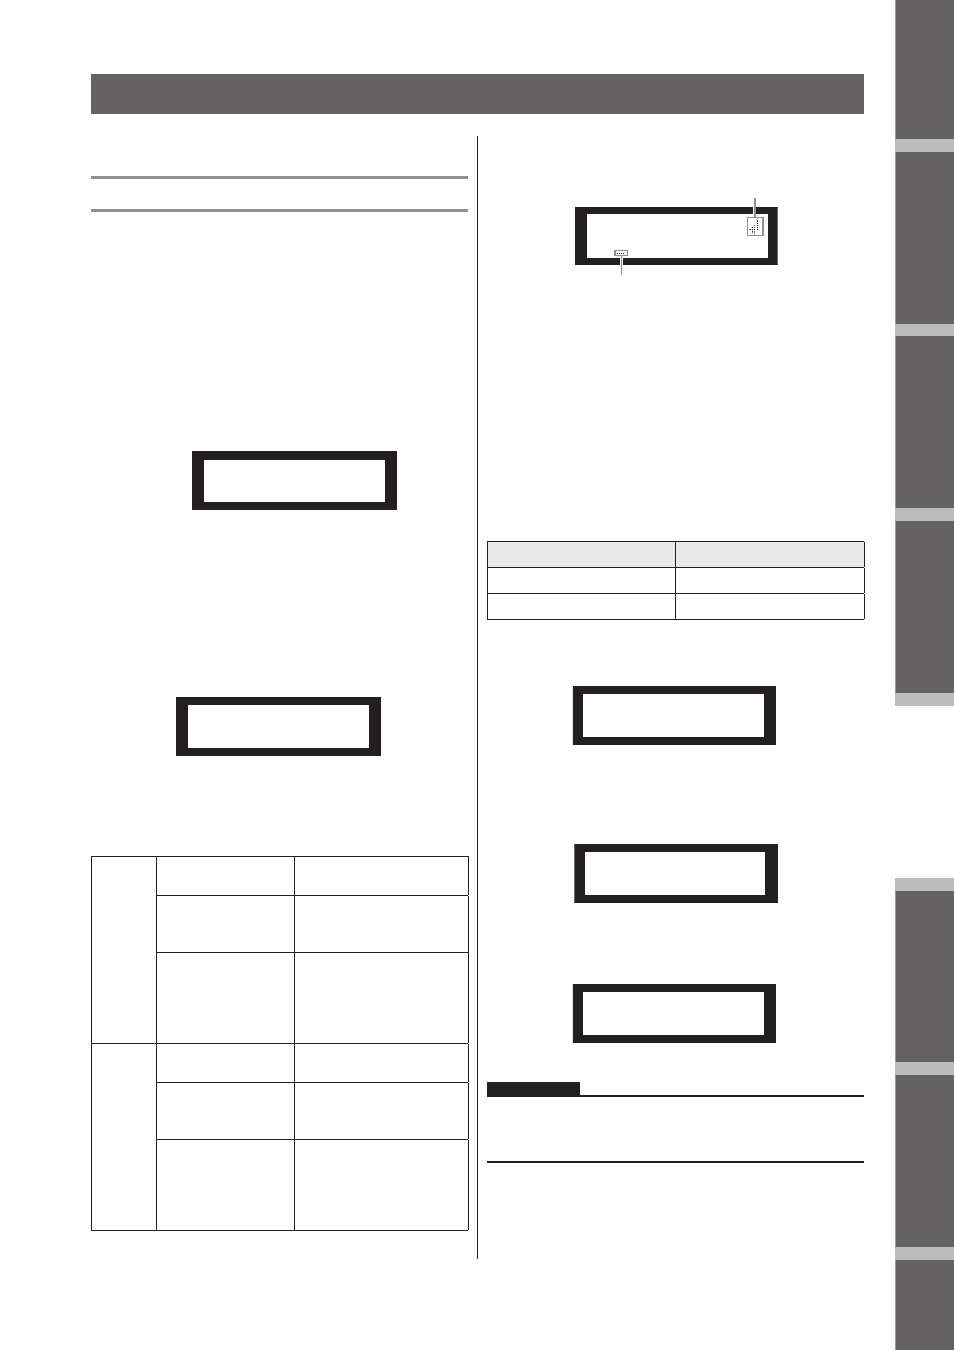
01:FOH(Event A)
Confirmation icon
Cursor
IN A
LEVEL =-138.00dB
IN B
LEVEL =-138.00dB
IN B
LEVEL =-138.00dB
Выберите канал, в котором будете изменять
время задержки. В данном примере, нажми-
те на клавишу OUTPUT 1 [SEL]
Нажмите повторно на клавишу [NEXT] до тех
пор, пока на экране не появится нужный па-
раметр. В данном примере, выберите пара-
метр Time (Время).
SP2060 Owner’s Manual
Fore
w
or
d
Netw
ork Settings
Ref
erences
P
anel Operation
Intr
oduction
to the SP2060
The Contr
ols
and Connector
s
24
Basic Operation
Changing the parameter values
You can adjust the parameter settings, such as EQ, according
to the speaker response or the acoustic environment of a par-
ticular venue. This section explains how to change the delay
time for Output channel 1 as an example.
1.
Display the parameter setting you wish to
change. To change the delay time, first press
the [DELAY] key to switch to the Delay
display.
Refer to “The Controls and Connectors” on page 22 for
information on the relationship between the parameters
and keys.
2.
Select a channel for which you wish to
change the delay time. In this example, press
the OUTPUT 1 [SEL] key.
3.
Press the [NEXT] key repeatedly until the
parameter you wish to change appears on the
screen. In this example, select the Time
parameter.
4.
Press the [▲ INC]/[▼ DEC] keys to change the
parameter value.
The parameter value on the screen changes accordingly.
This section describes the function of the panel keys and re-
lated displays.
Some parameters will prompt you to confirm the operation
to reflect the change in the value.
In this case, a confirmation icon will appear on the display.
Press the [NEXT] key to move the cursor to the icon, then
press the [YES] key. A message prompts you to confirm.
Press the [YES] key to confirm the operation.
LEVEL
You can view and adjust the Input and Output channel lev-
els.
1.
Press the [LEVEL] key to select the Level
display.
2.
Press the [SEL] key for the target channel.
The corresponding channel is selected. The [SEL] key
LED for the selected channel lights up.
3.
Press the [▲INC]/[▼DEC] keys to adjust the
input or output level.
Panel Operation
[▲ INC]
key
Press the [▲ INC]
key.
The value increases.
Hold down the
[▲ INC] key.
The value continues to
increase as long as you
hold down the key.
While holding down
the [▲ INC] key,
press the [▼ DEC]
key.
The value continues to
increase at a rate more
rapid than when you hold
down the [▲ INC] key.
[▼ DEC]
key
Press the [▼ DEC]
key.
The value decreases.
Hold down the
[▼ DEC] key.
The value continues to
decrease as long as you
down the key.
While holding down
the [▼ DEC] key,
press the [▲ INC]
key.
The value continues to
decrease at a rate more
rapid than when you hold
down the [▼ DEC] key.
OUT 1
ON/OFF = ON
OUT 1
TIME = 2.67ms
Parameter
Range
INPUT A/B/SUM
–
∞
, –138.00 through +10.00dB
OUTPUT 1-6
–
∞
, –138.00 through +10.00dB
NOTE
When INPUT A/B LINK is turned On, the parameters for
channels A and B are linked and set to the same value
automatically.
SCENE EDIT
01:FOH(Event A)
Confirmation icon
Cursor
IN A
LEVEL =-138.00dB
IN B
LEVEL =-138.00dB
IN B
LEVEL =-138.00dB
Для изменения значения параметра, нажми-
те на клавиши [
/
INC]/[
\
DEC]
Значение параметра на экране будет соответственно
изменено.
Клавиша
[
/
INC]
Нажмите клавишу
[
/
INC].
Значение увеличится
Нажмите и удержи-
вайте клавишу [
/
INC].
Значение будет увеличи-
ваться в течение времени
удерживания клавиши
Удерживая в на-
жатом положении
клавишу [
/
INC],
нажмите на клавишу
[
/
DEC].
В течение времени удер-
живания клавиши [
/
INC],
значение будет увеличи-
ваться более быстро.
Клавиша
[
/
DEC]
Нажмите на клави-
шу [
/
DEC].
Значение уменьшается.
Нажмите и удержи-
вайте клавишу [
/
DEC].
Значение будет умень-
шаться в течение времени
удерживания клавиши
Удерживая в на-
жатом положении
клавишу [
/
DEC],
нажмите на клавишу
[
\
INC].
В течение времени удер-
живания клавиши [
/
DEC]
значение будет умень-
шаться более быстро.
В данном разделе дается описание функций клавиш панели
и соответствующей индикации на экране.
Иконка подтверждения
SP2060 Owner’s Manual
Fore
w
or
d
Netw
ork Settings
Ref
erences
P
anel Operation
Intr
oduction
to the SP2060
The Contr
ols
and Connector
s
24
Basic Operation
Changing the parameter values
You can adjust the parameter settings, such as EQ, according
to the speaker response or the acoustic environment of a par-
ticular venue. This section explains how to change the delay
time for Output channel 1 as an example.
1.
Display the parameter setting you wish to
change. To change the delay time, first press
the [DELAY] key to switch to the Delay
display.
Refer to “The Controls and Connectors” on page 22 for
information on the relationship between the parameters
and keys.
2.
Select a channel for which you wish to
change the delay time. In this example, press
the OUTPUT 1 [SEL] key.
3.
Press the [NEXT] key repeatedly until the
parameter you wish to change appears on the
screen. In this example, select the Time
parameter.
4.
Press the [▲ INC]/[▼ DEC] keys to change the
parameter value.
The parameter value on the screen changes accordingly.
This section describes the function of the panel keys and re-
lated displays.
Some parameters will prompt you to confirm the operation
to reflect the change in the value.
In this case, a confirmation icon will appear on the display.
Press the [NEXT] key to move the cursor to the icon, then
press the [YES] key. A message prompts you to confirm.
Press the [YES] key to confirm the operation.
LEVEL
You can view and adjust the Input and Output channel lev-
els.
1.
Press the [LEVEL] key to select the Level
display.
2.
Press the [SEL] key for the target channel.
The corresponding channel is selected. The [SEL] key
LED for the selected channel lights up.
3.
Press the [▲INC]/[▼DEC] keys to adjust the
input or output level.
Panel Operation
[▲ INC]
key
Press the [▲ INC]
key.
The value increases.
Hold down the
[▲ INC] key.
The value continues to
increase as long as you
hold down the key.
While holding down
the [▲ INC] key,
press the [▼ DEC]
key.
The value continues to
increase at a rate more
rapid than when you hold
down the [▲ INC] key.
[▼ DEC]
key
Press the [▼ DEC]
key.
The value decreases.
Hold down the
[▼ DEC] key.
The value continues to
decrease as long as you
down the key.
While holding down
the [▼ DEC] key,
press the [▲ INC]
key.
The value continues to
decrease at a rate more
rapid than when you hold
down the [▼ DEC] key.
OUT 1
ON/OFF = ON
OUT 1
TIME = 2.67ms
Parameter
Range
INPUT A/B/SUM
–
∞
, –138.00 through +10.00dB
OUTPUT 1-6
–
∞
, –138.00 through +10.00dB
NOTE
When INPUT A/B LINK is turned On, the parameters for
channels A and B are linked and set to the same value
automatically.
SCENE EDIT
01:FOH(Event A)
Confirmation icon
Cursor
IN A
LEVEL =-138.00dB
IN B
LEVEL =-138.00dB
IN B
LEVEL =-138.00dB
Курсор
При изменении некоторых параметров будет предложено
сделать подтверждение для изменения значения.
В этом случае, на экране появится иконка подтверждения.
Нажмите на клавишу [NEXT] для перемещения курсора на
эту иконку и затем нажмите на клавишу [YES]. Появится со-
общение подтверждения выполнения операции. Нажмите
кнопку [YES] для подтверждения операции.
Уровень
Вы можете просмотреть и отрегулировать уровни сигналов
на входном и выходном канале.
Параметр
Диапазон
INPUT A/B/SUM
–
∞, –138.00 до +10.00dB
OUTPUT 1-6
–
∞, –138.00 до +10.00dB
Нажмите на клавишу [LEVEL] для выбора
экрана Level (Уровень).
SP2060 Owner’s Manual
Fore
w
or
d
Netw
ork Settings
Ref
erences
P
anel Operation
Intr
oduction
to the SP2060
The Contr
ols
and Connector
s
24
Basic Operation
Changing the parameter values
You can adjust the parameter settings, such as EQ, according
to the speaker response or the acoustic environment of a par-
ticular venue. This section explains how to change the delay
time for Output channel 1 as an example.
1.
Display the parameter setting you wish to
change. To change the delay time, first press
the [DELAY] key to switch to the Delay
display.
Refer to “The Controls and Connectors” on page 22 for
information on the relationship between the parameters
and keys.
2.
Select a channel for which you wish to
change the delay time. In this example, press
the OUTPUT 1 [SEL] key.
3.
Press the [NEXT] key repeatedly until the
parameter you wish to change appears on the
screen. In this example, select the Time
parameter.
4.
Press the [▲ INC]/[▼ DEC] keys to change the
parameter value.
The parameter value on the screen changes accordingly.
This section describes the function of the panel keys and re-
lated displays.
Some parameters will prompt you to confirm the operation
to reflect the change in the value.
In this case, a confirmation icon will appear on the display.
Press the [NEXT] key to move the cursor to the icon, then
press the [YES] key. A message prompts you to confirm.
Press the [YES] key to confirm the operation.
LEVEL
You can view and adjust the Input and Output channel lev-
els.
1.
Press the [LEVEL] key to select the Level
display.
2.
Press the [SEL] key for the target channel.
The corresponding channel is selected. The [SEL] key
LED for the selected channel lights up.
3.
Press the [▲INC]/[▼DEC] keys to adjust the
input or output level.
Panel Operation
[▲ INC]
key
Press the [▲ INC]
key.
The value increases.
Hold down the
[▲ INC] key.
The value continues to
increase as long as you
hold down the key.
While holding down
the [▲ INC] key,
press the [▼ DEC]
key.
The value continues to
increase at a rate more
rapid than when you hold
down the [▲ INC] key.
[▼ DEC]
key
Press the [▼ DEC]
key.
The value decreases.
Hold down the
[▼ DEC] key.
The value continues to
decrease as long as you
down the key.
While holding down
the [▼ DEC] key,
press the [▲ INC]
key.
The value continues to
decrease at a rate more
rapid than when you hold
down the [▼ DEC] key.
OUT 1
ON/OFF = ON
OUT 1
TIME = 2.67ms
Parameter
Range
INPUT A/B/SUM
–
∞
, –138.00 through +10.00dB
OUTPUT 1-6
–
∞
, –138.00 through +10.00dB
NOTE
When INPUT A/B LINK is turned On, the parameters for
channels A and B are linked and set to the same value
automatically.
SCENE EDIT
01:FOH(Event A)
Confirmation icon
Cursor
IN A
LEVEL =-138.00dB
IN B
LEVEL =-138.00dB
IN B
LEVEL =-138.00dB
Нажмите на клавишу [SEL] для выбора нуж-
ного канала.
Будет выбран соответствующий канал. Клавиша [SEL]
выбранного канала будет светиться.
SP2060 Owner’s Manual
Fore
w
or
d
Netw
ork Settings
Ref
erences
P
anel Operation
Intr
oduction
to the SP2060
The Contr
ols
and Connector
s
24
Basic Operation
Changing the parameter values
You can adjust the parameter settings, such as EQ, according
to the speaker response or the acoustic environment of a par-
ticular venue. This section explains how to change the delay
time for Output channel 1 as an example.
1.
Display the parameter setting you wish to
change. To change the delay time, first press
the [DELAY] key to switch to the Delay
display.
Refer to “The Controls and Connectors” on page 22 for
information on the relationship between the parameters
and keys.
2.
Select a channel for which you wish to
change the delay time. In this example, press
the OUTPUT 1 [SEL] key.
3.
Press the [NEXT] key repeatedly until the
parameter you wish to change appears on the
screen. In this example, select the Time
parameter.
4.
Press the [▲ INC]/[▼ DEC] keys to change the
parameter value.
The parameter value on the screen changes accordingly.
This section describes the function of the panel keys and re-
lated displays.
Some parameters will prompt you to confirm the operation
to reflect the change in the value.
In this case, a confirmation icon will appear on the display.
Press the [NEXT] key to move the cursor to the icon, then
press the [YES] key. A message prompts you to confirm.
Press the [YES] key to confirm the operation.
LEVEL
You can view and adjust the Input and Output channel lev-
els.
1.
Press the [LEVEL] key to select the Level
display.
2.
Press the [SEL] key for the target channel.
The corresponding channel is selected. The [SEL] key
LED for the selected channel lights up.
3.
Press the [▲INC]/[▼DEC] keys to adjust the
input or output level.
Panel Operation
[▲ INC]
key
Press the [▲ INC]
key.
The value increases.
Hold down the
[▲ INC] key.
The value continues to
increase as long as you
hold down the key.
While holding down
the [▲ INC] key,
press the [▼ DEC]
key.
The value continues to
increase at a rate more
rapid than when you hold
down the [▲ INC] key.
[▼ DEC]
key
Press the [▼ DEC]
key.
The value decreases.
Hold down the
[▼ DEC] key.
The value continues to
decrease as long as you
down the key.
While holding down
the [▼ DEC] key,
press the [▲ INC]
key.
The value continues to
decrease at a rate more
rapid than when you hold
down the [▼ DEC] key.
OUT 1
ON/OFF = ON
OUT 1
TIME = 2.67ms
Parameter
Range
INPUT A/B/SUM
–
∞
, –138.00 through +10.00dB
OUTPUT 1-6
–
∞
, –138.00 through +10.00dB
NOTE
When INPUT A/B LINK is turned On, the parameters for
channels A and B are linked and set to the same value
automatically.
SCENE EDIT
01:FOH(Event A)
Confirmation icon
Cursor
IN A
LEVEL =-138.00dB
IN B
LEVEL =-138.00dB
IN B
LEVEL =-138.00dB
Для регулировки уровня входного и выход-
ного сигнала нажмите на клавиши [
/
INC]/[
\
DEC]
SP2060 Owner’s Manual
Fore
w
or
d
Netw
ork Settings
Ref
erences
P
anel Operation
Intr
oduction
to the SP2060
The Contr
ols
and Connector
s
24
Basic Operation
Changing the parameter values
You can adjust the parameter settings, such as EQ, according
to the speaker response or the acoustic environment of a par-
ticular venue. This section explains how to change the delay
time for Output channel 1 as an example.
1.
Display the parameter setting you wish to
change. To change the delay time, first press
the [DELAY] key to switch to the Delay
display.
Refer to “The Controls and Connectors” on page 22 for
information on the relationship between the parameters
and keys.
2.
Select a channel for which you wish to
change the delay time. In this example, press
the OUTPUT 1 [SEL] key.
3.
Press the [NEXT] key repeatedly until the
parameter you wish to change appears on the
screen. In this example, select the Time
parameter.
4.
Press the [▲ INC]/[▼ DEC] keys to change the
parameter value.
The parameter value on the screen changes accordingly.
This section describes the function of the panel keys and re-
lated displays.
Some parameters will prompt you to confirm the operation
to reflect the change in the value.
In this case, a confirmation icon will appear on the display.
Press the [NEXT] key to move the cursor to the icon, then
press the [YES] key. A message prompts you to confirm.
Press the [YES] key to confirm the operation.
LEVEL
You can view and adjust the Input and Output channel lev-
els.
1.
Press the [LEVEL] key to select the Level
display.
2.
Press the [SEL] key for the target channel.
The corresponding channel is selected. The [SEL] key
LED for the selected channel lights up.
3.
Press the [▲INC]/[▼DEC] keys to adjust the
input or output level.
Panel Operation
[▲ INC]
key
Press the [▲ INC]
key.
The value increases.
Hold down the
[▲ INC] key.
The value continues to
increase as long as you
hold down the key.
While holding down
the [▲ INC] key,
press the [▼ DEC]
key.
The value continues to
increase at a rate more
rapid than when you hold
down the [▲ INC] key.
[▼ DEC]
key
Press the [▼ DEC]
key.
The value decreases.
Hold down the
[▼ DEC] key.
The value continues to
decrease as long as you
down the key.
While holding down
the [▼ DEC] key,
press the [▲ INC]
key.
The value continues to
decrease at a rate more
rapid than when you hold
down the [▼ DEC] key.
OUT 1
ON/OFF = ON
OUT 1
TIME = 2.67ms
Parameter
Range
INPUT A/B/SUM
–
∞
, –138.00 through +10.00dB
OUTPUT 1-6
–
∞
, –138.00 through +10.00dB
NOTE
When INPUT A/B LINK is turned On, the parameters for
channels A and B are linked and set to the same value
automatically.
SCENE EDIT
01:FOH(Event A)
Confirmation icon
Cursor
IN A
LEVEL =-138.00dB
IN B
LEVEL =-138.00dB
IN B
LEVEL =-138.00dB
ПРИМЕЧАНИЕ:
При включении INPUT A/B LINK, параметры каналов А и В будут
связаны, и на них будут автоматически установлено одинаковое
значение.
Работа с панелью