Receiver collar, Prepare the receiver collar, Function and response table – Инструкция по эксплуатации Petsafe In-Ground Fence PRF-3004XW-20
Страница 152
PiG19-10764 Deluxe ultralight™ add-a-Dog
®
Receiver Collar
This unit has 4 adjustable levels of Stimulation plus a Tone Only mode.
Prepare the Receiver Collar
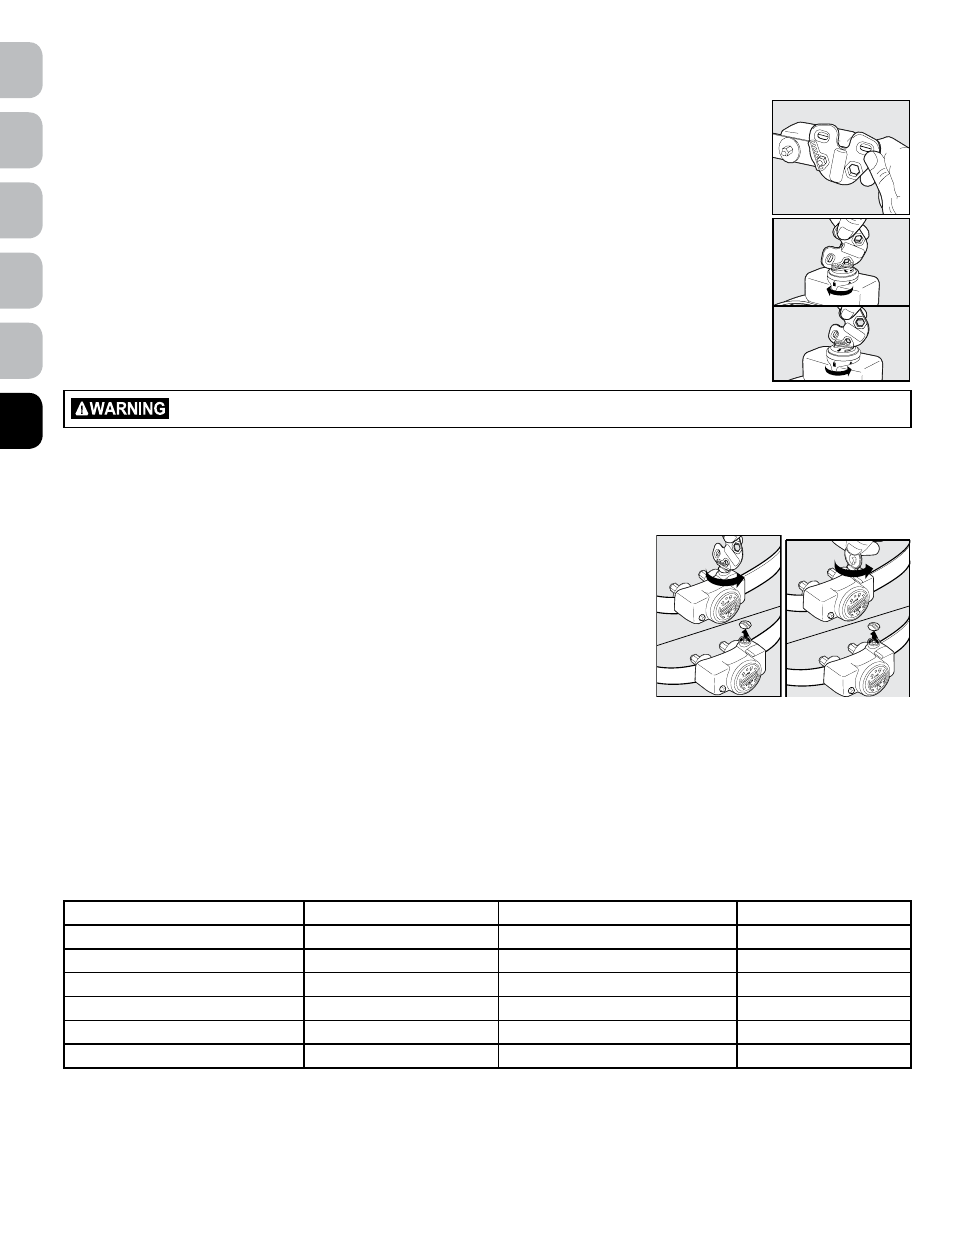
There are two sets of Contact Points that can be used on your receiver. Your Receiver Collar comes with the short
Contact Points installed. The longer Contact Points should be used on dogs with long hair. Tighten the Contact Points
using the Test Light Tool
(a) to one-half turn beyond finger tight. Check the tightness weekly.
To insert and Remove the Battery
Note: Do not install the battery while the Receiver Collar is on your pet.
This Receiver Collar utilizes a replaceable PetSafe
®
battery (RFA-67D-11). This unique battery is designed to make
battery replacement easier and increase water protection.
To insert the battery, align the symbols on the battery (arrow) and Receiver Collar (triangle)
(B). Use the edge of the
Test Light Tool to turn the battery clockwise until the arrow lines up with the lock symbol on the housing.
To remove the battery, turn the battery counter-clockwise using the edge of the Test Light Tool
(C).
DO NOT attempt to cut into or pry open the battery. Be sure to discard the used battery properly.
Battery life will vary depending on how often your pet tests the system and receives a Static Stimulation. Check the Receiver Collar every
month to ensure the battery is working properly.
A replacement PetSafe
®
battery (RFA-67D-11) can be found at many retailers. Contact the Customer Care Centre or visit our web site at
www.petsafe.net to locate a retailer near you.
To set the static stimulation level
Read all steps before attempting to set the Static Stimulation Level.
1. Remove the clear plastic cover with the Test Light Tool to expose the Stimulation Level Button
(D).
2. With the battery installed, press the Stimulation Level Button and release when the Receiver
Indicator Light comes on
(e).
3. The Receiver Indicator Light will emit a series of flashes representing the Static Stimulation Level.
4. Increase the Static Stimulation Level by pressing and releasing the Stimulation Level Button within 5
seconds of the previous series of flashes.
5. After setting the Static Stimulation Level, replace the cover to protect the Stimulation Level Button.
The Static Stimulation levels increase in strength from 1 to 5. Pushing the Stimulation Level Button while the Receiver Collar is on level 5 will cause
the Receiver Collar to revert to Level 1. Refer to the Function and Response Table to choose the Static Stimulation level that best fits your pet.
The Receiver Collar is equipped to automatically increase the level of Static Stimulation the longer your pet remains in the Static Stimulation Zone if
the collar is set at level 2 or above.
The Receiver Indicator Light acts as a low battery indicator, flashing every 4 to 5 seconds when replacement is required.
Function and Response Table
indicator light Response
static stimulation level
Receiver Collar Function
Temperament of Pet
1 Flash
1
No Static Stimulation, Tone Only
Initial Training Mode
2 Flashes
2
Low Static Stimulation
Timid
3 Flashes
3
Medium Static Stimulation
Timid or Average
4 Flashes
4
Medium High Static Stimulation
Average or High Energy
5 Flashes
5
High Static Stimulation
High Energy
Flashes once every 4 to 5 seconds
Indicates Low Battery
B
C
a
D
e
152 www.petsafe.net
FI
DA
SV
RU
NO
EN