Setting the correct tape length – Инструкция по эксплуатации Panasonic NV-RX30EN
Страница 19
Внимание! Текст в этом документе был распознан автоматически. Для просмотра оригинальной страницы Вы можете воспользоваться режимом "Оригинал".
(-M4, 20)
3
1SI?3i№/T^, ;ti!ì?SS№tiJ
[EJECT
A ]
ffiOo
umiltà
5
SS-hiS#^^, fSÌà®[LOCK]fflOo
mmmxmmmm-n.
[
[^ 30],
•
imu-.
6
iiT[sp/LP]ia,iiiipw0iiiifiiUt(sp
^LP)o
7
®[TAPE]ii,
fiSÌI/1t©*JS[ S 45]o
[ m
30]----------------- >[o 45]------------------
* [ m
60]------------
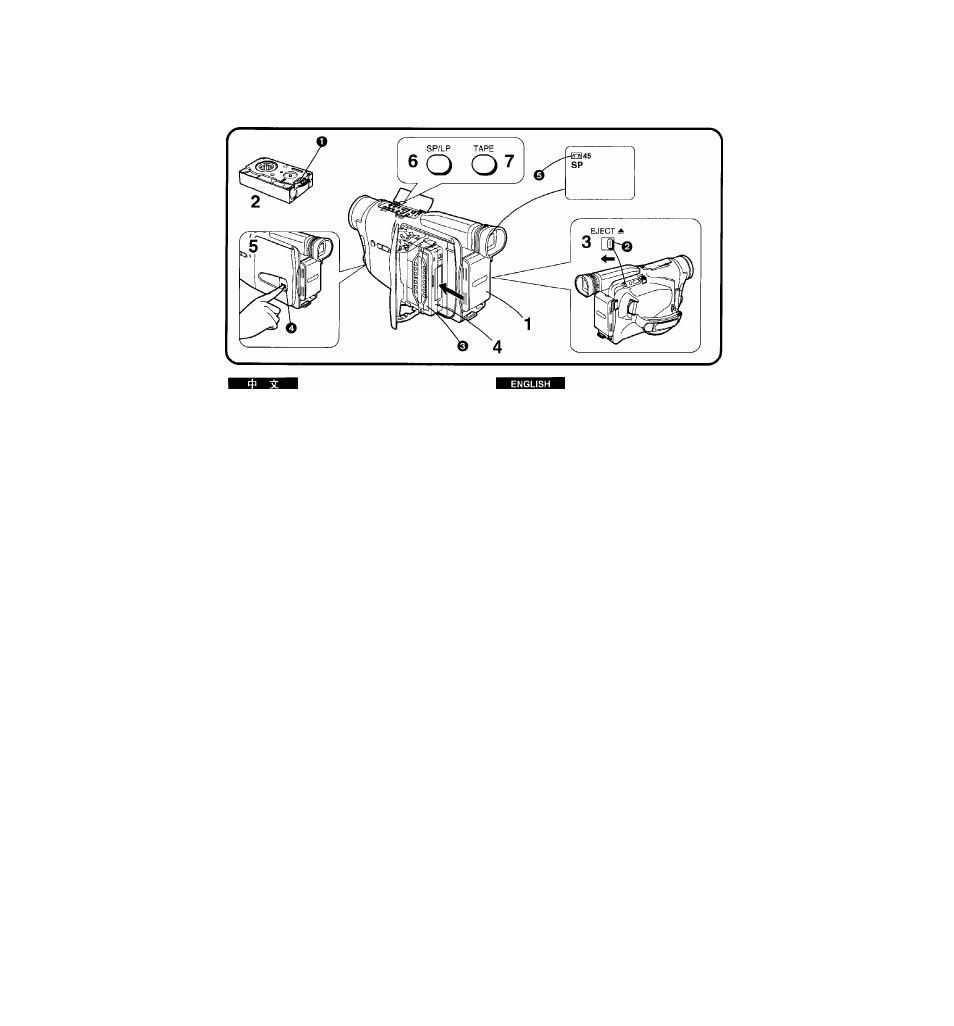
Connect the AC Adaptor or attach a
charged Battery. (-^ 14,20)
Turn the cog wheel
O
to tighten the
tape.
Slide the Cassette Eject [EJECT A]
Lever O in the direction of the arrow.
Insert the cassette with the cassette
window 0 facing outwards and push
it all the way in.
Close the Cassette Compartment by
pressing the [LOCK] Button Q.
Setting the Correct Tape Length
To ensure that the displayed remaining tape time during
recording and playback is correct, you need to set the
tape length that matches that of the inserted cassette.
The initial setting is [O 30].
• If you use a 45-minute cassette, for example:
6
Press the [SP/LP] Button to select the
desired recording speed (SP or LP).
7
Press the [TAPE] Button until the Tape
Length Indication 0 in the Finder is
[Q 45].
•The Tape Length Indication changes in the
following order:
r ^ [ m
30]--------------------- 45]---------------------- >[0 60]---------
yab
Wo
fèLLOcKjiaO.
■ Ejecting the Cassette
Slide the Cassette Eject [EJECTA] Lever 0 in the
direction of the arrow and pull out the cassette.
Close the Cassette Compartment by pressing the
[LOCK] Button ©.
22