En gl ish – Инструкция по эксплуатации Kastor KT-H-20 Wood-burning sauna stoves
Страница 41
EN
gl
ISH
2.4.2.
2.5.
2.5.1.
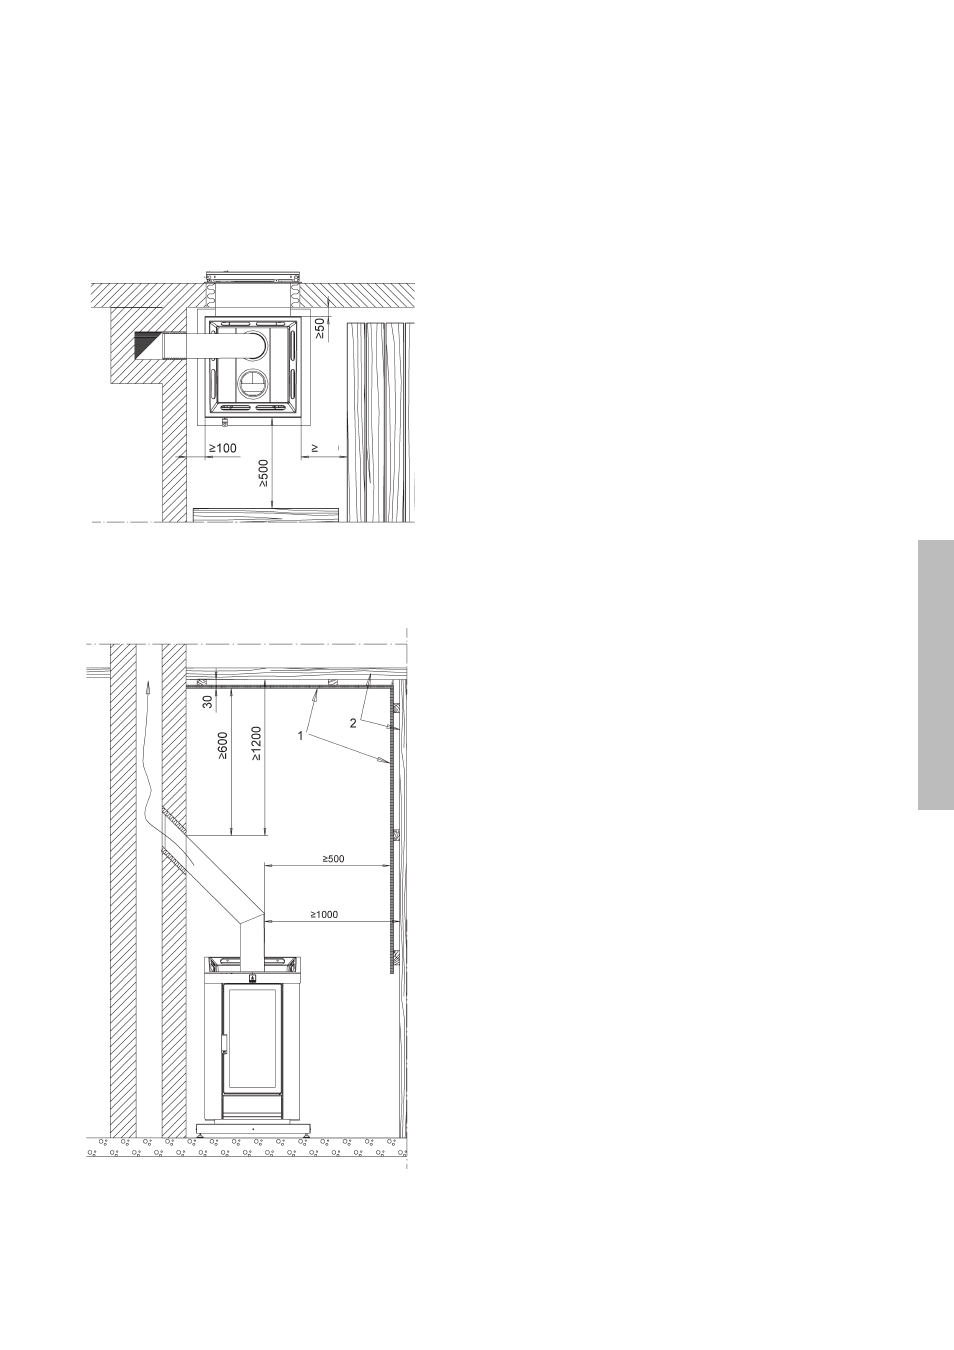
2.4.2. REDUCTION OF SAFETY DISTANCES
The required safety distances at the back and sides can be
reduced by 50% using a single layer of protection and by 75%
with a doubled layer. The protection can be either a 1 mm
thick metal sheet or 7 mm of fibre-reinforced cement board
(not gypsum board coated with paper or similar). (Illustration
2.4.1)
A ventilation space of 30 mm must be left between wall and
protector. The protector must be detached from floor and ceil-
ing. If the sauna has a flammable floor in front of the stove,
the area to be protected extends 100 mm beyond the door’s
sides and a minimum of 400 mm in front of it. In this case, the
protection must be at least a 1 mm thick metal sheet.
If the stove is installed with one side and the back against a
brick wall, safety distances of 50 mm to the side and 50 mm
at the back are sufficient. If it stands with its back and both
sides next to brick wall, 100 mm should be left on both sides to
ensure air circulation. At the back, 50 mm remains sufficient.
The safety distances around an uninsulated connection pipe
can be reduced in a similar manner. The pipe’s insulated part
within the sauna must always extend 400 mm from the ceiling.
For chimneys, the minimum safety distances to flammable
material differs from product to product. Check the manufac-
turer’s instructions. In case of doubt, approach your local fire
safety officials.
2.5. CONNECTING THE STOVE TO A bRICK CHIMNEY
The stove can be connected to a brick chimney from the top.
For a brick chimney connection, the safety distances and
protectors named in chapter 2.4 and the chimney’s masonry
regulations must be adhered to.
2.5.1. CONNECTING FROM THE TOP
Make an opening into the brick chimney that is 2-3 cm larger
than the connection pipe. Use a 45° bent pipe for the connection
from the top of the stove, which can be turned to align with the
chimney. Suitable 45° bent pipes are available at the hardware
store. Extend the bent pipe with an extension piece, if neces-
sary. Install the stove’s own connection pipe in the backmost
flue opening on top of the stove (the foremost opening is the
sweeping hole, which must not be used for the pipe!). The bent
pipe is then attached to the stove’s own connection pipe. Saw
the bent pipe and any extension pipe down to a suitable size
where necessary. Make sure the pipe extends sufficiently into
the chimney (but not so far that it blocks up the chimney).
Illustration 2.4.1.a KT-S and KT-H Sauna stove safety distances from walls.
Measurements in millimetres.
Illustration 2.4.1.b KT-S and KT-H Sauna stove safety distances from walls.
Measurements in millimetres.
200