En gl ish – Инструкция по эксплуатации Kastor KT-H-20 Wood-burning sauna stoves
Страница 38
EN
gl
ISH
1.2.1.
1.3.
1.4.
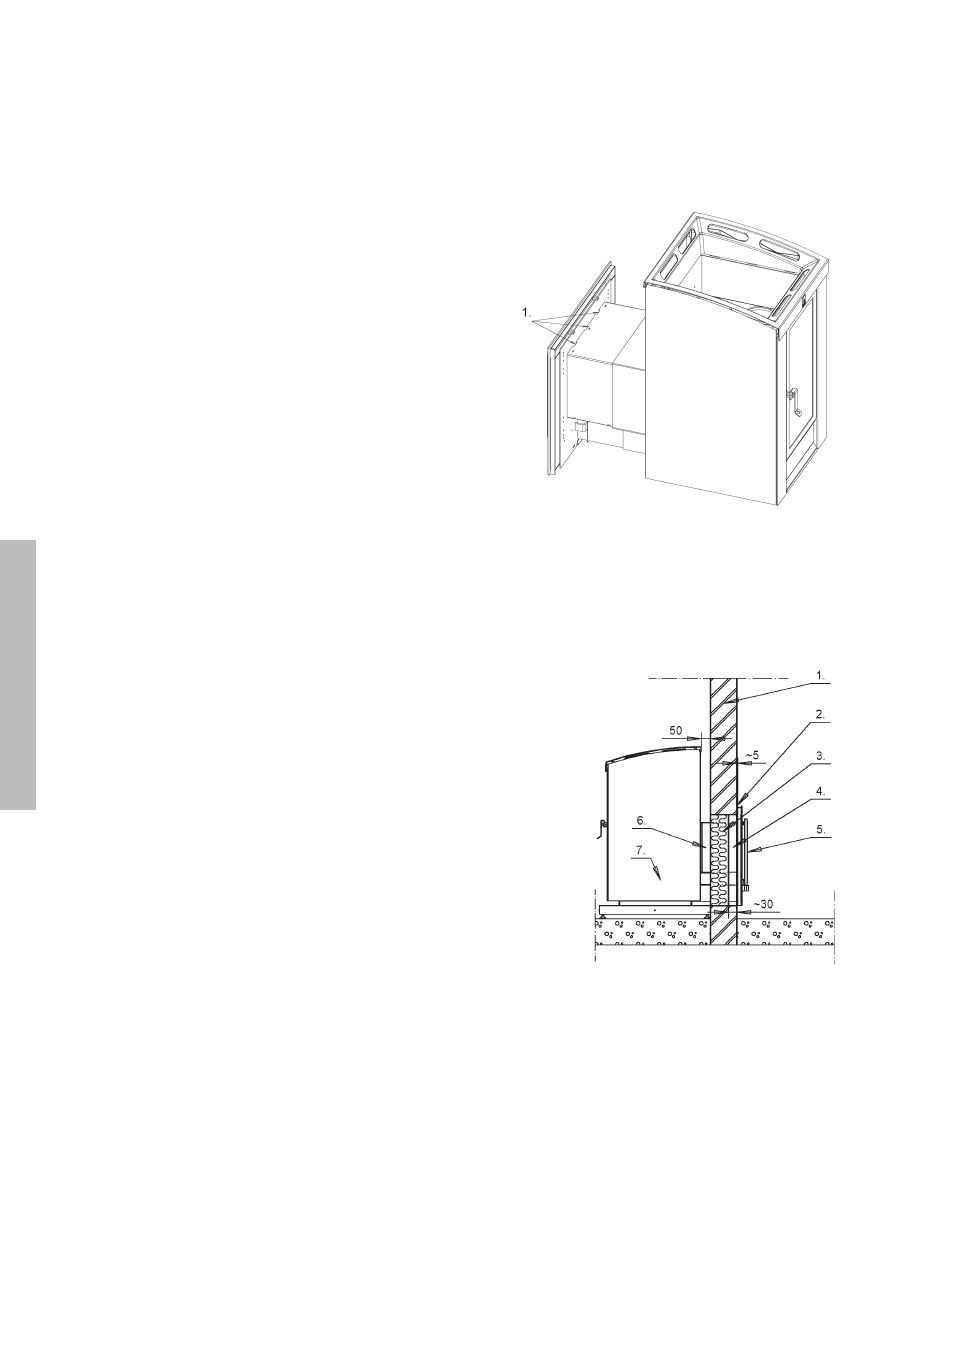
1.2.1. NOTE DURING INSTALLATION OF
INSULATION WOOL!
Behind the door of the stove’s extension neck are three 5 x 30
mm ventilation holes on the upper and lower surface. These
holes must not be covered with insulation wool, as that would
stop air circulation across the glass and cause soot accumula-
tion on it. The door frame must also not be flush against the
wall. Leave a ventilation space of 5-8 mm.
1.3. HEATING WALL PIERCING STOVES
The logs are usually placed in the fire compartment from the
door outside the sauna. The logs must be pushed all the way
to the end of the compartment, on top of the grate. Do not burn
wood in the area of the extension neck. The lighting is usually
performed from the same door. Kastor’s KT-S and KT-H models
also have an opening door on the sauna side, from which
you can add more logs or light the fire on the sauna side. On
the sauna side, the stove is equipped with the big glass door
familiar from the KO series stoves with a smaller opening door
within it. The latter is equipped with a log restrainer, which can
be removed for replacement or cleaning the glass.
1.4. INSTALLATION OF WATER TANK VK-20
The water tank package is installed according to instructions
that come with its own package. Attach it to the sauna stove
before the burn-in to ensure the removal of any fumes that
might come off the water tank and the hardening of the flame-
proof paint on the front panel.
figure 1.2.1. ventilation holes on the upper surface (1)
The insulation wool layer should start 30 mm
inside the wall on the door side.
figure 1.2.2. Insulation wool and ventilation space
1. Wall
2. ventilation gap between door frame and wall, about 5 mm
3. Insulation wool
4. ventilation 30 mm
5. door
6. Extension neck
7. Stove