Installation and preparation for use, En gl ish – Инструкция по эксплуатации Kastor KT-H-20 Wood-burning sauna stoves
Страница 39
EN
gl
ISH
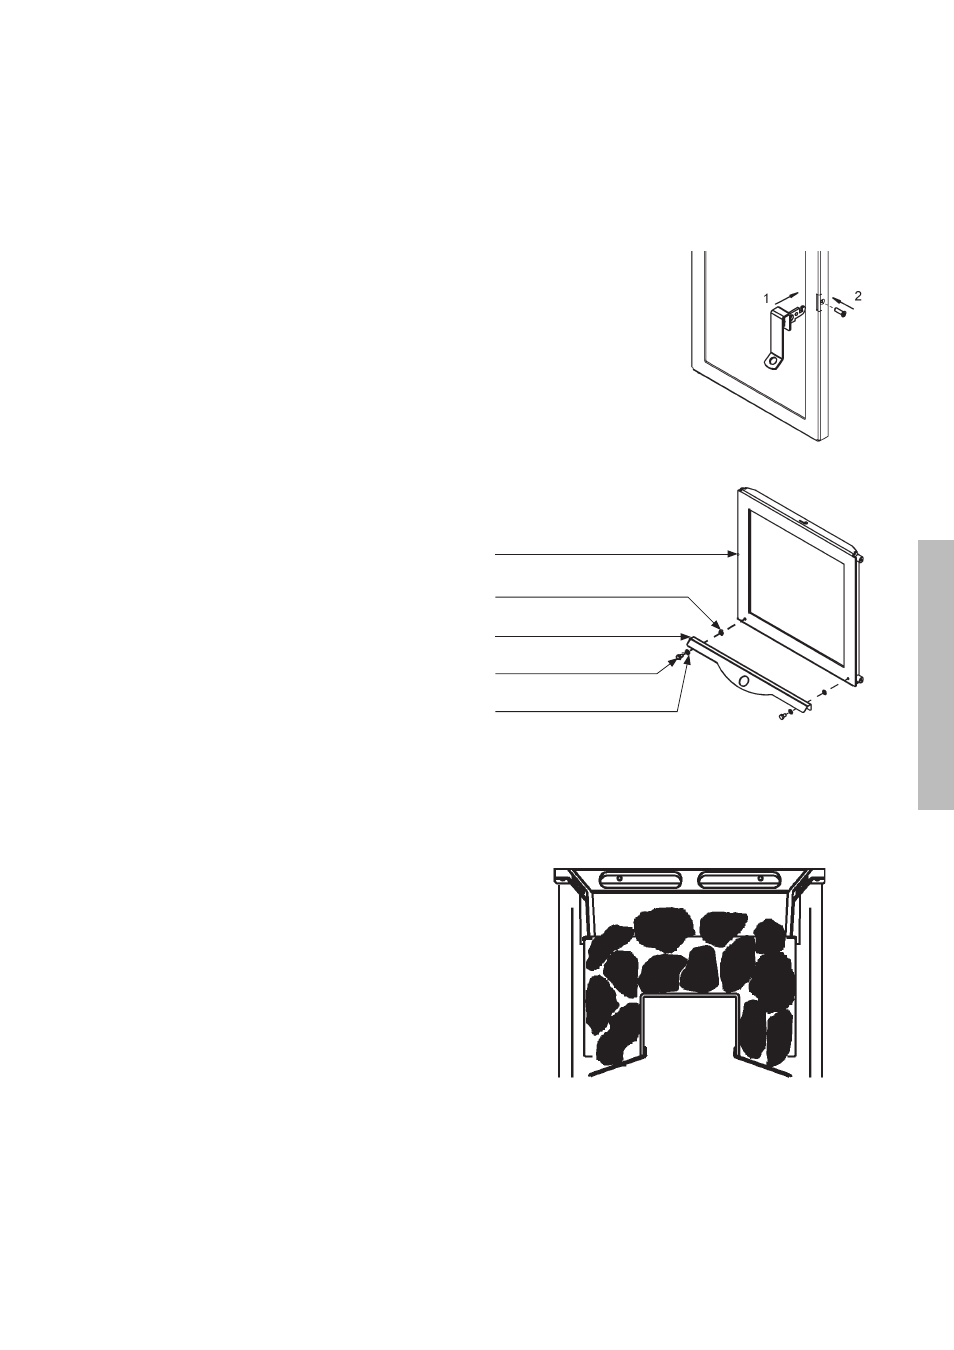
Illustration 2.1.2. Installation of door handle
Handle
door
Washer
Attachment screw
Washer
Illustration 2.1.1. Installation of door handle
1. Handle
2. Attachment screw
2.
2.1.
2.2.
2.1. PREPARING FOR USE AND bURN-IN
• Install door handle (Illustration 2.1.1.)
• On the KT-H model, install the elevator door handle at the
end of the extension neck (Illustration 2.1.2.)
• Install VK-20 water tank, if any, according to its separate
installation instructions.
• Place the stove outdoors on a non-flammable surface
without the door or elevator door on the extension neck
to ensure sufficient draft without a long chimney. This
prevents a blackening of the door glasses during the burn-
in:
- without stones
- tank, if any, filled with water.
• Remove any decals and protective plastic sheeting.
• Check that the grate and air guide plate (see chapter 2.8)
are in place.
• Install the connection pipe delivered with the package into
the backmost flue opening on top of the sauna stove.
• BURN-IN: The purpose of the burn-in is to remove out of
doors any flammable protective coating substances and to
harden the stove’s coating. Burn a few full loads of wood in
the fire compartment. Continue the burn-in until there are
no more fumes rising from the stove.
• Once the stove has cooled down after the burn-in, move it
into the sauna.
• See to it that the sauna is well ventilated during the first
couple of heatings.
2.2. STONES AND THEIR ARRANGEMENT
Use peridotite or dunite or darkish natural stones with diam-
eters of over 10 cm. Always wash the stones before install-
ing them. They must not be stacked too tight or heaped up
– arrange them so that plenty of air can pass between them.
Fill the stone compartment up to the edge, with flat stones in
upright positions (Illustration 2.2). In the KH-20 and KO-20
models, the maximum stone capacity is about 60 kg.
By adjusting stone size, amount and adding other types of
stone you can balance the steam consistency to suit the
sauna and your preferences. Since these are highly individual,
we cannot give a general rule of thumb – you will find the right
mix by trial and error.
For the stove’s proper functioning it is essential that the hot
air circulates between the stones to heat them quickly. If the
stones are too small or improperly arranged, you will heat the
sauna instead of the stones!
2. INSTAllATION ANd prEpArATION fOr USE
Illustration 2.2. Stone arrangement. Make sure that there is sufficient air
between the stones. Sectional view of the stove’s stone compartment.