Protecting images – Инструкция по эксплуатации UFO DS 8650
Страница 55
EN-55
Protecting Images
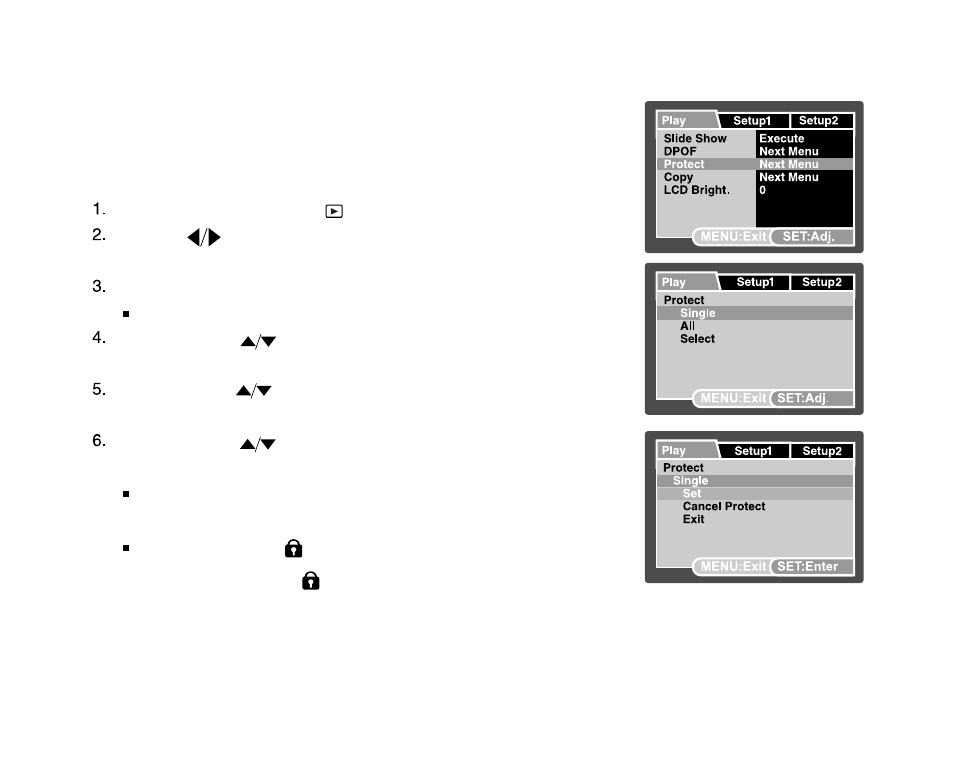
Set the data to read-only to prevent images from being erased by mistake.
Protecting Images
1. Slide the mode switch to [
].
2. Select the image that you want to protect with the W / X buttons.
3. Press the
MENU button.
J
The playback menu is displayed.
4. Select [Protect] with the S / T buttons, and press the
SET button.
5. Select [Single] or [All] with the S / T buttons, and press the
SET button.
6. Select [Set] with the S / T buttons, and press the
SET button.
J
Protection is applied to the image and the camera returns to
the playback mode.
J
The protect icon [ ] is displayed with protected images.
When [All] has been selected, [ ] is displayed with all the images.
46
Ц
и
ф
р
о
в
а
я
к
а
м
е
р
а
>
>
Защита изображений
Вы можете защитить изображения, чтобы предотвратить их от случайного удаления.
Защита изображений
Переключатель режимов в полож.
.
Кнопками выберите снимок, который Вы
желаете защитить.
Нажмите кнопку МЕНЮ.
На дисплее появится меню воспроизведения.
С помощью кнопок выберите пункт
[Protect/Защита] и нажмите кнопку УСТАНОВИТЬ.
С помощью кнопок выберите [Single\Один]
или [All \ Все] и нажмите кнопку УСТАНОВИТЬ.
С помощью кнопок выберите пункт [Set \
Установить] и нажмите кнопку УСТАНОВИТЬ.
Защита активируется и камера возвращается
к режиму воспроизведения.
Появляется иконка “ “ вместе с защищенными изображениями. Если был
выбранный пункт [All\Все], то “ ” отображается со всеми снимками.
EN-55
Protecting Images
Set the data to read-only to prevent images from being erased by mistake.
Protecting Images
1. Slide the mode switch to [
].
2. Select the image that you want to protect with the W / X buttons.
3. Press the
MENU button.
J
The playback menu is displayed.
4. Select [Protect] with the S / T buttons, and press the
SET button.
5. Select [Single] or [All] with the S / T buttons, and press the
SET button.
6. Select [Set] with the S / T buttons, and press the
SET button.
J
Protection is applied to the image and the camera returns to
the playback mode.
J
The protect icon [ ] is displayed with protected images.
When [All] has been selected, [ ] is displayed with all the images.