2 ®[dat€/titlejsa, ® b*s/a#fbl mi, 3 e[date/time/shift](a*0/atrby^), Fem±at^p 3^4 – Инструкция по эксплуатации Panasonic NV-VX22EN
Страница 41: Setting the date and time
Внимание! Текст в этом документе был распознан автоматически. Для просмотра оригинальной страницы Вы можете воспользоваться режимом "Оригинал".
a
• [CAMERA]i^Ti^it®^^o
2 ®[DAT€/TITLEjSa, ® B*S/a#FBl Mi
0)o(-^28)
3 e[DATE/TIME/SHIFT](a*0/atrBy^)
IS, ¡1^ “^” SP^igiSrA^^o
4
MiIi$[DATE/TIME/SETl(a*fl/a#rB‘l/
K!t)lfi, itSli/T.iliiH£M^t!t(l:t*j:
1998)o
^ - :
1990 ^1991-^. . . . . . . . . . . . . -»2089 >1990-
1^2-. . . . . . . . . . . . . . . . . . . . . . . . . . . . . ^12-1-
0:
1-^2^............................................... -»31-^1-
0—W......................... —23^0-
•S'ii; 00^01—....................--59—00-
•fem±at^p 3^4
“0’\
io “^S”o
5
6
0#, l1IS[DATE/TIME/SHIFT]|io
ENGLISH
Setting the Date and Time
1
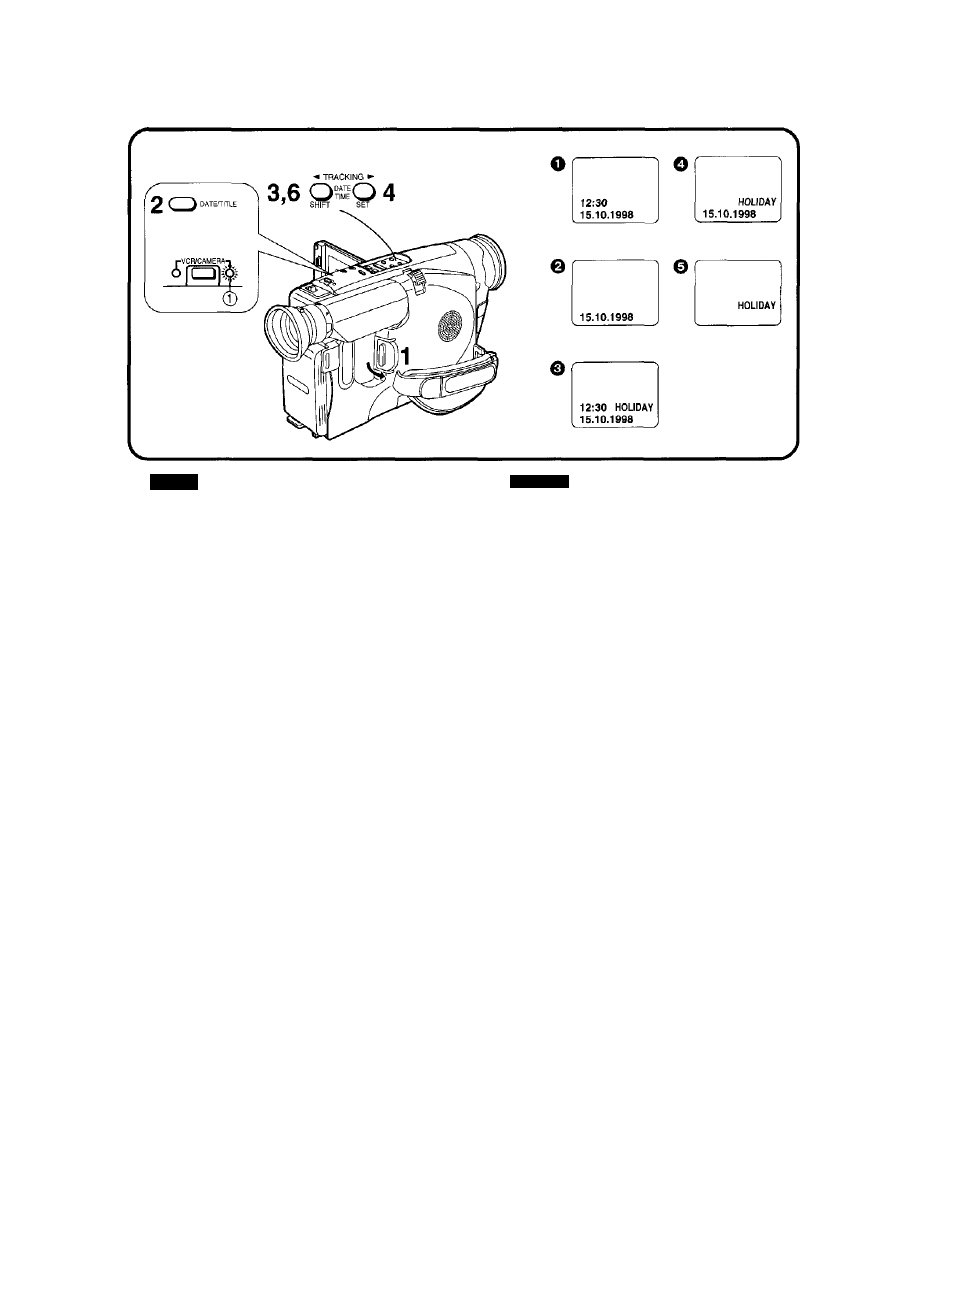
Turn out the [POWER] Switch to turn the
Movie Camera on.
•The [CAMERA] Lamp ® lights.
2
Press the [DATE/TITLE] Button to make
the Date/Time/Title Indication appear on
the LCD Monitor.
•To set the date and time, one of the indications
other than the Title Indication alone 0 shown
above must be displayed on the LCD Monitor.
If the Title Indication alone @ is displayed, select
another Date/Time/Title indication (O - ©)•
(-> 28)
3
Press the [DATE/TIME/SHIFT] Button
until the “Year” portion flashes.
4
Press the [DATE/TIME/SET] Button
repeatedly until the current year
(for example: 1998) is displayed.
•The figures in the DateTTime Indication change in
the following order:
Year; 1
990^ 1991-^..................... ^2089-^
1
990->...
Month: 1^2-^............................. ^12^1^...
Day:
1^2^............................. ^31-^1^...
Hour: 0^1->...............................^23^0^...
Minute: 00^01^......................... ^59-^00^...
5
Also set the “Month”, “Day”, “Hour”,
“Minute” in the same way as explained
in steps 3 and 4.
6
After you have set the date and time and
confirmed that they are correct, press
the [DATE/TIME/SHIFT] Button.
•The operation of the clock starts.
44