Building in – Инструкция по эксплуатации Zanussi ZDE 320
Страница 23
23
Fig. 6
a) Seal
FO 0199
a
290
510
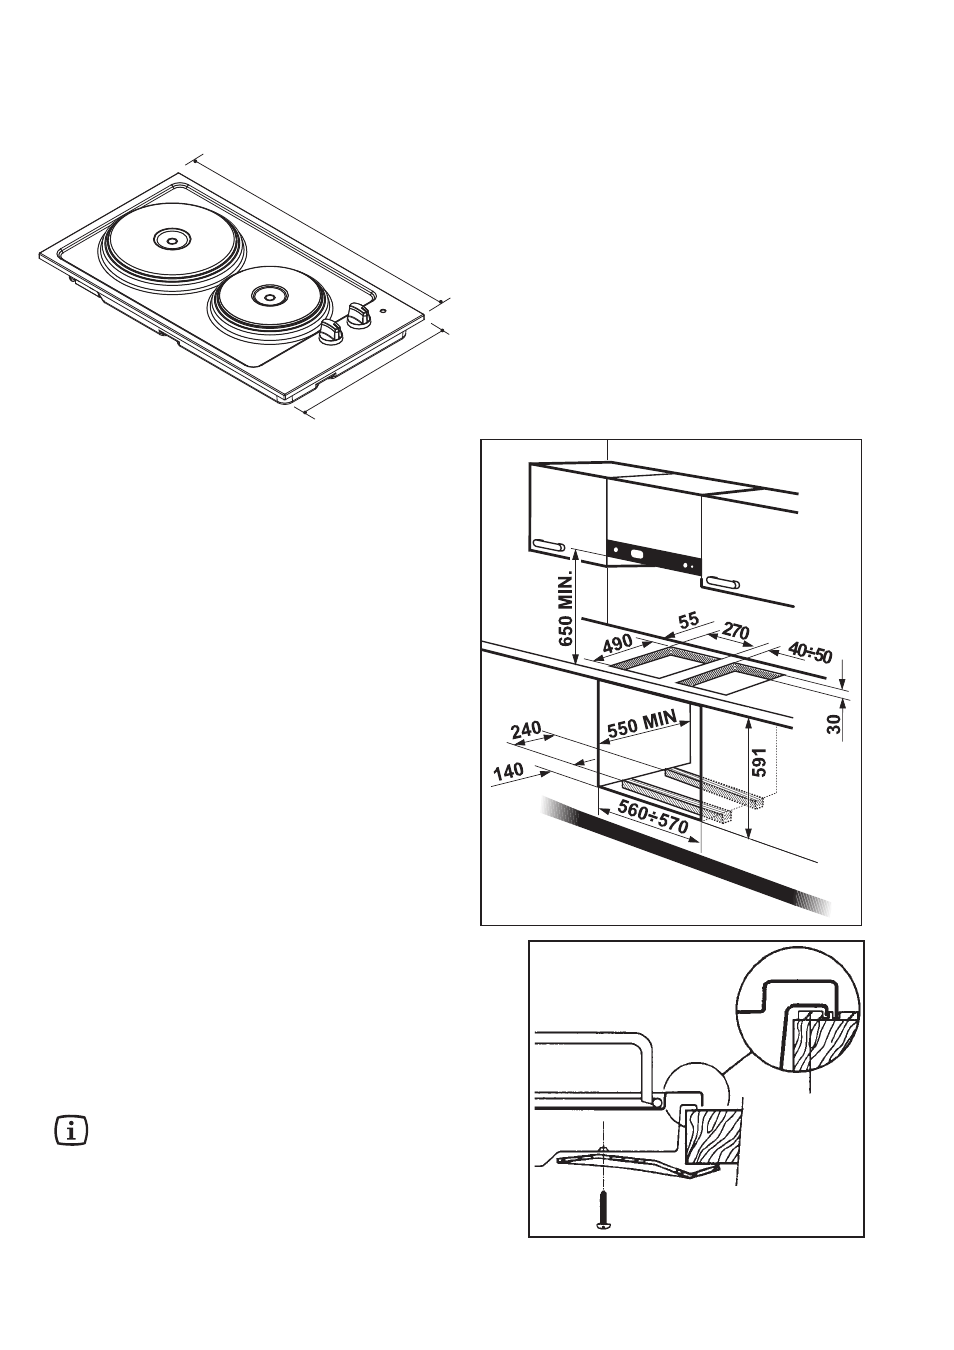
Fig. 5
Building In
These hobs can be inserted in a built-in kitchen unit
whose depth is between 550 and 600 mm. The hobs
dimensions are shown in Fig. 4.
Dimensions are given in millimetres
Fig. 4
Installation and assembly
These hobs can be installed in a kitchen unit with an
opening for insertion whose dimensions are shown in Fig.
5.
The edge of the cut out must have a minimum distance
from the rear wall of 55 mm.
If there are side walls, or sides of the furniture unit near
the hob, the cut out edges must have a minimum
distance of 100 mm.
Hanging forniture units or hoods must be placed at 650
mm minimum from the hob.
Carry out the building in of the hob as follows:
1. Put the relevant sealings, supplied with the hob,
on the edges of the cut out, taking care that the
sealings meet without overlapping;
2. place the hob in the cut out, taking care of its centring;
3. fix the hob with the relevant screws (Fig. 6). The
traction of the screws is able to trace the sealing, any
excess of which can then be easily removed.
If several 30cm hob are to be installed side by side into the
same cut out, an assembly kit including a support side
bracket and supplementary sealings is available at our After
Sales Centres. The relevant installation instructions are
supplied within the kit package.