Petporte smart flap, Installation into walls, Assembly instructions – Инструкция по эксплуатации Petsafe Petporte Smart Flap® Microchip Cat Flap
Страница 110: Fig. 1 fig. 2
FI
DA
SV
RU
NO
EN
110 www.petsafe.net
Petporte smart flap
®
Installation into Walls
Wall fixing screws are not provided with this catflap as the type needed will vary greatly depending on the wall construction. Various fixing types are
available from hardware and D.I.Y. stores depending on the wall construction: chemifix bolts and nuts, screws fixed into inter-set or plastic rawl plugs, nylon
self drill or polytoggle.
1. An opening must be formed in the wall at the appropriate height and size for your cat to be scanned, based on the Cutting Template provided. The
opening should be formed by a qualified builder avoiding utility supplies and not damaging the integrity of buildings damp-proof courses. The principle
difference between fitting the Petporte smart flap
®
through a wall and a door is the method of fixing the interior and exterior sections to the wall.
2. To fix the interior section to the wall utilise the four, 5 mm diameter holes in the corners of the interior section that are accessible with the large interior cover
plate removed.
3. To fix the exterior section to the wall utilise the two, 6 mm diameter holes in the sides of the exterior section that support the porch.
The Petporte smart flap
®
comes with a single Extension Tunnel that provides 52 mm length. Extra Extension Tunnels can be purchased, with each individual
tunnel providing 40 mm additional length. These are not provided with the Petporte smart flap
®
because wall thicknesses vary. Some consumers prefer to form
their own tunnels by using marine grade plywood or other materials.
Please refer to the Accessories section of this guide for information on purchasing additional Extension Tunnels.
We do not accept responsibility for incorrect operation of the unit should modifications be made to the antenna coil. Under no circumstances
should you alter or adjust the windings of the antenna coil.
Assembly Instructions
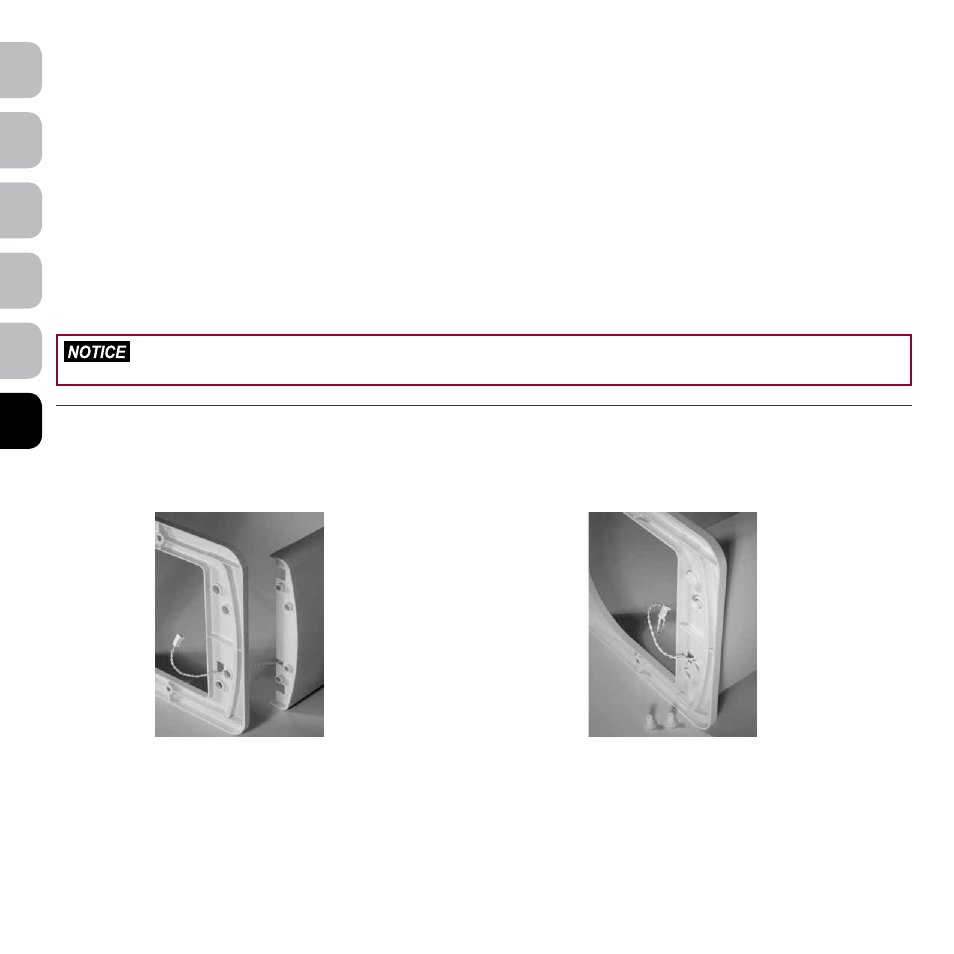
Fig. 1
Fig. 2
Pass the porch cable from the porch
through the small rectangular opening
in the exterior section.
Pass the four “mushrooms” pins
through the back of the exterior
section into the porch.