Getting started – Инструкция по эксплуатации Sony PlayStation 3 CECH-3008A
Страница 18
18
Getting started
Adjusting video output settings
Depending on the type of cables and the connectors used, you may
need to adjust the PS3™ system's video output settings to display
video at HD resolutions (
page 16) on a TV.
If video is not displayed
Switch the video input of the TV to match the input connector used to
connect to the system.
Turn off the system, and then turn it on again by pressing the power button
for at least five seconds (until the system beeps a second time). The video
output setting will be reset and video will be output at standard definition
(SD) resolution.
1
Select
(Settings)
(Display Settings) [Video Output
Settings], and then press the button.
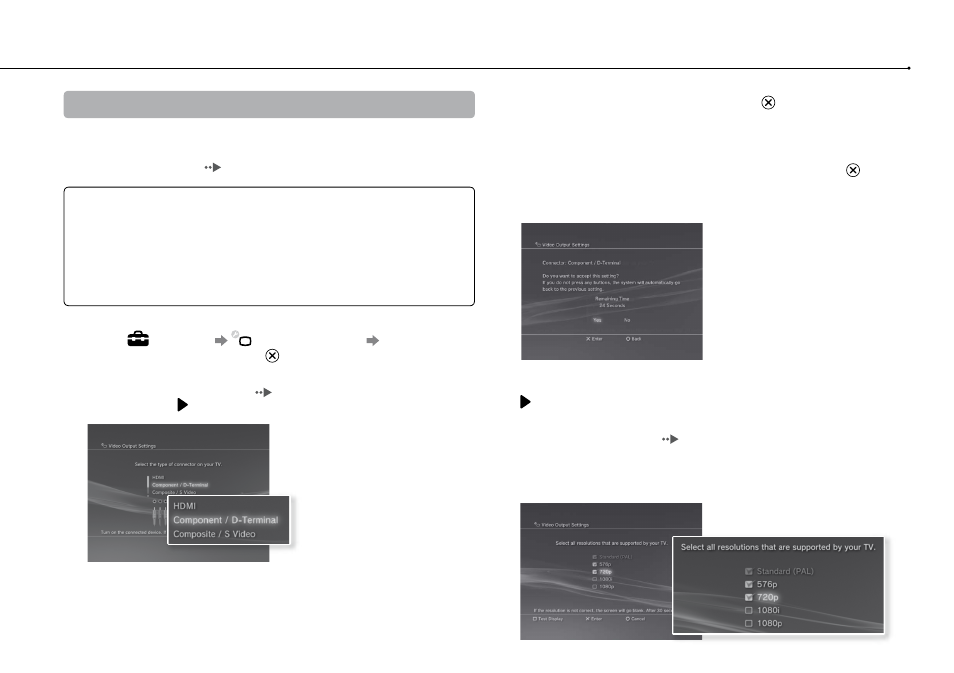
2
Select the input connector (
page 17) in use on the TV, and
then press the button.
If you select [HDMI], you will have the option to choose [Automatic] or
[Custom] on the next screen. In most cases, select [Automatic], and video
output settings will be completed automatically.
If you select [AV MULTI / SCART], you must choose the type of output signal
on the next screen. In most cases, select [Y Pb/Cb Pr/Cr].
3
Confirm the screen, and then press the button.
If you changed the connector in step 2, a screen for confirming the change
will be displayed.
4
Confirm the settings, select [Yes], and then press the button.
If you changed the connector in step 2, a screen for confirming the settings
will be displayed.
5
Select the resolutions supported by the TV, and then press the
button.
The resolution displayed on the TV varies depending on the input connector
and the type of cable used (
page 17). The highest resolution you
selected will be used for video output.
Depending on the connector selected in step 2, this screen may not be
displayed.