Installation wav (method 2) – Инструкция по эксплуатации Hyundai H-CMD7083
Страница 5
Внимание! Текст в этом документе был распознан автоматически. Для просмотра оригинальной страницы Вы можете воспользоваться режимом "Оригинал".
Installation method A
•
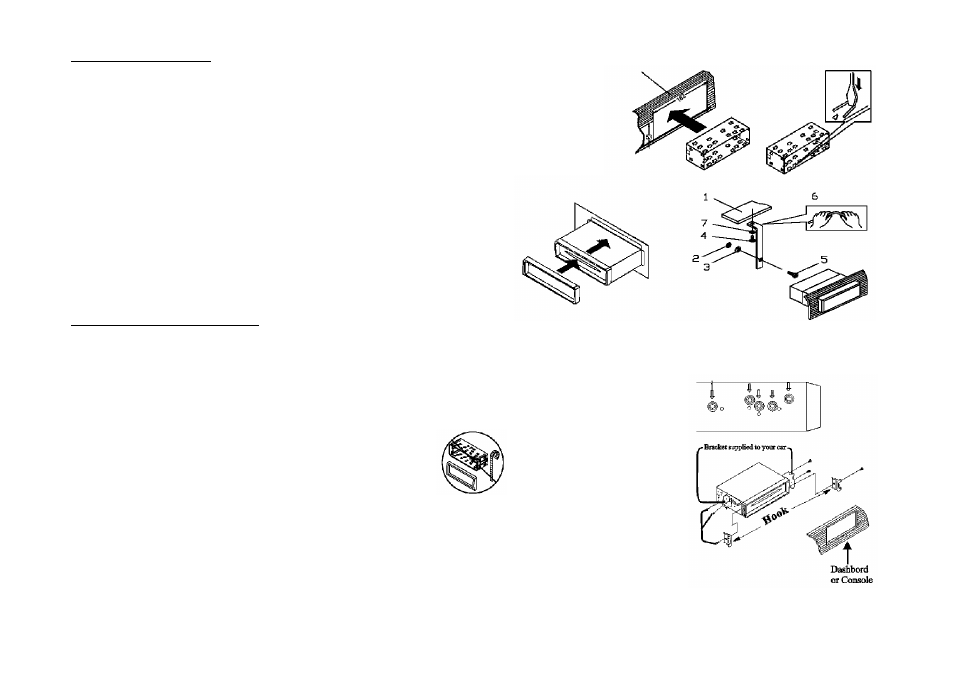
After inserting the holder into the dashboard, select the appropriate tab and
bend them inwards to secure the holder in place.
•
Insert fingers into the groove in the front of frame and remove it.
•
Insert the levers supplied with the unit to the grooves at both sides. The unit
can be installed or removed from the dashboard.
Installation wav (method 2)
Installation using the screw holes at both sides of the unit.
1.
Select a position where the screw holes of the main unit are fitted for aligned, and tighten the screws at 2 positions at
each side.
Use either truss screws (5 x 8mm) or flush surface screws (4 x 8mm), depending on the shape
of the screw holes in the bracket.
2.
Screw.
3.
Factory radio mounting bracket.
4.
Dashboard or Console.
5.
Hook (Remove this part).
Note: The monnting box, onter trim ring, and the Half-sleeve are not nsed for this method of
installation.
5