Bdt 3/bdt 30, Connecting the player/preparing the remote control, Connecting the player – Инструкция по эксплуатации Harman-Kardon BDT-3
Страница 10: Preparing the remote control
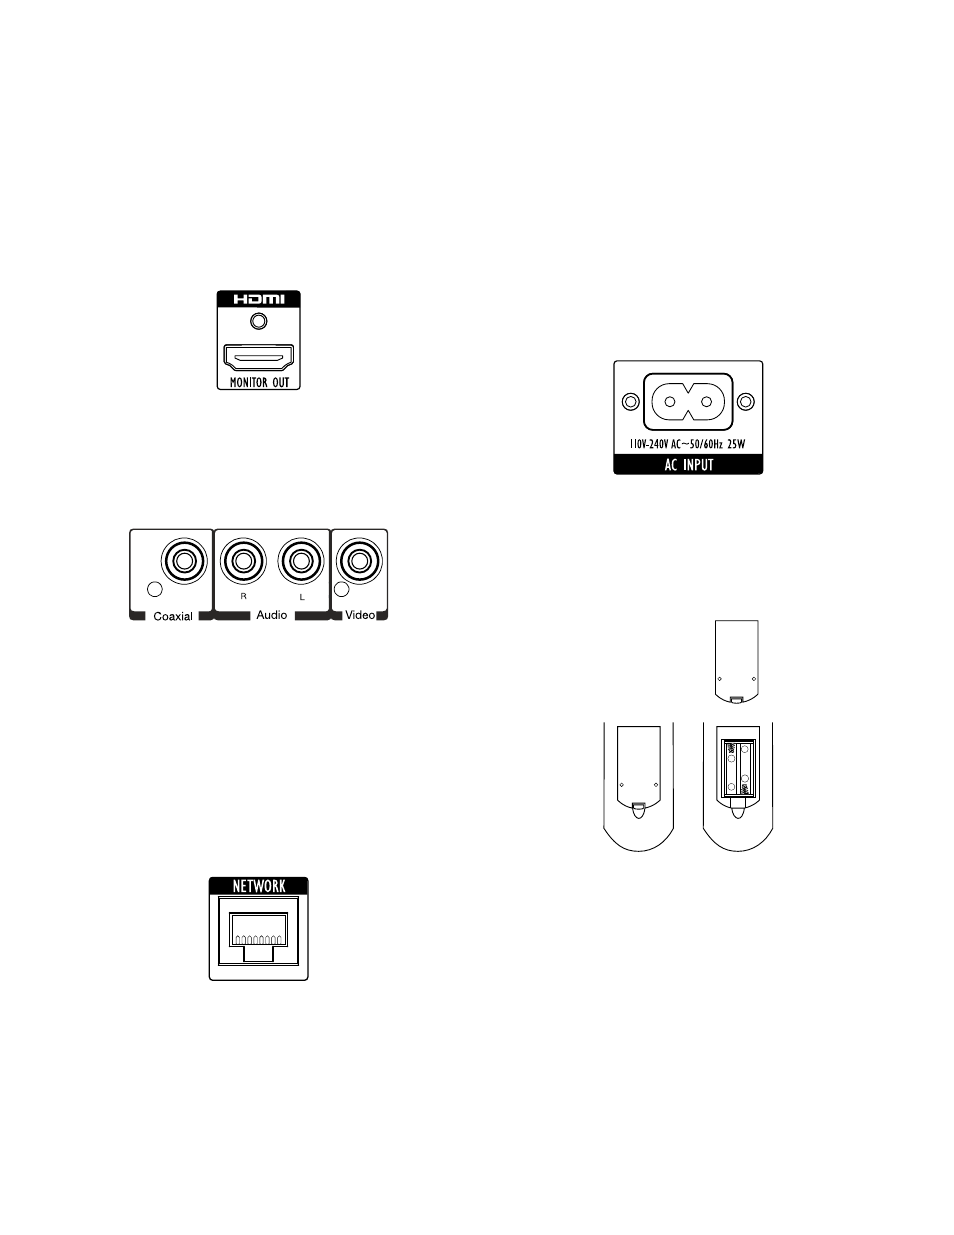
Connecting the Player
HDMI Connection
If Your Receiver/Processor Has an HDMI Connection
use the supplied hdMI cable to connect the player’s hdMI Output connector to your
receiver/processor’s hdMI input. use another hdMI cable to connect your receiver/
processor’s hdMI output to your Tv’s hdMI input.
If Your Receiver/Processor Does Not Have an HDMI Connection
use the supplied hdMI cable to connect the player’s hdMI Output connector directly to
your Tv’s hdMI input.
Coaxial Digital Audio Output Connection
If you did not connect the BdT 3/BdT 30’s hdMI Output connector to your receiver/
processor, connect the player’s coaxial digital Output connector to your receiver/
processor’s coaxial digital input.
Analog Audio Output Connections
connect the BdT 3/BdT 30’s Analog Audio Output connectors to your receiver/proces-
sor’s analog audio inputs or to your analog recorder’s analog audio inputs.
Composite Video Output Connection
If you did not connect the BdT 3/BdT 30’s hdMI Output connector to your Tv or your
audio/video receiver, connect the player’s composite video Output connector to your
Tv’s or audio/video receiver’s composite video input.
Network Connection
use a cat. 5/RJ45 network cable (not supplied) to connect the BdT 3/BdT 30’s Net-
work connector directly to a network router, a network switch, a network modem or an
ethernet network wall jack that has Internet access. NOTe: The BdT 3/BdT 30 cannot
access content on other networked devices. The network connection enables the BdT 3/
BdT 30’s Bd-live features. see Bd-live Interactivity, on page 15, for more information.
Power Cord Connector
The BdT 3/BdT 30 comes with a detachable Ac power cord. This type of cord makes it
easier for you to install and connect all other system wiring to the player’s rear panel.
NOTES:
• The power requirement for the BdT 3/BdT 30 is 110 – 240v Ac, 50/60hz, 25W.
connecting to a power source other than the one listed may damage the player or
cause abnormal operation.
• Before connecting the Ac power cord to a wall outlet, confirm that all of the other
connections have been made correctly.
• connect the female end of the BdT 3/BdT 30’s detachable power cord to the
player’s Power cord connector. Plug the other end into a working, unswitched
Ac outlet.
set the BdT 3/BdT 30’s Main Power switch in the “On” position. The player’s Power
indicator will turn amber, indicating that the player is in the standby mode.
Preparing the Remote Control
Installing the Batteries
your BdT 3/BdT 30 remote control uses two AAA batteries (supplied). Insert the batteries
as shown in the illustration, making sure to observe the correct polarity.
–
–
+
+
Using the Remote Control
When using the remote, remember to aim it toward the player’s front panel. Make sure
that no objects, such as furniture, block the remote’s view of the player. Bright lights,
fluorescent lights and plasma video displays may interfere with the function of the
remote.
• The remote has a range of about 20 feet (6.1m), depending on the lighting
conditions.
• you can use the remote at an angle of up to 30° from either side of the player.
If the remote does not seem to be operating properly, make sure that the batteries are
inserted correctly. If the remote still does not operate properly, replace both batteries
with new ones.
10
BDT 3/BDT 30
Connecting the Player/Preparing the Remote Control