Din rear-mount 17, Fastening the front panel, Installation – Инструкция по эксплуатации Pioneer DEH-200MP
Страница 17: Din rear-mount
Advertising
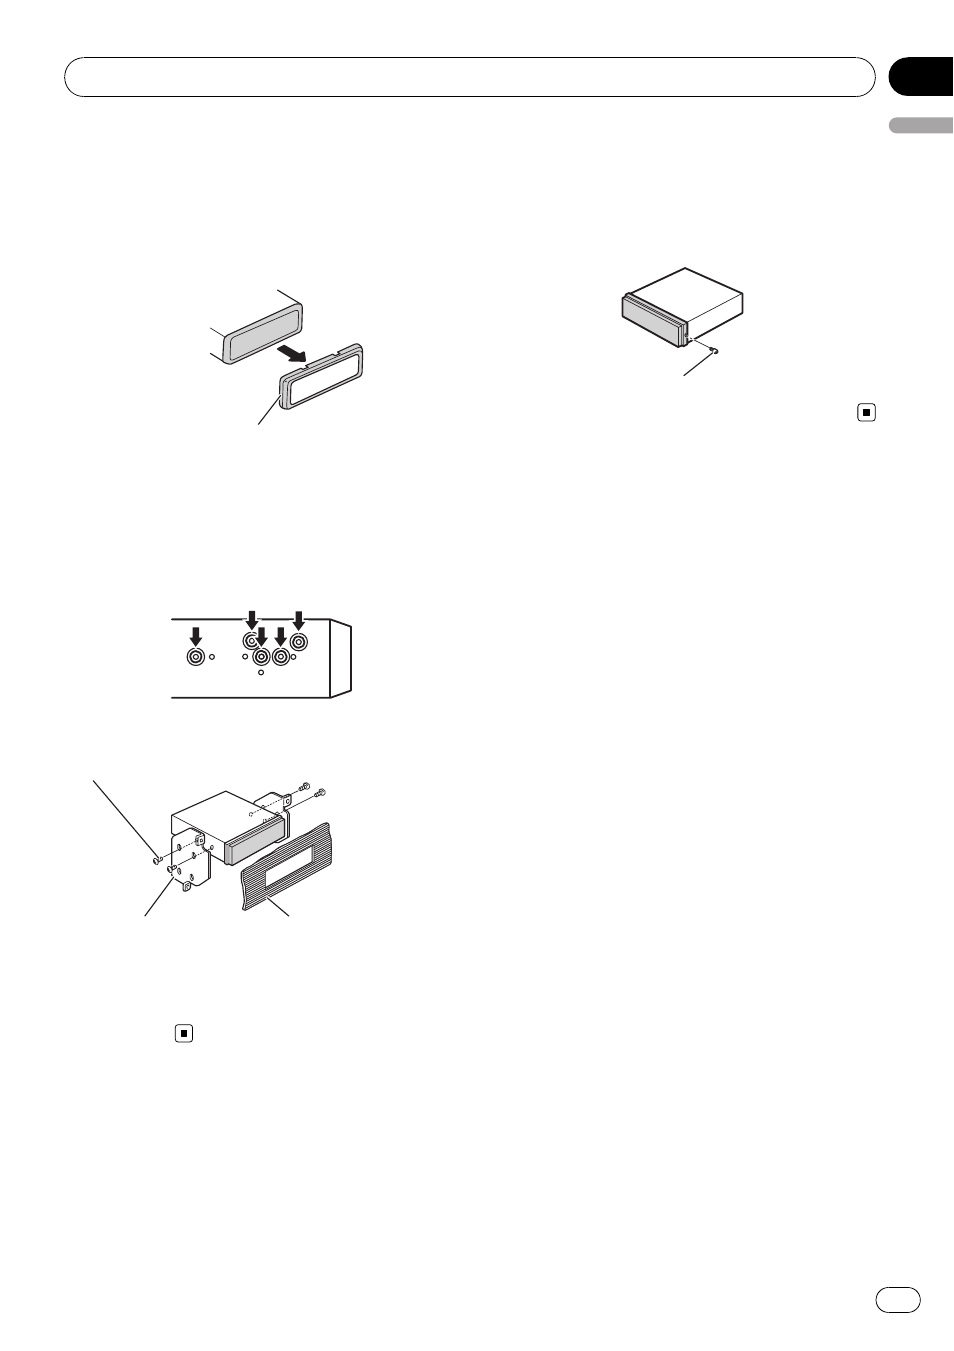
DIN Rear-mount
1
Extend top and bottom of the trim ring
outwards to remove the trim ring. (When
reattaching the trim ring, point the side
with a groove downwards and attach it.)
Trim ring
! It becomes easy to remove the trim ring if
the front panel is released.
2
Determine the appropriate position
where the holes on the bracket and the
side of the unit match.
3
Tighten two screws on each side.
Screw
Mounting bracket
Dashboard or console
! Use either truss screws (5 mm × 8 mm) or
flush surface screws (5 mm × 9 mm), de-
pending on the shape of screw holes in the
bracket.
Fastening the front panel
If you do not plan to detach the front panel,
the front panel can be fastened with supplied
screw.
Screw
Installation
En
17
English
Section
04
Advertising