Инструкция по эксплуатации Saturn ST-MC9181
Страница 4
8
indicates that this product is ready for
menu setting.
7. Menu setting.
According to the food, choose one of the
buttons on the control panel. For more
desired menu, press “ MENU”. After
selecting desired menu, timer indicator
and menu indicator flash synchronously.
At this moment, you can press “ UP + ”
or “ - DOWN ” to adjust the cooking
time. Please refer below “COOKING
GUIDE”.
* PRESET
a) If preset time is not required, pass
this step.
b) If present time is required, press
“PRESET” button once to increase the
timer by 5 minutes. The maximum pre-
set time is 23 hours and 55 minutes.
After 23 hours and 55 minutes, the time
will start a new cycle again. You can
long-press the button to increase the
preset time quickly. Display shows the
preset time which user want to delay
the cooking process started. Cooking
process will start after preset time is
over.
* RICE
Press “RICE”, the display indicating the
default time (12 minutes). After timer
indicator 5 times flash, cook process
start. Anytime, you can press “UP +” or
“- DOWN” to adjust the cooking time.
* CAKE
Press “CAKE”, the display indicating the
default time (25 minutes`). After timer
indicator 5 times flashing, cook process
start. Anytime, you can press “UP +” or
“ - DOWN ” to adjust the cooking time.
* CHICKEN
Press “ CHICKEN ”, the display indicat-
ing the default time (10 minutes). After
timer indicator 5 times flashing, cook
process start. Anytime, you can press “
UP + ” or “ - DOWN ” to adjust the
cooking time.
* FRY
Press “ FRY ”, the display indicating the
default time (60 minutes). After timer
indicator 5 times flashing, cook process
start. Anytime, you can press “ UP + ”
or “ – DOWN ” to adjust the cooking
time.
* More Cook Functions (Beef, Soup,
Pizza, Bean, Tendon, Porridge,
Baby’s Food, Fish, Thaw)
Press “MENU ” to selecting desired cook
function, the display indicating the cook
function and the corresponding default
time. After timer indicator 5 times flash-
ing, cook process start. Anytime, you
can press “UP + ” or “ - DOWN ” to ad-
just the cooking time. Press time of
“MENU ” for different cook function:
BEEF -- 1 time
BEAN -- 4 times
SOUP -- 2 times
TENDON -- 5 times
PIZZA -- 3 times
PORRIDGE -- 6 times
BABY’S FOOD -- 7 times
FISH -- 8 times
THAW -- 9 times
* Off / Keep Warm
a) When the cooking process is over,
the product will signal 3 times and the
display will be on continual warm func-
tion.
b) At any stage, you can just press
“OFF/ KEEP WARM “button to stop the
current operation menu and return back
to original stage.
c) Before any setting of the parameters
or the commencement of the cooking
process, by pressing the ”OFF/KEEP
WARM “ button, its display will indicat-
ing ”WARM“ and the product will go into
keep warm state. With the second press
9
on this button, the product no longer in
the keep warm state.
* Take Out The Food
a) When the cooking process are over,
the product will signal 3 times and the
display will be on continual warm func-
tion.
b) Press “OFF /KEEP WARM” button to
stop keeping warm.
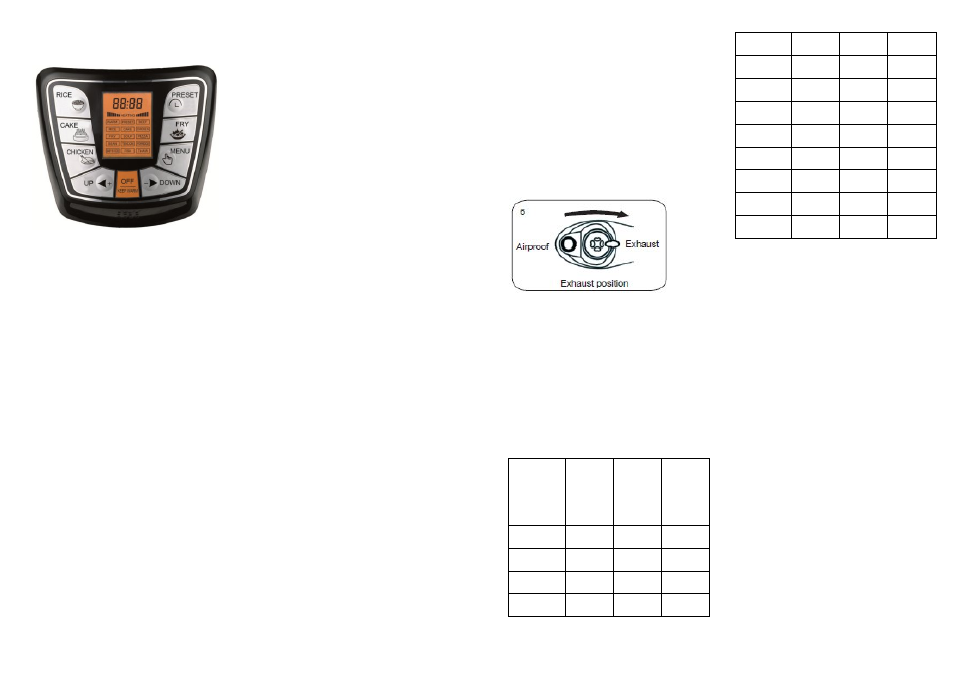
c) Turn the pressure relief valve to
“EXHAUST ” position to release steam
till the floating valve is down in place.
(See Figure 6.)
For liquid food (Porridge, Soup and
etc.), the pressure relief valve cannot be
moved to “EXHAUST” position to release
pressure. This is to avoid the liquid of
food to spurt out from the vent hold.
User should wait for the temperature to
drop and Floater to sink in order to take
out the food. Wet towel can be placed
on the lid to increase the speed of cool-
ing down.
d) Unplug the power supply.
e) Hold the handle firmly, turn it clockwise
to the clamping position and then lift it.
(See Figure 1).
Cooking
time
Range
Food/
Functions
Minimum Default
Time
Maxi-
mum
Rice
5
minutes
12
minutes
15
minutes
Cake
1 minute 25
minutes
99
minutes
Chicken
1 minute 10
minutes
25
minutes
Fry
1 minute 60
minutes
99
minutes
Beef
1 minute 30
minutes
50
minutes
Soup
1 minute 25
minutes
40
minutes
Pizza
1 minute 30
minutes
99
minutes
Bean
1 minute 30
minutes
50
minutes
Tendon
1 minute 40
minutes
60
minutes
Porridge
1 minute 15
minutes
35
minutes
Baby's
food
1 minute 8
minutes
20
minutes
Fish
1 minute 10
minutes
15
minutes
Thaw
1 minute 5
minutes
25
minutes
5) Cleaning Methods
1. Remove the plug before cleaning
2. Clean the lid, including seal belt,
pressure relief valve, filter, vent, floater,
floating valve and wipe it with towel.
3. Clean the body with soft towel. Never
soak it in water for cleaning or spay
water over it.
4. Take off the water collector and clean
it with a wet towel.
5. Clean the inner pot with a sponge or
non-metal soft brush, and then dry it
with towel.
6. Clean the pressure relief valve and
the holes with soft brush to ensure
smooth flow of steam during the cook-
ing process.
6) Safety Rules
1. Never use the utensil along with in-
flammable products or in a humid loca-
tion.
2. The amount of water or food added
to the inner pot should be determined in
line with step 2 in the section “HOW TO
USE THIS PRODUCT ”.
3. Never damage the seal belt or re-
place it with other rubber belt or tension
belt.
4. Never twist the inner steel ring with
hand or other tools with force. If the