Приложение – Инструкция по эксплуатации Supra S-19L33EU
Страница 20
Внимание! Текст в этом документе был распознан автоматически. Для просмотра оригинальной страницы Вы можете воспользоваться режимом "Оригинал".
3.
Switching on/off
1) Connect the TV to power outlet, if the power indicator is red, it means the TV is off now. You need to press the Power switch or the [Power]
button on the remote control to turn on the TV, and the power indicator will display blue.
2)
Press the Power switch or the [Power] button on the remote control to turn off the TV.
«------------■
'
I S O U T O G ^ J
4. Signal source selection
1) Press the number [0]-[9] button or [CH+] or [CH-] button to select TV input;
2)
Press the [Source] button to enter the Source menu.
3)
Press the [CH+] or [CH-] button to select TV, SCART, AV, S-Video, Component, HDMI or VGA.
4)
Press the [VOL+] or [Oi^ button to confirm.
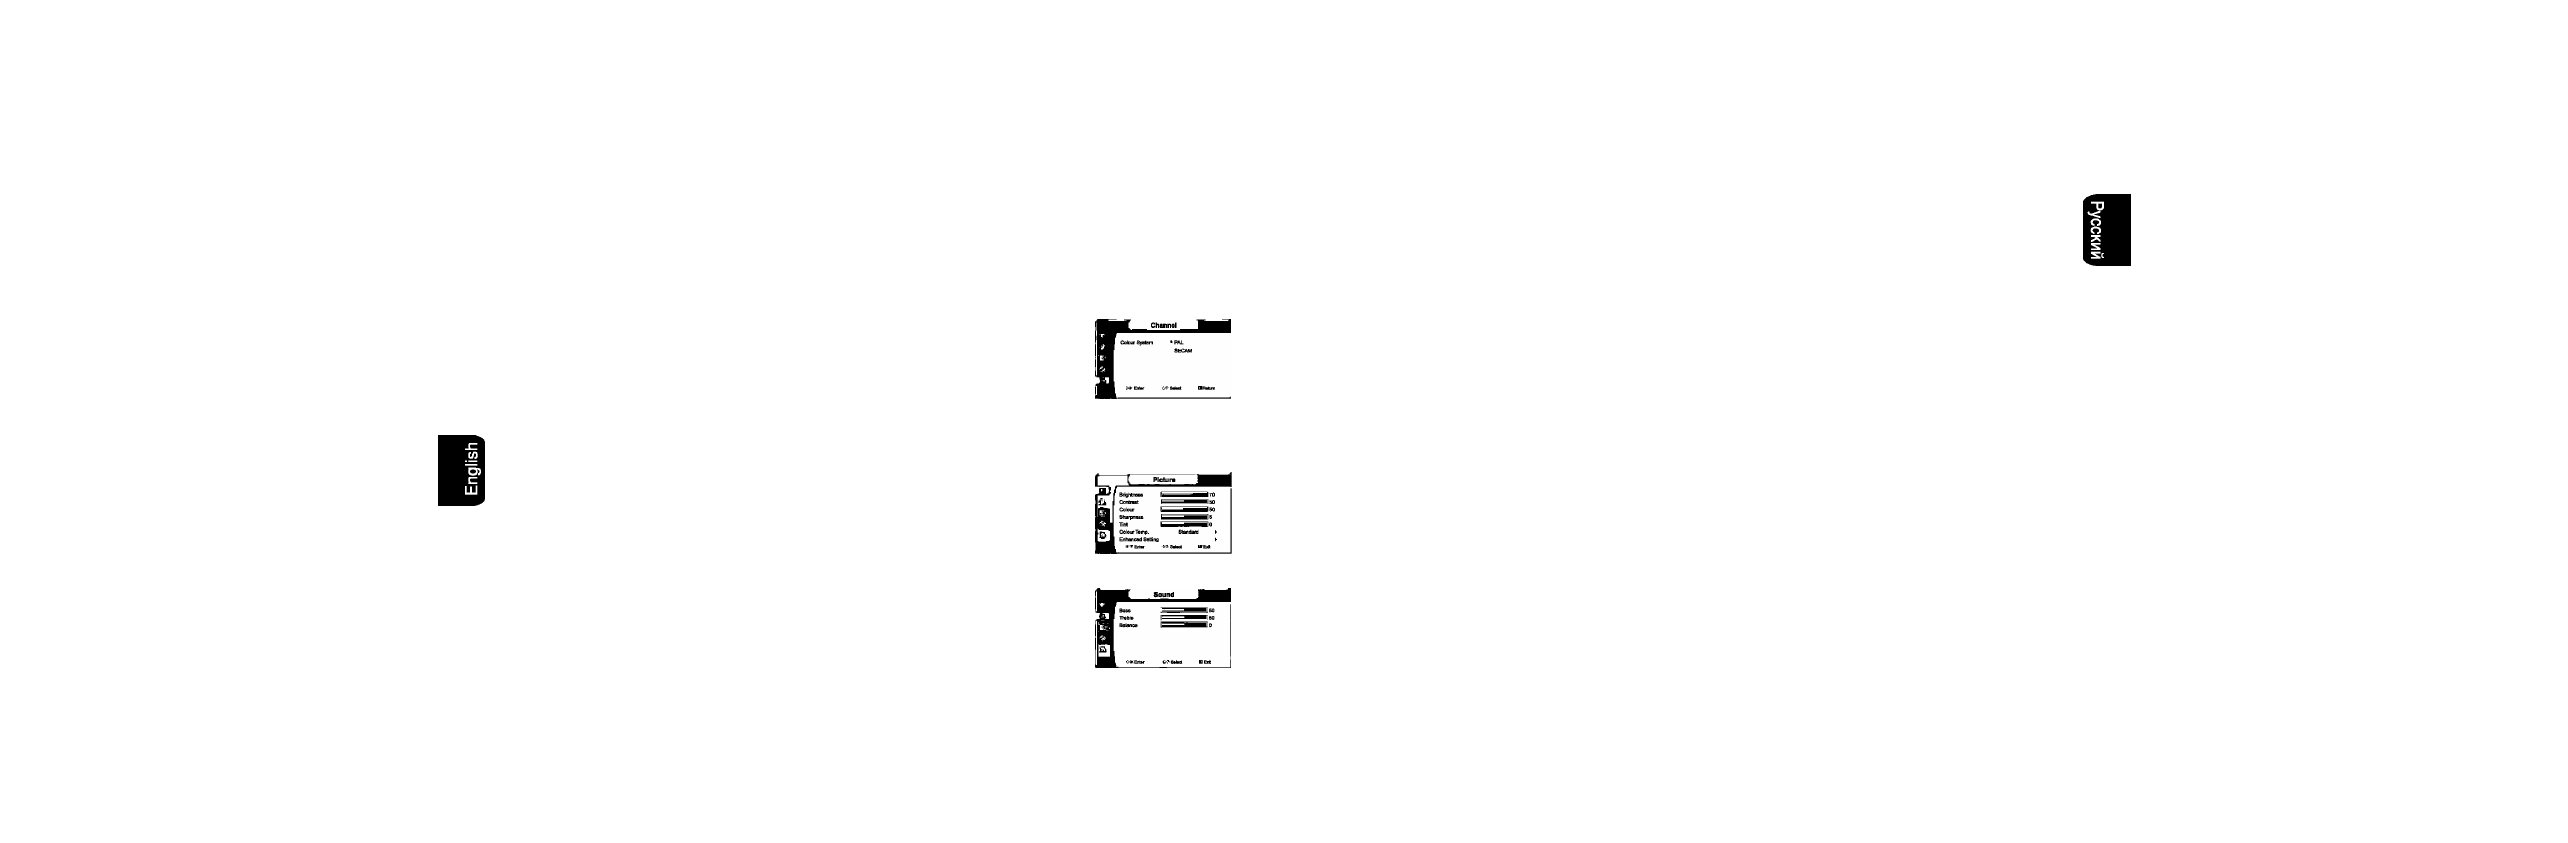
5. Colour system selection
1) Press the [Menu] button to enter the main menu.
2)
Press the [CH+] or [CH-] button to select the item Channel, and press the [VOL+] or [OK] button to enter Channel menu.
3) Press the [CH+j or [CH-j button to select Colour System, and press the [VOL+] or [OK] button to enter Colour System.
4) Press the [CH+] or [CH-] button to select PAL or SECAM, and press the [VOL+] or [Ol^ button to confirm.
¡>TV
SCART
AV
S-Video
Component
HDMI
VGA
OO Salact
Приложение
Чистка и уход
ВНИМАНИЕ:
Внутри телевизора имеется высокое напряжение. Не пытайтесь снимать заднюю крышку.
Для получения квалифицированной помощи обратитесь в сервисную службу.
Чистка экрана телевизора:
1) Выключите телевизор во избежание возможного поражения электрическим током.
2) Используйте чистую целлюлозную губку или замшевую ткань для чистки экрана ТВ. Не допускайте попадания воды внутрь изделия, вода
может повредить телевизор.
3) Вытрите лишнюю влагу сухой тканью.
4) Полируйте корпус качественным средством для полировки мебели для сохранения внешней отделки.
6. Channel install
1) Press the [Menu] button to enter the main menu.
2)
Press the [CH+] or [CH-] button to select the item Channel, and press the [VOL+] or [OK] button to enter Channel
menu.
3)
Press the [CH+] or [CH-] button to select Auto Install, and press the [VOL+] or [OK] button to enter Auto Install
menu.
4)
Press the [CH+] or [CH-] button to select Auto Install, and press the [VOL+] or [Ol^ button to start auto install.
7. Picture adjustment
1) Press the [Menu] button to enter the main menu.
2)
Press the [CH+] or [CH-] button to select the item Picture, and press the [VOL+] or [OK] button to enter Picture
menu.
3)
Press the [CH+] or [CH-] button to select the item you want to adjust.
4)
Press the [VOL+] or [VOL-] button to adjust the value, or press the [VOL+] or [OK] button to enter the item you
want to adjust.
Осторожно: Не используйте сильные растворители, такие как бензол или другие, химикаты для чистки корпуса. Не храните их рядом с
телевизором.
Вниманию пользователя
1. Если телевизор становится неуправляемым, выключите питание и включите снова.
2. Долговременный показ статического изображения при использовании чередующегося входа может вызвать зависание изображения.
Чтобы устранить проблему, достаточно выключить и включить телевизор. При использовании чередующегося входа не рекомендуется
просматривать статическое изображение в течение длительного времени.
8.
Sound adjustment
1) Press the [Menu] button to enter the main menu.
2)
Press the [CH+] or [CH-] button to select the item Sound, and press the [VOL+] or [OK] button to enter Sound
menu.
3)
Press the [CH+] or [CH-] button to select the item you want to adjust.
4)
Press the [VOL+] or [VOL-] button to adjust the level.
Note1: All buttons mentioned above are on the remote control unless indicated othenvise.
Note2: For more detailed information, please refer to the user's manual.
- 2 -
- 1 5 -