7 глава 3. общие инструкции – Инструкция по эксплуатации Asus CP240
Страница 22
3-7
Глава 3. Общие инструкции
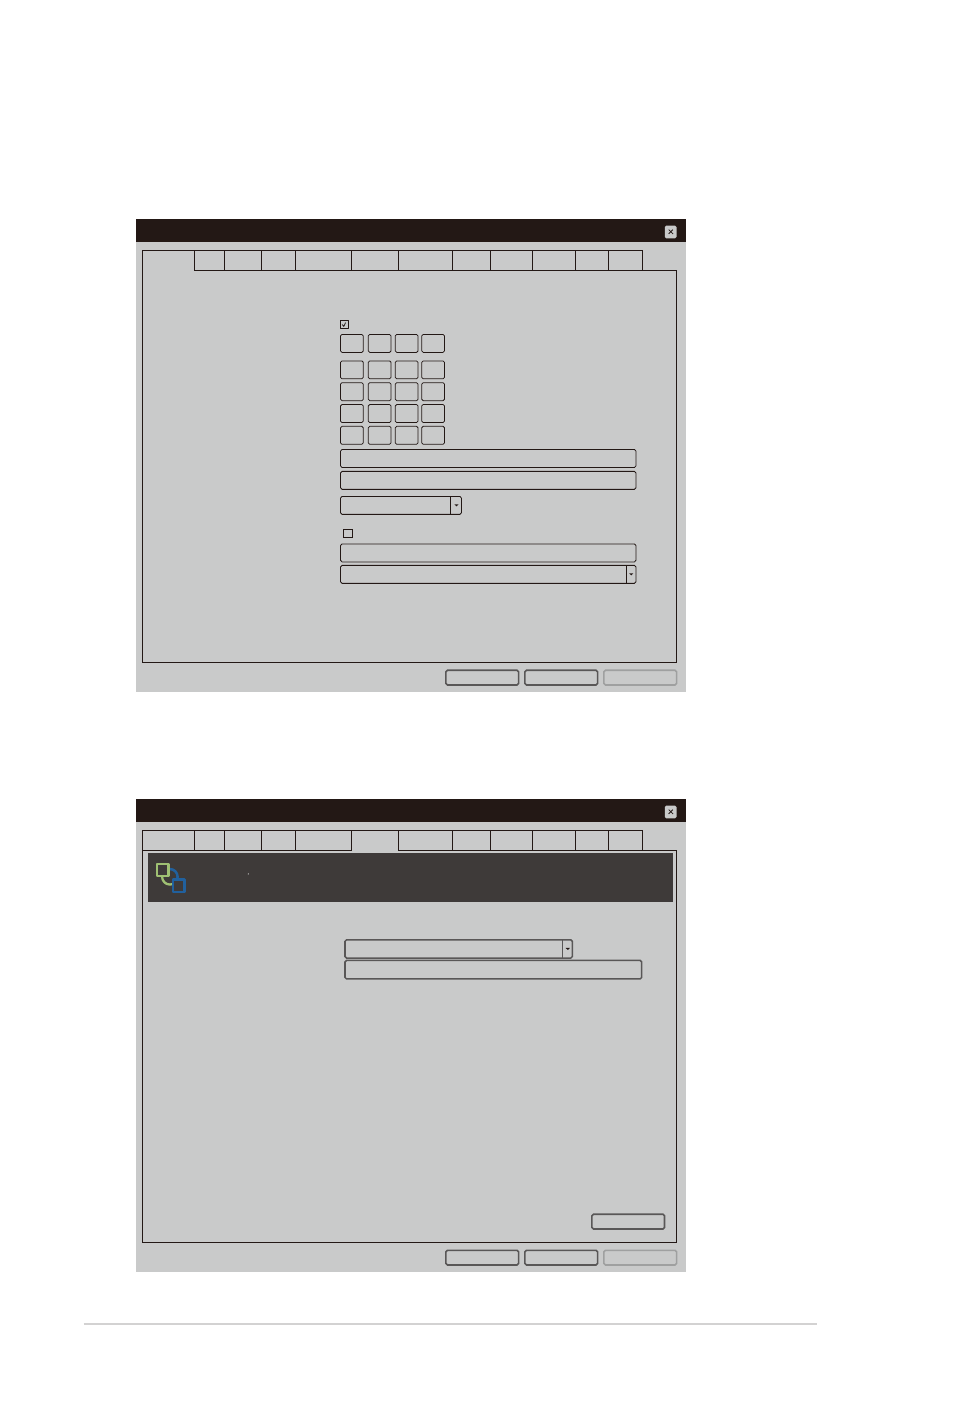
4. На вкладке [Network] (Сеть) в меню "[Configuration]" (Настройка)
установите флажок для параметра "Enable DHCP" (Включить
DHCP).
Configuration
Change the network settings for the device
Enable DHCP:
192 . 168 . 100 . 51
255 . 255 . 255 . 0
192 . 168 . 100 . 1
192 . 168 . 100 . 2
0 . 0 . 0 . 0
Auto
IP Address:
Subnet Mask:
Gateway:
Primary DNS Server:
Secondary DNS Server:
Domain Name:
FQDN:
Ethernet Mode:
Enable 802.1X Security:
Identity:
Client Certificate:
Network IPv6 SCEP Label Discovery Session Language Power Display Access Audio Reset
OK
Cancel
Apply
5. Выберите вкладку [Session] (Сеанс) и войдите в поле "DNS Name
or IP Address" (Имя DNS или IP-адрес) и щелкните кнопку "Apply"
(Применить) для выполнения.
Configuration
Configure the connection to a peer device
Connection Type:
DNS Name or IP Address:
View Connection Server
192.168.100.252
vm
ware
Horizon View
TM
Client
Network IPv6 SCEP Label Discovery Session Language Power Display Access Audio Reset
OK
Cancel
Advanced
Apply